Beach Party
Beach Party
This could have been a pretty good mission; it's got some potentially interesting tactical aspects. But they blew it with something so stupid it just about ruins the whole thing. I wish I had the ability to edit this mission.
Beyond that, though, it can be a pretty exciting little mission, brief but very intense for a minute or so there. That's if you play it right; it can also be something of a nightmare.
If you do play it as I'm about to outline, and you run it successfully, the really dumb aspects won't be too intrusive, except for some weird stuff at the last.
MISSION: This is supposed to be the sequel to the previous mission: the hijacked plane got shot down so now you've got to escape by other means. An unarmed boat (apparently with no crew) has been sent to pick you up. But Secret Agent .0069 is determined to salvage at least some key parts of the wrecked plane, so you have to hold off the attacking Germans until he can get the stuff loaded.
That's the official mission, except it's a crock of horse shit. You don't have to do anything of the sort. The attackers show no interest whatever in Secret Agent Man or his damn boat; if you run away and leave them to overrun the beach - and there are possible mission plans that do this - they'll stand around within pissing distance of him and totally ignore him. That's what I meant about one stupid thing that ruins it; how can you get into something that blatantly impossible?
No, the real mission is, as usual, to kill off the bad guys without getting yourselves killed. When you've done that you can go get on the God-damned boat. Until then just forget about the asshole in the funny clothes. He's the one person on the beach tonight who doesn't need protection. Except that if you or your men hit him with a stray shot, the mission fails.
But if you play it as I'm about to lay it out, there won't really be time for this to come up, and the general illusion will be that of protecting the boat even though actually what you're trying to protect is your own butts.
CONDITIONS: Night. Clear, big moon. Visibility still shit.
THE OPPOSITION: Bunch of Germans in very odd uniforms. Some very aggressive, some completely useless and easy to kill. Two motorcycles.
PERSONNEL: In theory you ought to be using the same people you used on the last one, since supposedly you were on the plane when it crashed. But there's the damn boat, surely somebody was operating it - it didn't come in by remote control - and so you can add one man and say he came in with the boat. That's if you can make yourself care enough to worry about such matters. When the mission itself has so many absurd aspects, I don't know why you'd be bothered by a little logical inconsistency of your own.
Still, the basic requirements are pretty much the same as for the previous mission: speed and marksmanship, and reasonable endurance. Your additional man - and you must add one, this is definitely a full-team job - should be fairly strong as well, because he's got to carry a machine gun.
All the same, you should know that there's a very high chance of losing at least one man. Don't take anyone you can't stand to lose; you're going to need a team of your best men for the next campaign. This is another of those tough-decision missions.
EQUIPMENT: Two machine guns. Issue yourself an MP-40, and one apiece to the machine gunners as well though they're not likely to need them. Give the fourth man an MP-44; this should be your best marksman. You don't need a rifle.
You'll also want some grenades. Take several; depending on how this goes, you may need quite a few. Those nice little German fragmentation grenades are particularly handy, as are the good old Mills bombs if you've got any left; but a few potato mashers would be good to have too.
AT THE START: You're standing on the beach beside the boat. The shit is about to fly. You have basically no time at all.
PROCEDURE: Instantly, without any hesitation whatever, pull the map up. This is your only chance of getting your team through the next minute or so. This is one of those missions, like the one back at the bunker in the Balkans, that give you absolutely no time to screw around.
Now the map's up and everything's stopped, you can consider the situation in a more deliberate way. The first thing to remember is that - as already, and bitterly, noted - the official mission is bullshit; you don't have to protect the boat or the jackoff in it.
And if you try you will be wiped out, because the attackers are in strength and coming fast. Don't confuse this with the usual hold-off-the-attacking-hordes-until-the-plane-comes scenario. It's not like that at all and if you play it that way you will be exterminated.
There are is one major attacking group and two small ones. The main attack is coming right down toward the beach through that gap or dip just to the left of where you're standing at the start. There are far too many of them to face them head-on from down by the boat, especially since you'd be in a hopeless tactical position on that flat open beach. Your only chance is to take them in the flank.
Another, much smaller group - just a few men and a motorcycle - will be coming around by the west end of the beach. They're very dangerous because they carry Panzerfausts; you mustn't let them get within range with those things.
Look at that map and you'll see that there are three main entrances, as you might say, to the beach; three breaks in the dunes, almost like gateways, where roads or trails come down to the beach. The second bunch will be coming through the one farthest to the west, up close to the south edge of the map, and a few individual Germans will come through the center gap.
There are several possible ways to play this mission but here's the most effective I've found:
Zoom the map in and study the contours. See that very slight kink in the line of the embankment, ahead of you and a little to the right, to the west of that big break in the dune line? Assign map commands to have one of your machine gunners run up to that point, close to the base of the embankment - and no farther east than that spot - and lie down. Give him the inventory command to use the machine gun, and Guard on the area where that big break or road comes down to the beach.
Keeping the map open, now select your other machine gunner. He's got a different place to go. Study the line of the embankment again. Look at that first big bend, to the west of where you put your first gunner. Give your second gunner a command to run there, to the point of that bend and up against the embankment, and have him lie down and use his machine gun. Give him Guard to the southwest, in the direction of the most distant break, where that second group is going to be coming.
Now command your fourth man, the one with the MP-44, to run in the same direction as the second machine gunner, up toward that first big bend; and position him just a little bit farther out - not too far, maybe a body length, don't let anybody get very far from that embankment - and lay him down and give him Guard on the middle break.
Take a deep breath and let it out.
Fold the map.
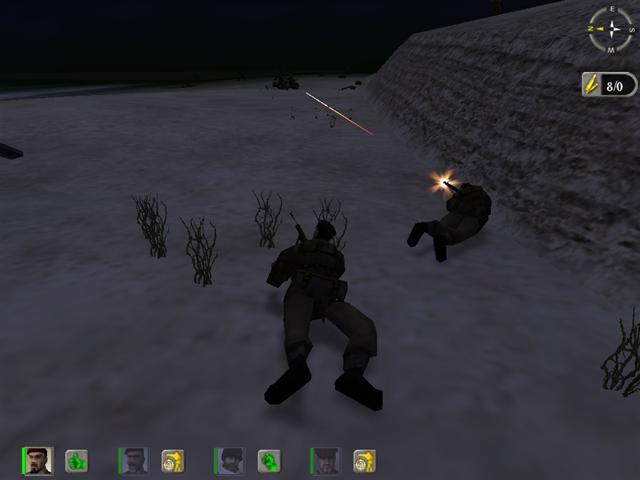
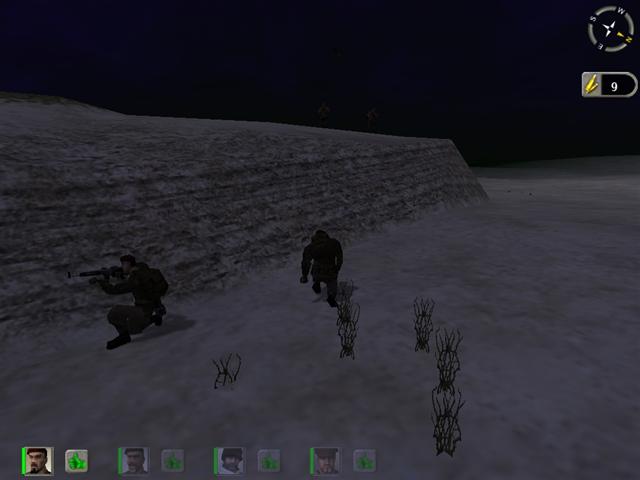
As the men take off, switch to first-person and do the same. Follow the first machine gunner. When he drops down into position, lie down to his left and a little behind him, so you don't interfere with his movement. Get far enough to one side that you can fire without hitting him, but don't get any farther from the base of that bank than you can help. Aim your MP-40 to the east, toward that road and the area beyond.
The shit will quite soon hit the fan. Probably the first shots will be fired by your machine gunner next to you, as he pots a few Germans off the top of the embankment off to the east. You won't be able to see them but he's got more range than you anyway. Just keep watching that roadway.
In a few seconds Germans will start appearing in that gap ahead of you. They'll swing around to fire at you but you and the machine gunner can get them before they do. Keep firing, but reload every chance you get. Glance up at the top of the embankment now and then and shoot anybody you see up there, but make it fast and don't get distracted from the main business at hand. Watch out for your machine gunner, he gets excited sometimes and may move over into your line of fire.
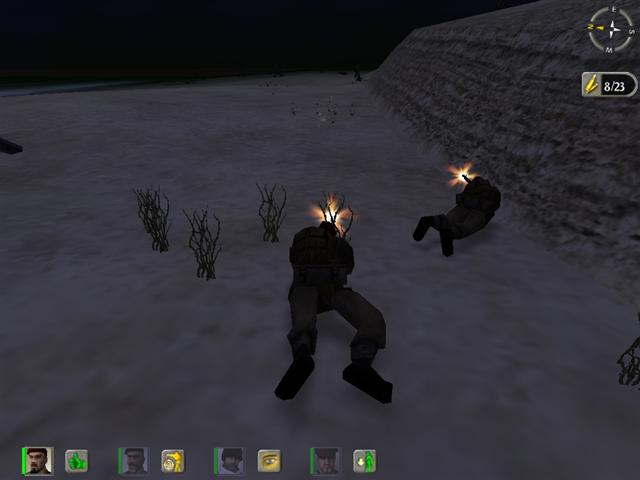
At some point quite soon, after you've killed a few of them, a motorcycle will come rolling into view. You can blow it up with a burst, or your machine gunner will; and here is why you positioned yourselves so far back, because if you got too close to that gap the resulting explosion will kill you both.
There may be a very brief pause after the motorcycle blows. By this time you may hear shooting coming from behind you, and see firing symbols under your other men's icons, as they take on the attackers coming from the other direction. Resist the impulse to swing around and help; more Germans are on their way down that road and you've still got to help cover it.
Your lives really are in the hands of those two men behind you. If they perform well enough, they'll take out that second group without letting them get close enough to be a threat. (That's the real advantage of the machine gun, by the way: not so much its rate of fire, but its range and its devastating stopping power.) If not, you're probably all going to be killed. That's why I said pick solid, first-class men, such as Ranking - he's really the Angel of Death with a machine gun, you hear him firing and it's very comforting - and Vanguard.
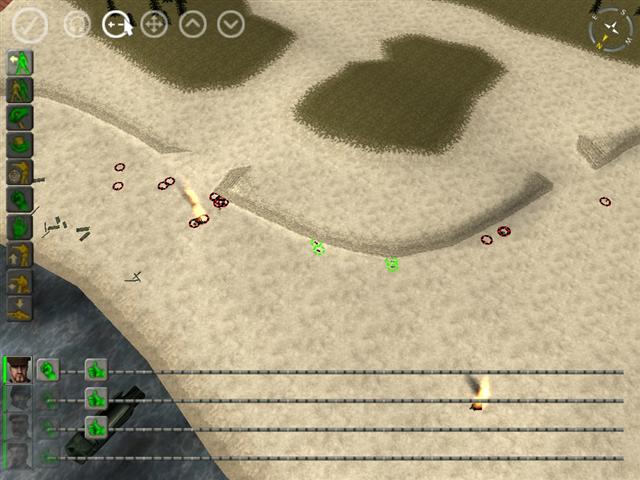
The map above shows how the whole thing is set up, and the results if it goes right. The locations of your men are very critical; a few feet one way or the other can make the difference in victory and a wipeout.
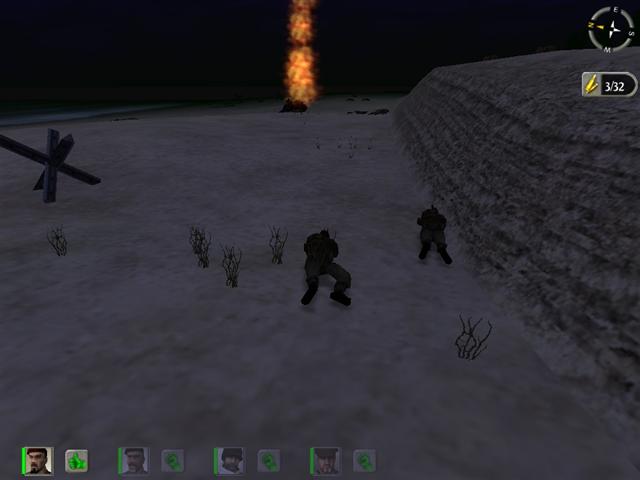
In a fairly short time (though it won't feel like it!) the shooting will die down. About this point you'll jump out of your chair as Secret Agent Man lets off a long blast on the boat's horn and a completion message informs you that you have successfully defended him against attack. Uh huh.
But don't jump up and go sprinting off across the beach just yet. There are bad guys still left in the area. In particular there are at least a couple standing at the top of the embankment, probably right above where your team is deployed - which is why you don't move out away from the bank any more than you can help.
These assholes are no big deal; they're easy to take out with grenades. Just make sure and move your men out from beneath them first, in case your aim is off.
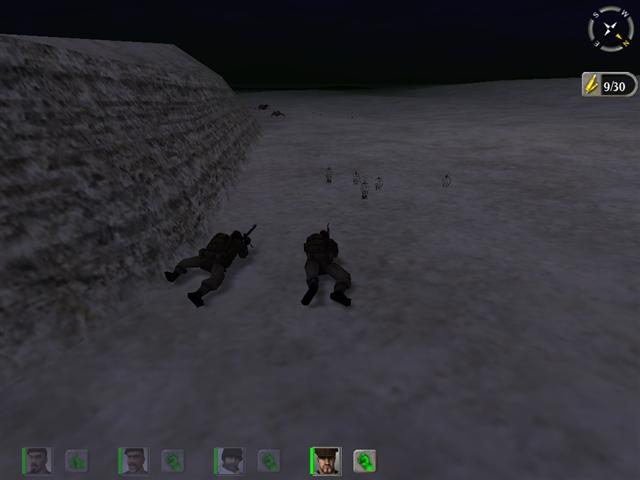
After you've cleared the top of the embankment, it's time to go hunting. There should be only a few enemy survivors by now and they're not hard to take. Run down along the foot of the embankment to the west and on around the bend to the next gap, and up the trail and then to your left, to the top of that grassy hill overlooking the beach. Get down as you get to the top and use third-person view to see who's standing around down there. You can gun them or bombard them with grenades, whatever you prefer. They're not very formidable opponents. You already got all the tough ones.
You may also have some slightly disturbing encounters. There are some Germans - I guess that's what they are - who never do anything at all but just stand around; or they may walk up to you, but they won't shoot. They're not unarmed, or out of ammo; if you check the bodies, they're carrying loaded MP-44s. But they're holding flare guns, which they never use. Very strange, but I'm not complaining; the odds are bad enough as it is. If you run into one of these zombies, gun him just to make sure.
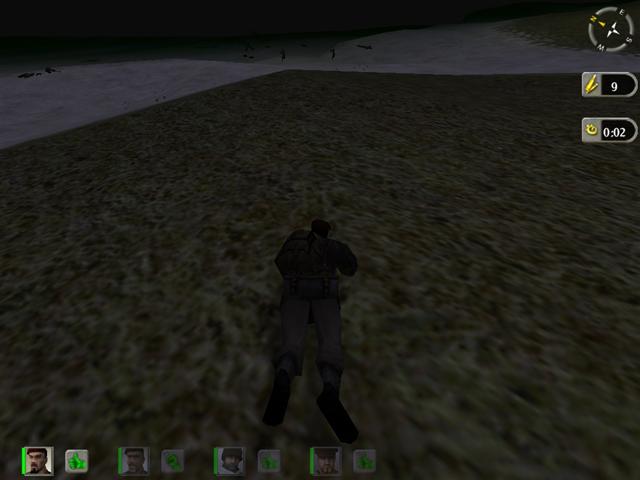
(There are several strange aspects to this mission. At the end, if you'll go back up through the dunes to the area where the plane crashed, you'll find one or two bodies. You didn't shoot them, none of your men did - you weren't even nearby - and the area isn't mined, so what happened to them? Nobody seems to know.)
Now check once again for weirdos lurking off down the beach. Usually there are quite a few, mostly harmless but better terminated on general principles.
Once you're sure you've got them all, take some time to do some scavenging. This is important, more so than usual, because the next campaign gives you a new and considerably reduced weapons menu; in particular, it doesn't offer any scoped rifles. None, not the Mauser or the Enfield either. The only way you can have them available to you is if you bring them with you from this campaign.
And you will definitely need them in the next campaign. So look around and find them. There are at least two guys carrying them and it's very much worth your while to locate them.
Also get those Panzerfausts from those goons who came down the beach. They'll be very useful in the next campaign, as an alternative or supplement to the heavy bazooka. Throw away the two machine guns you brought; you won't need them any more - there's only one time in the next campaign that you need a machine gun, and the Bren will be available - and the Panzerfausts are much more valuable. Search all the bodies, too, for those useful German fragmentation grenades.
Now you can move your people down to the beach and onto the boat. You may find this the most irritating and frustrating part of the mission; usually some use of the jump key is required, and the whole business is utterly graceless and stupid-looking.
And now you have completed the first Devil's Bridge campaign. If you're anything like me, so far you are distinctly underwhelmed by this addon.
Does it get better? We shall see.