Thank You For Flying Luftwaffe
Thank You For Flying Luftwaffe
Another silly mission. In the words of a great Mexican-American: "This is stoopid, man!" The premise is idiotic even for H&D, and badly handled at that; the designers' knowledge of aviation clearly rivals their grasp of naval matters. Considered from these angles, this first mission in the Devil's Bridge addon is as dumb as C5. (Arguably dumber; the basic concept of C5 wasn't totally incredible, just hopelessly botched, whereas this one is asinine in its very conception.)
And yet. And yet....
Damn it, it's fun.
All right, guilty-pleasures fun, but fun all the same. Once you get past the silly premise and focus on the action itself, it's an enjoyable mission. It's dead bloody easy, yet it's got enough puckersome moments to keep it from being boring.
And the premise material isn't constantly in your face. In C5 there was nothing you could do and nowhere you could look without being reminded of the dumbness of the whole thing. In this one you spend most of the time engaged in the simple joys of killing people and blowing things up - classic H&D - and the really goofy stuff only comes in at the end and then there are ways of getting around it. So what the hell. Might as well have some laughs with it.
MISSION: To rescue a captured secret agent and help him steal an experimental German jet bomber, which is of great interest to Allied scientists - as well it might be, since it has the ability to operate from a dinky little landing strip that would just barely handle a Cessna 172. Also to blow up some Messerschmitt Bf-109 fighters which apparently share this amazing STOL capability.
CONDITIONS: Rainy. Poor visibility, varying considerably over the course of the mission.
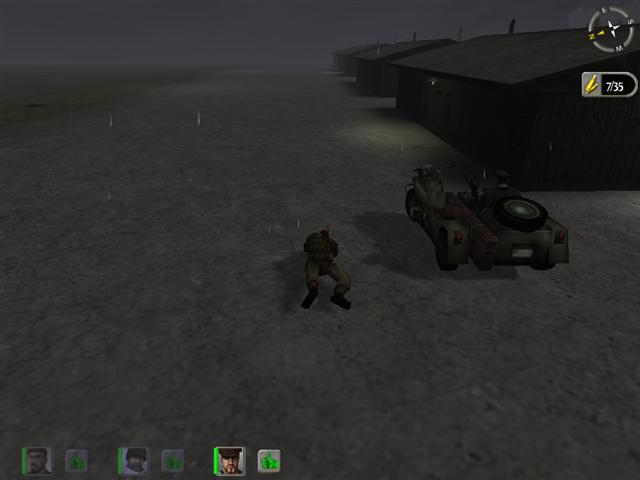
THE OPPOSITION: Nearly thirty, if the debriefing is to be believed. A shitload, anyway. Mostly quartered in the row of wooden barracks just inside the perimeter fence, with a couple of sentries up by the hangars and a few standing by AA gun emplacements. Many guard towers but only one of them manned. One odious punk on the main gate, one moron guarding the prisoner. All in all very thin security for such a supposedly top-secret installation. As I said, this one is easy.
PERSONNEL: You're only allowed a three-man team for this one, because you have to escape in this airplane with limited space. That's OK, three will do fine. You need excellent shots, with at least reasonably good reactions; strength and stealth aren't involved. Endurance shouldn't be a factor - if you do it right, nobody's going to get hit - but still, considering the odds, I wouldn't take someone really frail, like Switcher or Web.
EQUIPMENT: Ten explosive charges. You have to blow up seven airplanes (not eight - one of them is already wrecked) and there's something you're going to be doing with the others. You can distribute these among the men if you like, but your character should be carrying at least six of them.
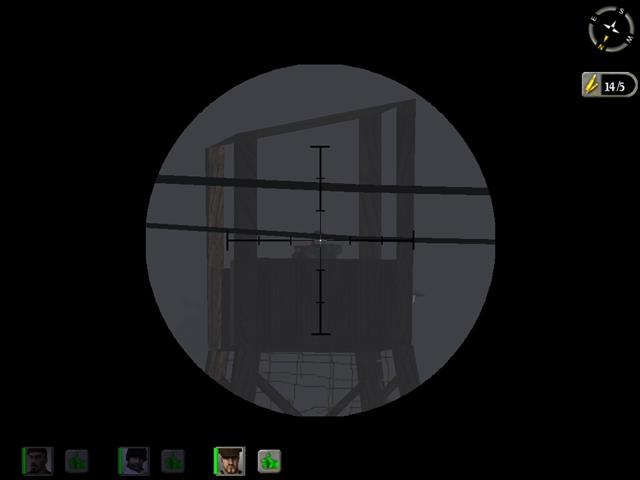
Each man should have a scoped rifle, with a modest number of rounds. The standard 40 rounds per rifle should be more than enough.
Each man will need an automatic weapon of some sort. The MP-44 would be perfect, if only they hadn't ruined it. However, since the AIs only use it semi-auto anyway, your two men may as well carry the MP-44. But for your own use the MP-40 will work much better, because you're going to need to do some serious blasting.
Finally, your own character must have a knife. Do not forget this; it's a vital necessity.
I've never found any use for grenades in this mission, yet you might want to have each man pack a couple just in case.
AT THE START: You're standing on a side road out in the country, in the rain. Just up ahead is an intersection. You're in no danger, but you don't have unlimited time; you have to get moving. A special interrogator is on his way to the airfield to question the captured secret agent.
PROCEDURE: Leave the other two and run up the road toward the intersection. Turn left and find yourself a place among the trees or on the hillside where you can cover the main road. This is going to be easy, but still you shouldn't expose yourself unnecessarily.
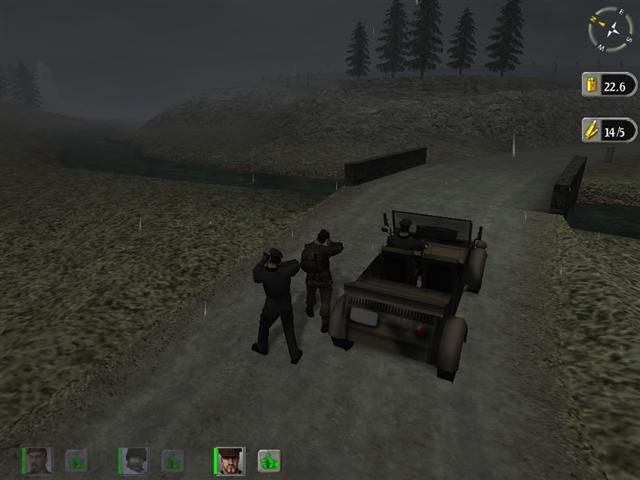
In a minute or so a Kubelwagen will come down the road from your left. Shoot the driver and the passenger with a single burst. Reload and go get behind the wheel.
Bring up your second man - or whichever of the two is the faster and more reliable gunman, not necessarily the better shot - and have him go over and take the dead officer's uniform. He can do this by the same method used to take weapons off bodies (remarkably, the corpse remains fully clad; evidently the officer was going for the layered look) and then change clothes using the same use-inventory command that you used in that little costume drama that night in Yugoslavia. He can take the officer's Luger pistol too but I don't know what he'd want it for. Sell it to some geek back at HQ maybe.
After changing into Nazi uniform, he can come and get in the Kubelwagen too. Then bring up the third man. For some reason you can't take the driver's threads, so the third man will just get in back in his SAS battledress.
Now drive the Kubelwagen down the road until you reach a little bridge. Both passengers will now disembark. Yes, including the one in the German uniform; if two of you try to drive up to the gate, the passenger will begin shooting at the guards and give the whole thing away. AIs....
So both men turn and follow the little stream off to the left. They can wade or they can walk along the bank, it doesn't really matter; the guard towers aren't manned. Around the bend they will find a place where a pipe is discharging water, in an environmentally irresponsible manner, into the stream. This is their route into the compound.
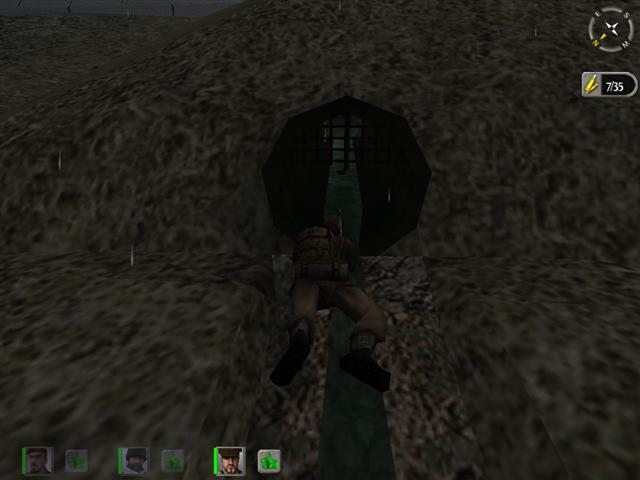
The second man - the one in the German uniform, hereinafter referred to as #2 - should go first. Take control in first person, so you can see where he's going. Crawl into the pipe until you reach a place where you can stand up. You'll find yourself in a large and sophisticated drainage and sewer system - grotesquely so for a little pissant airfield out in the boondocks, but that's the sort of thing you've learned by now not to think about - and you can now run up the tunnel standing fully upright. Be prepared for some extremely strange sound effects. I defy anybody to get through this part without having to go pee.
When you reach a fork in the tunnel, go to the right. Soon you'll reach another fork; go right again. As you near the end of this tunnel, you'll see a door and, opening off to the left, a short side tunnel. Park your man near the end of this - don't let him climb out even a little way - and then go back and bring up the other man in the same way.
Meanwhile here's you sitting in the Kubelwagen by the bridge, tapping your fingertips on the wheel and whistling "The Hedgehog Can Never Be Buggered At All" through your teeth. OK, the boys are in place, now you can drive on up the road.
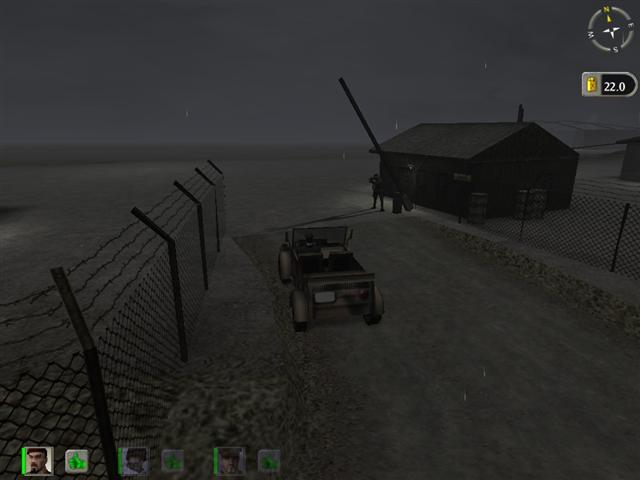
Slow down as you approach the turn and drive carefully through the main gate. The tower guard will more or less ignore you. The loathsome little lout standing by the gate will wave his MP-40 in your general direction - doesn't even know enough to throw a snappy Heil Hitler salute, discipline has really gone to hell in the last days of the war - but he won't shoot as long as you keep going. Resist the temptation to run over him; turn right and drive past the guard shack and the building next to it. Note the door standing open and the light coming from within. Drive around the building and park the Kubelwagen wherever you like - not too close to the eastern side of the building, you're going to want that area free pretty soon.
Get out and walk over beside the building, where nobody can see you, and get out your knife. Do the stash routine so it doesn't show. Now go on around to the front and in through the open door. There's a numb-nuts guard inside. Walk up to him and take out the knife and stab him. He'll make a rather comical sound and expire. Put the knife away and get out the MP-40.

DO NOT OPEN THE DOOR BEHIND HIM. If you let the secret agent out, he will take off toward the hangars and everything will go totally to hell. You're not here to liberate him at this point. The reason for knifing the guard is that when the alarm goes off, the guards have orders to come in and kill the secret agent. You've eliminated the closest one; now it's time to get the others.
For now, though, leave your character in the room with the dead guard - it's as good a place as any; after all it's raining outside - and go back to your lads in the drainage tunnel. Have #2 put away his weapon and climb out through the hole ahead. This is the only ticklish moment; there are a couple of riflemen (no scopes, luckily) in an AA emplacement off to the north and while they generally don't get involved - I don't think they can see that far - you can't help wondering how they'd react to the sight of an officer in full uniform emerging from a drainage hole.
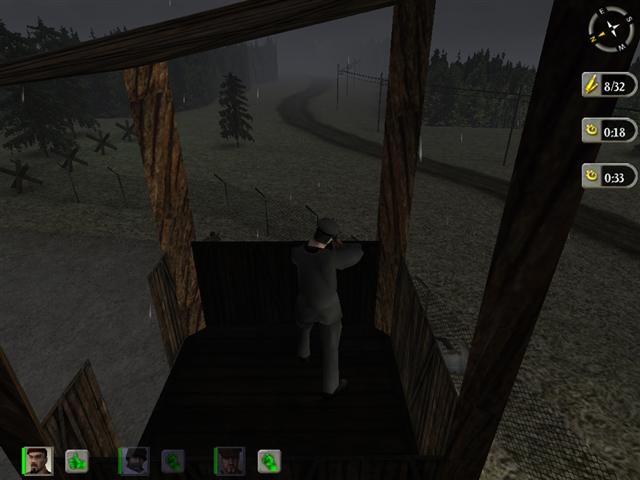
Walk #2, in a normal and dignified manner, up toward the nearby barracks row. In between the nearest two buildings he will find a good old H&D standby: a BMW motorcycle with side hack. Have him mount up and start the bike and drive it out and to the left, in a circle - watch out he doesn't drive into the drain hole - so that he winds up at a point just a little way from the southwest corner of the barracks on the end. He should be facing east, along the lane in front of the barracks row, and he should be pretty close to the building on the end but not quite up even with it.
It may take a little maneuvering to get him lined up; he doesn't have to be perfectly aligned, but you want him fairly so. You'll find that this bike has a feature not commonly found on motorcycles: a reverse gear. None of my friends who ride Beemers have ever mentioned this useful feature.
When you're satisfied with his position, have him dismount and walk around to the other side of the bike and get into the sidecar. Move your mouse briefly to make sure he's got control of the machine gun. He should have a field of fire along the front of the barracks row.
Now #3 can come out of the drainage tunnel and run over and lie down near the bike, facing in the same direction, though he should be a little distance off to the left for better coverage. I haven't found it necessary to give either man a guard command; they'll know what to do.
And now back to our fearless leader, waiting in the anteroom. Go out the door and turn left, staying close to the building. Walk over behind the guard shack and then ease around the corner and up along the north side just a little way - use third person and be very careful, if that little turd by the gate spots you it's all over. Get a little way down the north wall anyway, you don't even have to go halfway.
Plant three explosive charges here, against the wall. Set each of them for maximum time; it's actually better if they don't go off simultaneously.
Run back the way you came and around to the east side of the building where you stabbed the guard. Take a position to the east of the building and just a little way back. You have to be able to cover the front of that building and make sure nobody gets through that doorway to kill the prisoner. Lie down if you like. Take aim at a point just beyond that open door. Wait. Resist the temptation to watch the numbers tick away; you need to be looking at your target area.
When the first charge goes off, all hell, predictably enough, will break loose. Men will start pouring out of all those barracks doors. Most of them will immediately get mowed down by your boys whom you have with fiendish ingenuity deployed down at the far end.
However, they can't see quite all the way to this end. Several goons will run out of the nearest barracks in the general direction of the runway. You have to gun them down, because they'll circle around and come at you, trying to get at the prisoner. Shoot fast and don't spare the 9mm. ammo; it's important to get them all, or as many as possible, while they're running across your field of fire. Any you miss will disappear behind that mound of earth to your right, and then things will get much hairier. Now is when you will really long for the old MP-44, and curse the damn fool who ruined its cyclic rate; it would be perfect for this.
As soon as you don't see any more running figures, even if you're sure you got them all, turn and face toward that mound of earth and watch for anyone coming over it at you. They'll come shooting and there's a good chance you could get hit.
If they don't show up in a short time, you can figure you're OK - they don't screw around, if they're out there they'll attack right away. When you're sure everything's quiet at this end, go back to your two shooters and take #2 out of the side hack and give him his rifle. Run him around back of the barracks row and have him walk eastward until he can see the guard in the tower by the gate and kill him.
Then he must keep going, moving out to the fence and checking repeatedly as he nears the gate. That gate guard may be a shithead but he's not as stupid as his buddies; he didn't run out with the others and get gunned down - he's still standing there beside the guardhouse, waiting for somebody to blunder into his sights. He'll be watching in the direction where all the action was going on, so it'll be easy for #2 to shoot him.
#3 should turn and take aim at that AA emplacement to the north. Probably he'll be able to take out the two sentries from where he is; if not he can crawl closer. As usual it can take a lot of shooting to get them both dead; the gun barrels tend to block the line of fire.
Back to #1: run over to the side of the nearest hangar and have a look around the corner. If you're in Easy mode then there may be one or two Germans standing around out in the open to the west. (In the harder modes they'll almost invariably have charged and got shot by now.) Shoot anybody you see and go around the end of the wall and into the big empty hangar and over to the other side. Go up to the corner and crouch or lie down and move sidewise until you can see up along the row of hangars. There's a guard walking a patrol in front of the mystery aircraft. Move forward until you can see him and bring him down.
There will also be a sentry somewhere near the three airplanes parked out in front of the hangars. Most likely he will be near the one closest to you, standing on that low mound of earth, but not always; locating him may take some doing. Get him anyway.
Back to #3: have him run up to the AA emplacement he just cleaned out and then turn until he can see another patch of turned-up earth to the northeast, beyond the runway. Let him crouch-run toward that and drop flat as he crosses the runway and sight in on the AA emplacement beyond. The two guards in this one are the last remaining enemy in the compound, so make sure they're finished off.
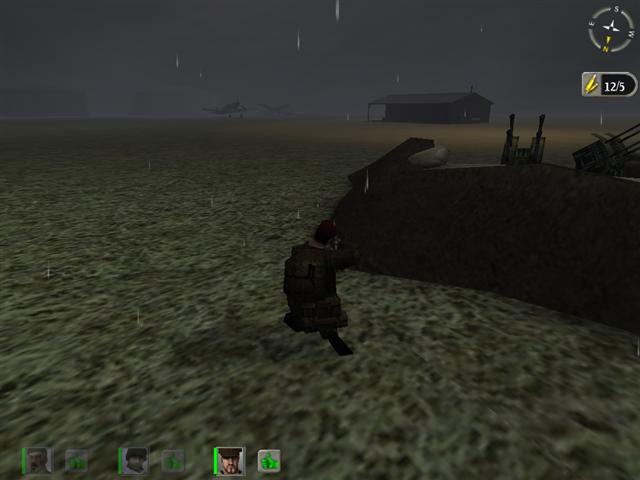
Then #3 should switch to his MP and get up and run over to the parked airplanes, checking first to make sure there aren't any extra guards around. If he's carrying explosives, and he should be, he can plant a charge under each of the two serviceable aircraft, ignoring the wrecked one, and then bugger off in the general direction of the main building and the parked Kubelwagen.
While everybody is waiting for the charges to go off, go ahead and move #3 to the southeast corner of the compound, over near the guard tower. (Not under it; that sort of thing confuses the AIs.) Have him lie down or crouch, facing east, and sight him in on the road; give him a Guard command on the point where the road first appears on the map. It's a little early for this but you might as well do it now while you've got control of this man.
And you might as well go get #2, too, and bring him over and place him somewhere off to the side of #3, and give him a Guard on the same spot. Now you've got those two out of the way and can think about your own moves.
Go up the line of hangars to the one next to the mystery plane, and go into the hangar and place an explosive charge next to the rear of the fuselage. You won't be able to get very close to the plane, but it's OK, it'll work. Set the timer and run back to the next hangar and set one there too. Put charges under all three of the fighters in the hangars and then haul ass out across the field toward those two remaining parked planes.
You should pause, now, and let the three charges go off, and check the map to make sure all three planes were destroyed. This will give your AIs time to settle down; guard shmard, when they hear a noise they're going to jitter around and act like fools for a minute or so.
After everything is quiet again, put a bomb under each of the two remaining planes, and give them both absolute maximum delay; you're going to need some time now.
As soon as you've set the second timer, run like mad in the direction of the southeast corner and climb the guard tower there. No sweat, you've got plenty of time to do it if you don't screw around. When you get to the top, have a look up the road to the east. Sight your MP-40 in on the road, just as far along it as you can see, and wait.
When the last charge goes off, you will get a completion message. Don't look up at it. Just about the time the letters disappear, a bunch of Germans - or somebody, could be the Fighting Uruk-Hai for all the look you get at them - will appear and come running up the road. They're bunched up nicely so you can get most or all of them with a single good long full-clip burst, and your boys below will get any you miss.
And now the fighting is over - unless you blew it very badly - and it's time to spring the captive. At this point the weirdness starts to escalate sharply, but there are things you can do to get past it.
Bring your two men up by the front of the HQ building, beside that open door, and stand them close together, so you can pick them up easily. Put your gun away and go inside. At this point you might want to turn off the sound, or take off your earphones, so you don't have to listen to some of the most monumentally idiotic dialogue ever recorded for a war game.
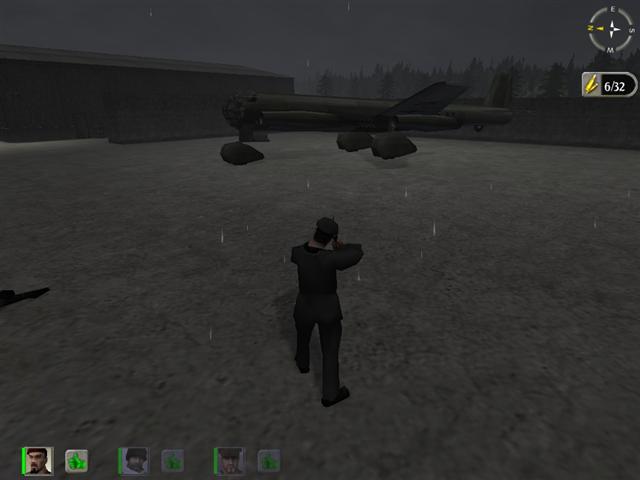
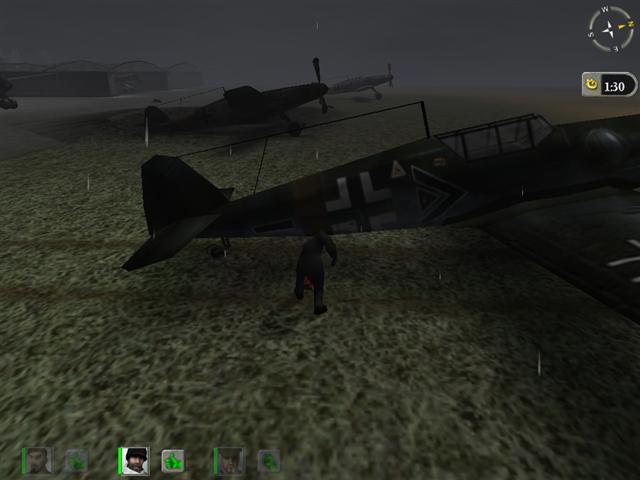
Open the door and walk up to the goofy-looking individual within. He's not handcuffed or anything, he's just standing around inside this fully-furnished office, surrounded by all sorts of useful stuff; there's even a window with no bars. Fine secret agent he is if he couldn't get out of here; James Bond would puke in disgust.
Anyway, walk up to him, listen to the stupid dialogue if you didn't listen to me, and watch as he takes off. Run after him, pausing to give your two men a follow-me. He'll run around the back of the hangars, so the three of you can go the short way, in front, and be there waiting by the plane by the time he arrives. Let him get on board and then walk up to the little hatchway on the left side of the nose and board the plane too.
(If you get in a hurry and board before he gets there, he'll just stand by the nose of the plane. All you have to do is hit Use to disembark for a moment, and he'll disappear inside and then you can hit Use again and there you are.)
It's not necessary to do it this way; you can just wait down by the runway and he'll pause to let you board. But this way you never really get a clear look at the plane; if you stand in the right place while you're waiting for him, and then move quickly to board without looking around, all you see is the nose section. In this way you never have to actually confront the grotesqueness of the premise; you can deny the whole secret-jet-bomber nonsense and tell yourself this is merely some sort of experimental short-take-off transport (perhaps with jet or rocket assist) which you're hijacking for escape purposes.
You can then get up and walk away from the computer so you don't have to see the airplane or the final supremely asinine sequence (my God, and I thought Il-2 Forgotten Battles had some dumb-looking aerial gunnery effects) and go get yourself a beer or something and come back in plenty of time to read the debriefing and get ready for the next one.
And then again maybe you enjoy silly shit. In which case you must really love H&D.