Das Bullshit
Das Bullshit
This campaign is only one mission long. This campaign would be OK if it had just one mission less.
This is the absolute WORST mission in H&D. Stupid, stupid, STUPID.
All right, some of the other missions are pretty silly - as you were, most of the other missions are pretty silly if you think about them, all of them have at least some silly aspect - but the dumbest of the other missions looks intellectually brilliant compared to this one. It is dumb in so many different ways, from the asinine premise to the Weird Marine Architecture to, oh, hell, just about every possible aspect is dumb. If it's got anything going for it I must have missed it.
It is so bad that it detracts seriously from the overall quality of the game. I can't imagine what the hell the designers were thinking. And it's even worse because it comes in between two of the best campaigns in the game.
In fact this is the mission that damn near caused me to stop playing H&D altogether. Seriously; I almost dumped the whole thing. I'm glad I didn't, because I'd have missed some really good stuff, but that's how much I hated it and my reaction hasn't changed in all the times I've run it.
It's not even fun silly, like the halftrack expedition. It's just depressing. You don't get to do any entertaining stuff like drive vehicles or blow things up. And it's hard enough that it takes a ridiculously long time to get through it.
God, I hate this mission. This is the one place I would use a cheat if I knew how, just to get past this God-damned piece of shit mission.
But it's got to be run in order to get at the subsequent missions, and the next campaign is very damn good, so there's nothing for it but to get through it somehow.
I'll be completely up front with you: my contempt for this mission is so total that I don't even count it as a valid H&D mission. Merely an obstacle to be gotten past; and so I will do anything to accomplish this - reload resurrections, deliberate sacrifices, whatever it takes. If you want to play it straight, you're pretty much on your own. I can tell you only how I play it.
MISSION: Go aboard a sinking German warship and find a secret code machine. Doesn't sound too ridiculous, does it? (Other than that this would have been the job of a naval boarding party, not the SAS.) Just wait. You're not going to believe it.
CONDITIONS: Dark. Windy and stormy, yet water absolutely calm. Just one of many miracles of rare device in C5.
THE OPPOSITION: Naval personnel (in army uniform) wandering around all over the place, with no clear purpose or function - none of them performing any duties whatever, or showing any signs of anxiety about being left aboard a sinking ship. All of them heavily armed, most with MP-44s.
PERSONNEL: No way in hell would I use any of my good men on this thing. Since I don't consider it a legitimate campaign, I don't use my usual viewpoint character (Major Calvert). In fact I use only men whom I never use for any other missions and consider dispensable.
Because of certain particular stupid aspects, it is necessary - or at least convenient - to sacrifice one man at the start. So I use somebody I can't stand: Lt. Switcher. I hate that little turd; he stood there with his finger up his ass and let me get killed back in Yugoslavia and I've never seen him do anything to justify his existence. At the same time he's a good enough shot and has good enough reactions that he'll probably take one or two with him.
The other three men should be picked for high endurance; they're going to get shot a good deal, and while I don't hesitate to do a reload-and-resurrect in this particular mission, it's a drag to have to keep on doing it. But don't use Aldridge; he's far too good a man to be wasted on this turkey. Big Willy is a good pick.
EQUIPMENT: Four Stens or MP-40s. Three rifles - one is all you need but the rifleman can get killed in places where it's not safe to go get his weapon. A couple of grenades apiece.
Since one of the men is to be thrown away there's no point in giving him much ammo.
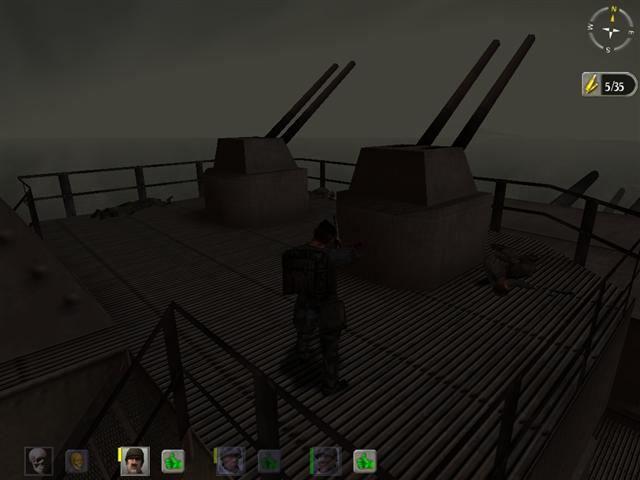
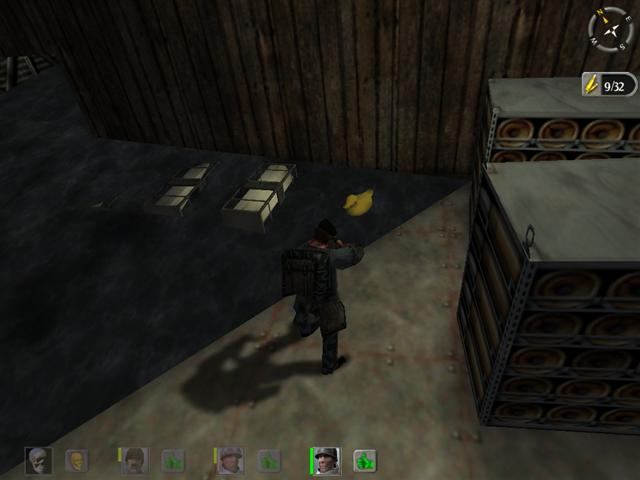
AT THE START: You're standing around your little rubber boat on the semi-submerged afterdeck of the ship. A PBY is sitting quietly an easy rifle shot away, yet nobody on board the ship is firing at it.
PROCEDURE: The key fact at the start is that there is no map. None. You have to move the men around manually, one by one.
Which is bad right off, because there really is not time to get all four of them under cover before the shooting starts. And you have to do this; left to their own devices even for a minute they will charge off and get gunned down.
So you leave one man (Lt. Switcher or whoever you don't like) to do as he pleases, and very hastily move the others one by one into the shelter of the aftermost gun turret. This is not easy, because they'll fight you; they'll keep moving around looking for the action. You will have to make them hunker down on the deck, so they can't see anything, and then they'll stay more or less quiet until you're ready to move them.
You just have to hope the bad guys will be too busy killing your throwaway man to get the others before you can get them into a safe spot.
Once things get quiet, select whichever man you want to be first and take the rifle and get to work.
The first job is to clear the bridge and superstructure; otherwise they'll nail you as soon as you try to move around. You can start by standing up and backing up, aiming up between the big guns. Back up until you see a man on the bridge and shoot him. Back up farther, past the raft, till you're ass deep in water, and you'll see another head on the bridge you can get.
Save. Save every time you kill anybody or accomplish anything. Then you can second-guess yourself at will and get this nightmare over with faster.
Move back forward to the dry part and switch to the Sten and go to the left of the big turrets and through the space between the turret and the superstructure. There is a man on the superstructure one deck up on the starboard (right) side, and another one up above him. Figure out where they are but don't break cover yet.
Shift to another of your men and take him to the other side. To the left of the second turret is a ladder (stairs) going up to the next deck. Run up it, fast. Look around quickly, you may be attacked, depending on how thoroughly you cleared the bridge with your rifle.
There'll be another ladder right in front of you. Run up that, part way. Shoot anybody you encounter (this may be a time of saving and resurrecting) and work your way back along the deck toward the rear of the ship, and on around the superstructure and forward again on the other side till you can spot the man standing there. His head will just be visible; you may want to use the rifle.
You could go down to the first deck and try for the man down there in the same way, but first go back to your character standing behind the forward turrets and have a look. The remaining German is very likely looking back toward the stern, where the last gunfire came from. If so you can pop out and shoot him before he can turn around.
One man can now go around the superstructure, clockwise, and toss a grenade in through the open door leading to the wheelhouse. There's a man in there and you might as well kill him.
Return to the main deck. You should by now have eliminated everybody on the outside who's a threat to you. You've probably accumulated some injuries too. You might want to switch to another body in better condition at this point. If you've lost another man don't worry, two are still enough to finish the job if you play it right.
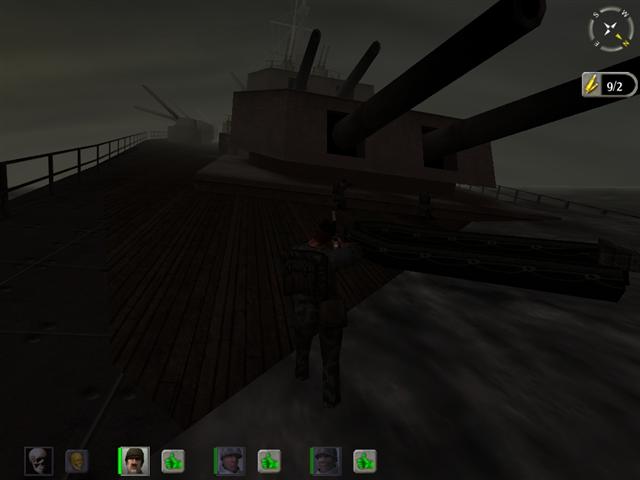
On the port side of the ship - the high side - there's an open doorway with light showing from the inside. Yes, this ship represents a great triumph of German technology: even though it's dead in the water and half sunk, it's still got full electrical power and all the lights are burning brightly throughout its interior. Jesus H. Christ....
Don't go through this door yet. Look to the right - back the way you came, along the high side of the ship - and you'll see a closed door. Walk up to it and open it. Shoot the asshole down at the far end of the compartment. Go in through the door and across to the far side and turn to the left and go along until you see another asshole, whom you can also shoot.
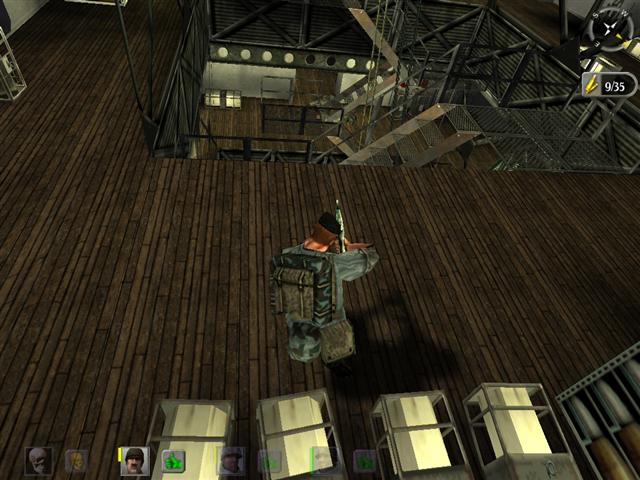
Now go back forward - the high side of the ship will be on your left as you face forward, that should keep you oriented - and through a kind of locker room and you'll see before you a big open cargo well, complete with winches and cables; actually not badly done, if this were supposed to be a cargo ship, but about as appropriate on a warship as a ham sandwich in an Orthodox synagogue.
Look down, cautiously, and you'll see you have a view of bits of the next deck down. Stand there and from time to time men will come walking by and you can shoot them. Now and then they will shoot back, so be careful.
And be careful where you shoot, too, and where you stand. The whole place is full of barrels of explosive liquids, shells, and other munitions, just standing around here and there, not secured in any way, as of course is the normal practice in any warship...but anyway the explosion potential is considerable, so watch with the stray bullets, and don't get yourself blown up.
You can bring in your other guys now, but don't let them get too close to the well, because they'll probably get themselves killed in incompetent shootouts. Incidentally, most of the guards topside had MP-44s and you might like to ghoul them up to improve your firepower.
Take some time and hang around shooting at the morons below. Move around and try different angles. If you're patient you can accumulate quite a few stiffs down there without much risk to yourself.
Bring in another man and run him forward - that's downhill; keep that in mind, it's a good way to stay oriented. On his way he can pause to have a look at the extremely strange control room.
Beyond that he'll find another cargo well, where he can take up position and snipe at the Germans on the next deck down. Let both these men hold their places and keep up the good work for a little while; be patient. In time they can clear all the opposition from the lower deck.
When you've taken out the dorks screwing around on the next deck and there don't seem to be any more coming, you can try going down the ladder to the next deck, but save first because you may not make it; if you missed any of the bad guys, you're a hell of a target on that ladder.
When you get there, move around and make sure you don't have any company in the immediate area. Work your way clear around the deck, from the forward end back to where you encounter water and then back up on the other side. You'll find that there are several cargo wells like the one you came down. (Not a sign of the barbettes and ammunition hoists and other support for the gun turrets, or any sign of their existence at all. Why the hell didn't they just make this a German cargo ship? It wouldn't have been nearly as grotesque.)
There's one son of a bitch down on the bottom level - yes, Virginia, this "heavy cruiser" is only three decks deep from the main deck to the bottom - and you're going to have to get him before you can proceed. You might be able to get him shooting down through the well; but he's pretty aggressive and he might just come on up the ladder after you, once he spots you.
Eventually you will shoot and climb and blunder your way to the bottom level. Or one of you will. All you really need is one man left alive to complete the mission, of course.
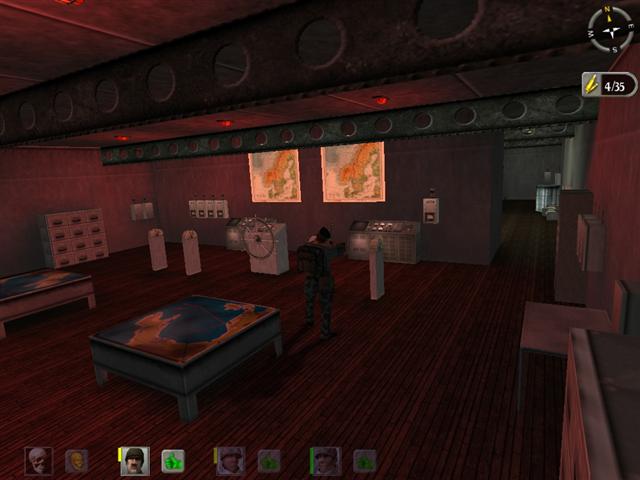
Now to look for the decoder machine. You might have noticed, while you were wandering around, that there were several rooms that looked like radio or communication rooms, or command centers; but I hope you didn't waste your time looking in such improbable places for a decoding machine. No, no. That's not where it is.
Exactly where you find it will vary from game to game. It's somewhere in the bottom of the ship, and that isn't as big an area as it sounds because only a short way back you reach a compartment that's partly under water. There you will see something that will make you say, "Oh, for God's sake."
You've only got three or four compartments to search. Sometimes it's all the way up in the bow, sometimes it's back near the water, sometimes somewhere in between.
But wherever you find it, one thing will be constant: it will be in a room full of miscellaneous supplies, and it will be sitting on the floor.
No shit. The top secret code machine - which looks exactly like a cheap portable typewriter - is sitting on the God-damned floor in a God-damned supply room. Not even on a desk or table. On the God-damned FLOOR.
Well, naturally. I mean where would you keep it?
Even if you could force yourself to buy all the other absurdities and grotesqueries up to this point, that should finish you off. If you can still take this mission seriously, even by H&D standards, after seeing that damn thing sitting on the floor, then I give up.
Anyway, pick the damn fool thing up and go back up the damn ladder and out to the damn deck and down to the damn boat and get the other damn fools if any are left and you'll get your damn completion message and then you won't have to run this damn thing again till the next damn game.
Oh, well. The next two missions are much better. Promise.