The Mad Major's Excellent Halftrack Adventure
The Mad Major's Excellent Halftrack Adventure
This is the longest mission in H&D and one of the most interesting and exciting. It isn't terribly difficult once you know a few things (and it's flatly impossible if you don't) but it does include some pretty tricky points and one bit that is quite difficult indeed. But if you were good enough to complete the previous mission, you can handle this one.
One other point of special difficulty: there is no map for this mission. None. You will have no way to issue commands except the crude voice kind (none of which are of any use in this mission) so you can't give Guard assignments; and the only way you can move a man is by direct control.
MISSION: Ignore absolutely everything in the "briefing" as well as the splash screen, both of which would lead you to believe that this is a high-speed vehicle-chase sequence - Smokey And The Halftrack as it were - because it's nothing of the sort. The mission is basically to get from Point A (the starting place, supposedly somewhere along the road after leaving the concentration camp) to Point B (the turnoff toward "Peenemunde") but you'll use up most of the rest of the alphabet before you arrive. There is no pursuit element at all except right at the beginning and if you don't take care of that instantly it will all be over. After that it's just a series of obstacles to be dealt with, and most of them will have to be approached on foot, with small arms. For most of the way, the track is basically a ride; only rarely does it function as a weapon and never as a high-speed getaway vehicle.
CONDITIONS: Daytime, bright and sunny. Beautiful day for a drive in the country.
THE OPPOSITION: Practically the whole German army. Or that's what it feels like anyway. Absolute shitloads of infantry with assorted weapons (mostly MP-40s and Panzerfausts, only a few rifles), plus a couple of tanks, a machine gun tower, and another halftrack. Even mines. This isn't going to be easy.
PERSONNEL: Really you should be using the same gang you used at the underground missile facility and the concentration camp. After all, the premise is that you're escaping in that track you hotwired back at the camp. And a team that worked well for that mission would be perfect for this one.
However, you've covered some distance since leaving the camp; it's not like the business with the tunnel, where you couldn't possibly have picked up replacements. So if you got shot up pretty bad back at the camp, and you feel short-handed, then you could rationalize that you left some guys hiding in the woods while you went in with Steiner, and you've picked them up.
But before you start adding people, you should know that more isn't necessarily better in this mission. In fact a fourth man will be a real pain in the ass. This is because of the way H&D loads this particular vehicle. If you have four guys on board, one will just stand at the rear, facing backward and therefore utterly useless - as well as vulnerable; you'll have to dismount him and leave him behind at every bit of action or he'll be killed.
Three is really a much better number for this one; there simply is nothing the fourth man can contribute. And in fact you could do it with two. In some ways two would be a very good number, though it would be a little unhandy at a couple of points.
So even if you lost half your guys at the camp, you don't really need reinforcements. More, yes, this isn't a mission you'd want to lone-wolf - although I suspect it could be done - but as long as you've got two reasonably good men you're OK.
In fact if you got away from the camp with all four, you might want to consider finding some excuse to dump one of them. I don't know, maybe you sent him off on some special mission of his own.
EQUIPMENT: I'm going to give you two alternative ways to run this mission. In the first, your character must carry two antitank mines and at least one Panzerfaust. This will leave him unable to carry anything else, but there's a way we can deal with that.
The other two should each carry a rifle with plenty of ammunition - 100 rounds wouldn't be excessive - and an MP-40 with several clips. Several potato mashers should be carried as well.
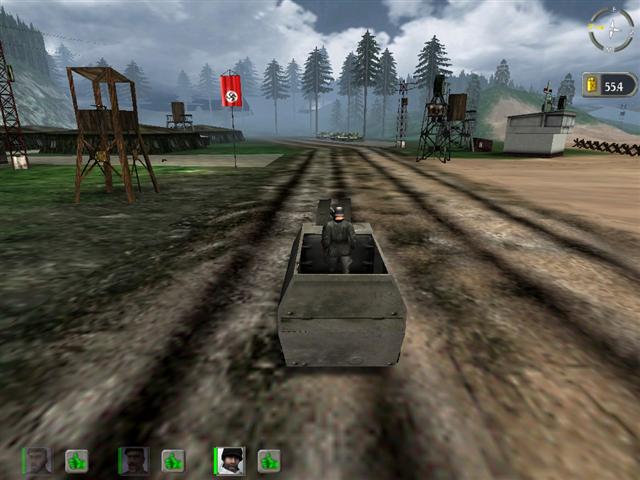
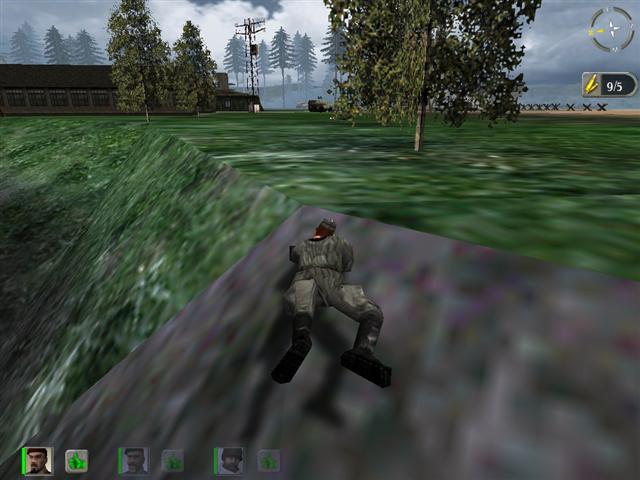
AT THE START: You are standing beside the halftrack on a dirt road. All the other men are aboard. There is a German tank coming up the road behind you.
PROCEDURE: There are two different ways to run this mission. Actually there are more, but these two are the most effective I've found. Each has its advantages and dis.
I am going to give you the more or less orthodox one first - the one which most people follow, in one form or another - and also the longest one. Before you make up your mind which one to use, you should read this page all the way through; because it is absolutely necessary to decide definitely before you begin - what you do in the first few seconds will depend on which version you're going to run, and there will be no time for hesitation; and once committed, there's no way to change.
Right, then, first the longer (and harder) way:
Immediately move over to the left side of the road and lay a mine in the middle of the left-most track. Move sidewise and lay the second one a foot or two to the right of the first one. Run to the track and jump in and drive like hell. Go around the bend and immediately get over to the right side of the road and bail out. (Hitting reverse will stop the track faster.) Get out a Panzerfaust and run back up the road and under the trees where you can watch what comes around the bend. Punch the trigger once to arm the Panzerfaust.
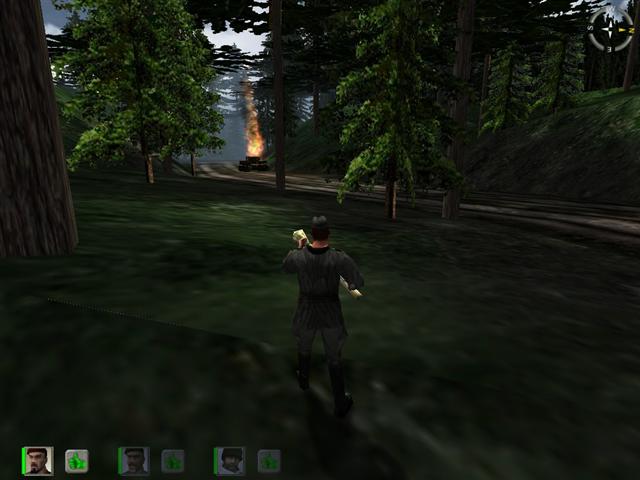
If you are lucky you will hear a loud boom as the tank hits a mine. However, the tank will also be firing its cannon so don't confuse one boom with another. If you hear a really loud boom and then everything gets quiet and stays that way for a considerable time, then you can go and have a look and admire your work.
If not, you'll know soon enough; the tank will come into view around the bend. Hit it with the Panzerfaust. If you miss it then just reload the mission, you've had it this time around. If you can't seem to make this work then maybe you should try the other way (see below).
Once you've eliminated the tank, by whatever means, it's time to do some reorganizing. The driver should dismount.
(Note: in this mission, for purposes of clarity, I am assuming that your own character is the one in charge - number one on the list is who I mean when I say "you." I will refer to whoever is driving as "the driver" and the third man as "#2" regardless of his position in the actual lineup. I am also assuming you've only got three men, but later I will be offering a suggestion how you can handle it if you've got four.))
The driver should now lay his own rifle, MP-40, and grenades on the road and then get back in the track. Step forward and pick all this stuff up. Now you're ready to go hunting.
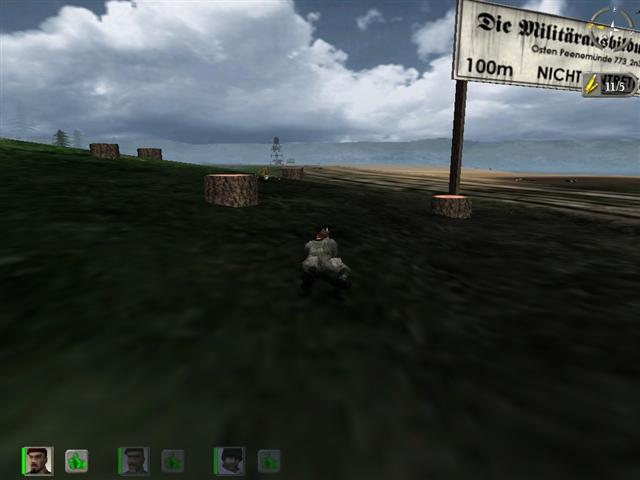
Go over to the left side of the road and move forward. When you pass under that fallen tree, watch out, the action is about to start. Get down and go around the bend until you reach a place where the road climbs up over a kind of hump on the left side. Wiggle up that, holding the rifle ready, and you'll see that off down the road there is a big sign and to the left of that sign a kind of little low hill, and standing on that hill a man with a gun. Pop him.
He's too far away to be dangerous, but if you work yourself up a little farther you'll see that there are a couple more goons who are a lot closer. Just down the road is a two-man team, Panzerfaust and MP. Snipe them with the rifle and then cross over to the other side of the road.
Move down the road in a crouch until you get to where the embankment to your right begins to flatten out. (Don't try to climb up onto it, there's one of those force fields.) You flatten out too, and start moving cautiously to your left, crabbing to the side while keeping an eye on the area in front of you with the scope.
You will see that up ahead, where the trees end, is a big wide sandy beach. The road passes under the big sign and runs along the left or inland side of the beach. A few trees and a lot of stumps are between you and the beach. Keep it that way; they're your best cover at this point.
As you move to the left, so that more of the beach comes into view, you will begin seeing troops on the beach. The trees and stumps may hide some of them, but down there are six Germans who have to be snuffed before you can go any farther. Four of them are fairly close, while the other two are farther off, out toward the limits of your range. Half of them have Panzerfausts and the other half MP-40s, but the Panzerfaust boys also carry MPs which they will use once they've fired their rockets. Don't dismiss the Panzerfausts, they will without hesitation fire those things at you and if they hit you or even get reasonably close you're done for.
Take your time, use the available cover wisely, and snipe all six of them without letting them get a shot at you. Then run over to the left side of the road again and flatten out behind the cover of the first little rise of ground.
Now things are about to get serious. To the left side of the sign, down the beach some way, you will see a light tower. Near that is a tank. You can't see it yet because you're not close enough. It can't see you either, which is why you're still alive. It's got this area covered, and make no mistake, it will shoot at an individual - including you - with its main gun. (It doesn't seem to have a machine gun, which is just as well.)
You must be extremely careful, then, not to show yourself or you will be blown to shit. It might miss you the first time but you can't count on it, and it will definitely get you the second. It is extremely accurate, and able to traverse that turret with impossible speed.
Crawl forward until you are behind the next rise of ground. Use the stumps and trees for cover. The tank will not shoot at you as long as it can't see you so even a stump is adequate cover if you keep it between you and the tank.
There are three men on the beach next to the tank, on the right - your right - and you have to find a position where you are hidden from the tank and pick them off. The range is pretty long so you're not in much danger from them (though beware those Panzerfausts) but you must not let yourself be spotted by that tank while you're doing this. Be sure you get all three and be sure they're all dead; these assholes have a way of lying there as if dead and then getting up again. But by now you should be able to tell the difference.
There may also be a couple of men on the other side of the tank, close to the stream bank. Get them in the same way.
Back up now and move sidewise, across the sheltered slope of the little rise, until you reach a steep dropoff. Looking down, you will see that you are in the presence of a true geologic and topographic wonder, not to say impossibility: a stream with a rock bed and steep rocky banks running parallel to a sandy ocean beach.
The stream makes things more complicated, because it limits how far you can move to the left. (And don't try to wade across it, you can't; you'll drown, no matter where you try it.) However, it also offers the solution to several problems.
For now, just crawl on around the rise of ground and out along the creek bank. It doesn't look possible, but you can. Wiggle on along the embankment, keeping an eye on the view through the scope, until you can see the two men standing on the creek bank behind the tank. (If you see the tank you've gone too far, haul ass backward.) Shoot them off there. Reload and take a deep breath.
The next part is very tricky and easy to blow. I strongly suggest saving at this point. It is very possible you will fail in your first attempts; it takes a little experimentation to get the hang of this. And you surely don't want to go through all that business with the tank, and then all that tiresome routine sniping on the beach, again. (If you do, then by all means go ahead and don't save; have fun.)
Get into third-person. This is hard enough at best; besides, when you do it in first-person sometimes the graphics go crazy.
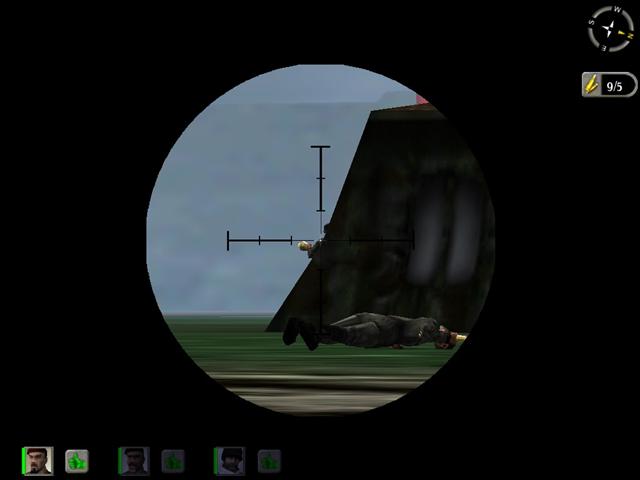
Move sidewise down to the water's edge and beyond. Yes, beyond. Crab-crawl till your whole body is out in the water and your elbow is more or less brushing the water's edge. You are going to crawl around the next corner, down low enough to be out of reach of that tank's gun. You are going to be moving in the water and some of the time your head will even be underwater. The H&D commandos can't swim but they can hold their breaths pretty well.
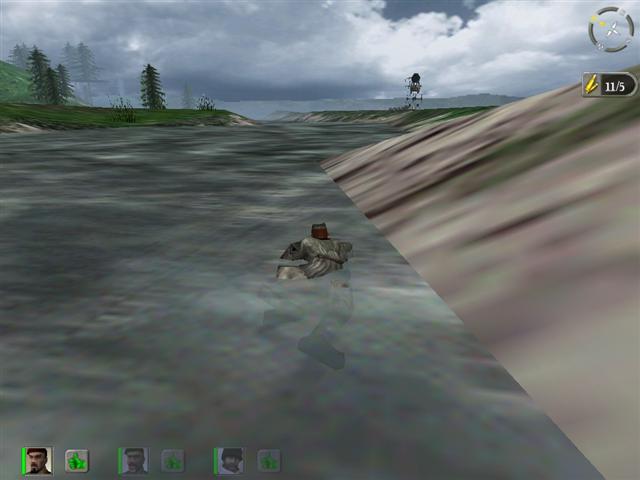
Crawl forward along beside the bank, staying just as low as you can. When you come around the corner, you will hear a clicking sound; the tank is getting ready to fire. If you do this right the shell will pass overhead and miss you. If not, well, I hope you saved.
The tricky part is getting the direction right once you come around the corner. DO NOT FOLLOW THE SHORELINE after you round the corner; the tank will blow you up for sure. You have to angle out away from the bank a little, cutting across that little cove, and stay out in the water so you're down out of shot.
At the same time, you mustn't angle out into the stream too far, because there's a limit to how deep your man can go and how long he can hold his breath. (Not all that long.) Out past a certain point you can come up to a crouch and thus handle somewhat deeper water, but be cautious about doing this and go back down flat as you reach shallower water. You really shouldn't have to do that if you've calculated your course right. You want to aim toward a point somewhat to the right of that light tower beside the tank. As I say, it may take you a couple of tries to get the hang of it.
Once you have reached the bank, turn and work your way along until you are roughly even with the tank. Using full wide angle third person, have a look at what's up on the road besides the tank. See, you've got company.
Pause at this point and switch to #2; get him out of the track and bring him forward. Have him run down the right side of the road in a crouch and cross over and flatten out in that area you just left, the little twin rises of ground. Now he's got to creep forward, using the trees and stumps for cover, until he can kill those two geeks standing next to the tank without being spotted.
Once this little job is accomplished, go back to #1. Keep crawling along the bank - by this time you should be about halfway between the water's edge and the top of the bank - and on a little way around the next bend. Watch for the guard tower to come into view and kill the guard. He's easy; you may have to take several shots but he's not likely to fire back at you.
Move back to your left and the water's edge again and crawl on around the bend. There is a machine gunner on a halftrack covering this part of the bank, as well as a man on the ground, so you have to stay low out of their sight. Once you are well around the little point you can get up and crouch-run if you like, but only for a very short dash. The next bend in the bank is as far as you can go.
It's vitally important to recognize the place, and not to pass it, because something very weird is going on just beyond this point. You cannot move in the water, even up against the bank, without submerging and drowning, and you cannot move along the bank without sliding into the water. This is where your bank-crawling ends.
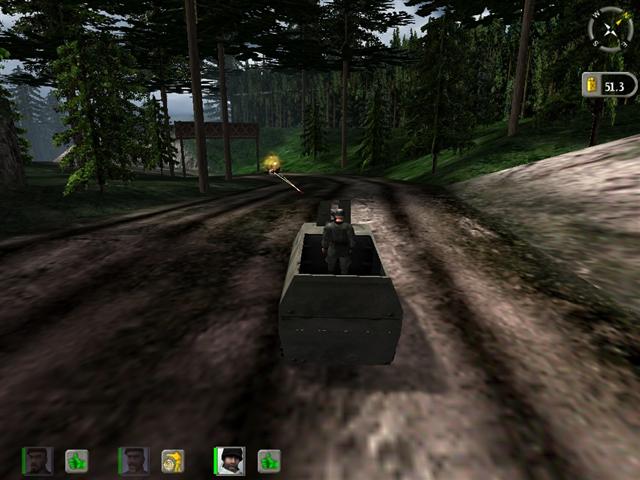
Move near the top of the bank, without showing yourself, and have a look in third person. There should be some buildings just ahead, and some power-line supports. There should also be a halftrack parked by the road and, out among the trees quite close to you, a lone man with a machine pistol or possibly a Panzerfaust.
The guy is easy to get so do him first. Just grenade his sorry ass; he's right there, dead meat if you can land one near him. When he's croaked, switch back to the rifle and get lined up and move upward just far enough to hang your sights on that son of a bitch in the halftrack. Shoot him in the head. Don't screw around, if you miss him he's liable to nail you with that MG.
The instant you hit the halftrack gunner, go backwards down the bank again, out of sight from the beach. If you were quick maybe you didn't even get shot at. Or if you were lucky maybe you didn't get hit too bad.
In case you haven't noticed yet, there are three Krauts over behind that other tank on the other side of the beach. Check it out in third person, you'll see them. They're going to ventilate you if you show yourself above the bank. Count on it.
So move back up the creek just a little way, staying down low on the bank. See those clumps of reeds or grasses by the edge of the bank? Use one of them for cover and snipe those guys. If necessary you can do the pop-up routine: pop up and shoot one, drop back down, etc.
When they are all three of them dead - and this may take some doing, and you may get hit - you're ready to climb up onto dry level ground again, and aren't you good and ready to do so. Don't worry, the tanks don't fire behind them and there's nobody else covering this area.
(There was a second tank, wasn't there? If not - if there were just those guys standing around, no tank nearby - then uh-oh. You've got a problem; it will be explained in a moment.)
You will see up ahead a kind of military base or encampment, with wooden buildings and guard towers (no sweat, they're not manned) and several more tanks parked across the road. Pause by that sentry you just killed and confiscate at least one of his Panzerfausts. Scamper on up to the nearest wooden building and turn left and run along next to the row of buildings until you reach the last one, which you will see is nestled up against a cliff. However, you can get behind it and there's room enough for you to run along through there. Go on behind the wooden buildings and then you'll come out behind some rows of very strange-looking structures, I suppose they're meant to be large tents.
Anyway go behind the first two rows of these and then pause and have a look around the corner. Off down toward the road you'll see a man holding a Panzerfaust. His back is to you. Use the rifle and blow in the back of his skull. Don't expose yourself any more than you have to and get back out of sight immediately.
Now then - if there were two tanks out there, one on the road and one on the beach, then you're OK, you can skip the next bit. If you only saw one, then you may have run into a pretty rare occurrence: the second tank may not have left the camp yet.
Have a third-person look at that bunch of tanks parked across the road. Are they all quiet, or is smoke coming from the exhausts of one of them? If it is, you've found the second tank. You'll have to destroy it before you can proceed. Work your way down among those tents till you've only got one tent between you and the road, and then get a Panzerfaust ready and step around the corner and bust that damn tank.
Now run on behind the last row of tent things and across the road, and start working your way back along the road on the far side, taking it slow and easy and being very watchful. There are two more guys standing in front of those green tent things next to the road, and as you move forward and then sidewise the first one will gradually come into view. Line up your shot and take his head off. Then keep moving sidewise - if you can't, get where you can - until you spot the next one and give him the same treatment.
At this point you should have three stiffs lying between the road and the green tent thingies, each clutching a Panzerfaust in his cold dead fingers. Go over and help yourself to the Panzerfaust supply. You can lay your rifle and your MP and grenades down temporarily in order to carry more Panzerfausts. You only have two tanks to kill but you may miss with one or two shots; these things are wildly inaccurate. (And when you've been shot at with one, you will not complain about this.)
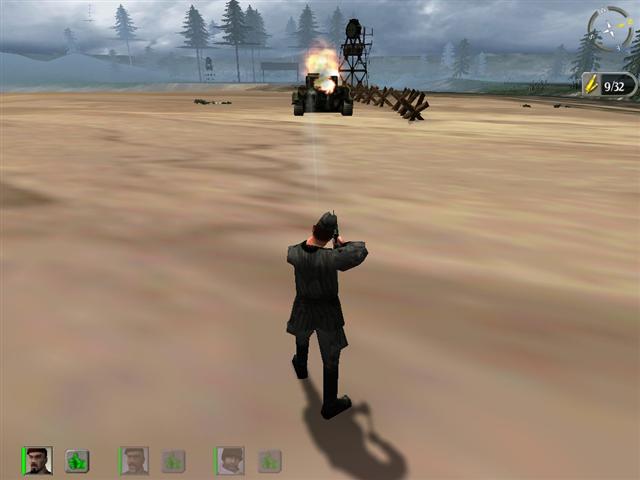
Now to have some fun. Walk out on the beach and up behind the nearer of the two tanks (assuming they're both there) and bugger it with a Panzerfaust. If it survives, hit it again. Blow that son of a bitch to shit.
You could walk out to the other one too, but why walk when you can ride? That halftrack is just sitting there; might as well get some mileage out of it. (No, none of those parked tanks can be used. Disappointing, I know.)
Besides, as soon as you go out toward the second tank, a couple of evil little dickheads are going to come running out of one of those wooden buildings and shoot at you. It'll be pretty long range but why risk it? So get in the track and start it up and drive it up the road till you're getting fairly near to the remaining tank, and then turn it crosswise to the road, so it shields you from gunfire from behind. Now you can dismount and get out another Panzerfaust and walk up to that tank - not too close, don't blow yourself up - and make the bastards inside pay for putting you to all this trouble.
At this point you've got two choices. The simple thing is to get back in the track and drive on up the road, park off to one side near the sign and go over and stand near #2, and then have your driver bring your track on down. Both of you get in - you next to the driver, #2 manning the machine gun - and rumble on down the road across the beach, pausing somewhere to let the driver score himself an MP-40 and some ammo; and as you approach the camp on the other side, #2 will take the two idiots out with the machine gun.
Then you can park the track back where you got it and, if you like, have a bit more fun picking up Panzerfausts and using them on the parked tanks, as well as blowing up your commandeered halftrack if you haven't gotten too fond of it.
Then take the track on across the beach to the camp and get everybody back on board. Climb in beside the driver, don't get in back with #2, there's nothing you can do there and you might as well be where you're safe.
Drive on through the camp and up the hill. At this point you should perhaps save, because there have been reports of a bug at this point, though I've never had any trouble myself.
You'll find that the track has no power at all; on any sort of hill it slows down to walking speed. Nurse it on over the top, though, and you're in for a real treat as this silly son of a bitch on a BMW comes roaring up the road at you. Your gunner will blow him to shit; probably he'll shoot the rider out of the sidecar first and then blow up the bike. Stop to give him an easier shot and enjoy the fireworks as the bike explodes.
(In the extremely unlikely event that the guy in the sidecar kills your gunner instead - I saw it happen once - you are fully justified in shouting, "OH, HE DID NOT EITHER!" and reloading and doing this again. Since you saved at the bottom of the hill, it's no real trouble; and it's not a cheat to work around something that silly.)
Drive past the burning bike - humming a few bars of "Bat Out Of Hell" if you like - and down the other side of the hill, but stop when you reach the next bend. Get out of the track and walk on down the road. At the bottom of the hill is a little guard shack with two weenies standing in front of it: the ever-popular Panzerfaust and MP team once again. From a position on the road well up the hill, you can headshoot both of them.
Move on down the road, but not too far. See the embankment off to the left? See where it ends up ahead, as the road makes a big turn back to the left? When you pass the end of the embankment, three men are going to come running out from the side road up ahead and open fire on you.
So bring up #2 and station him up at the top of the embankment where he has a field of fire on the intersection. Get the driver from the track and let him take a position next to #2; he might as well get to shoot somebody too. Then switch yourself to the MP and walk cautiously on down the road, staying close to the embankment and watching that area by the side road. Chances are #2 and the driver will see them before you do, so as soon as you hear them open fire stop and go to a crouch and join in. There are only three of them and they're some distance away and, frankly, they're not very good, so the three of you should have no trouble wiping them out.
Bring the track on down the hill and around the bend and stop by the intersection.
Don't take the turnoff to the right; it doesn't go anywhere that will do you any good. Stay on the road you're on.
Go and get back in the track, but leave #2 where he is for now. Around the next bend are two assholes with MPs and they will sometimes shoot the gunner out of a track; as you negotiate the turn there is a point where it's difficult for the gunner to bring his weapon to bear on them.
So if you want to be careful - and you should, a good gunner is worth preserving - leave #2 by the roadside, just after the intersection, and drive the track on around the bend and stop. The two gunsels will fire at it until they exhaust their ammo - it won't take long, they're not carrying much - and since for once neither of them has a Panzerfaust, you're in no danger at all.
It's a little tricky running over them because of their location. You can of course just leave them there, but you're not going to do that, are you? OK, then get out and go shoot them. (Or let #2 do it.) This is one of the very few times in an H&D mission when a pistol is of any use; it's perfect for dispatching these two losers. As you walk up to them they may scream things like "Englander!" "Der Tommy!" and the rest of their usual repertoire, which makes it even more satisfying to put a .45 slug between their wide-set blue Master Race eyes.
Get #2 back in the track. It's about to get even better.
If you proceed any farther down this road, you will run into an amateurish but unpleasant roadblock or ambush: several troops standing around with various weapons, and a Kubelwagen parked by the side of the road. This is not too tough an obstacle, but beyond that is something much nastier: a couple of tanks blocking the road. Haven't you had enough with the tanks already? Yes, I thought so. Well, you're about to give them all the slip with the Secret Road of Fu Manchu.
While you're out of the track committing war crimes (well, that's what you just did, you know), have a look at the area to the left of the road, just past the two deceased Ubermenschen. Look carefully and you'll discover a grassy trail that turns into a narrow but usable side road meandering up through a cut in the mountainside.
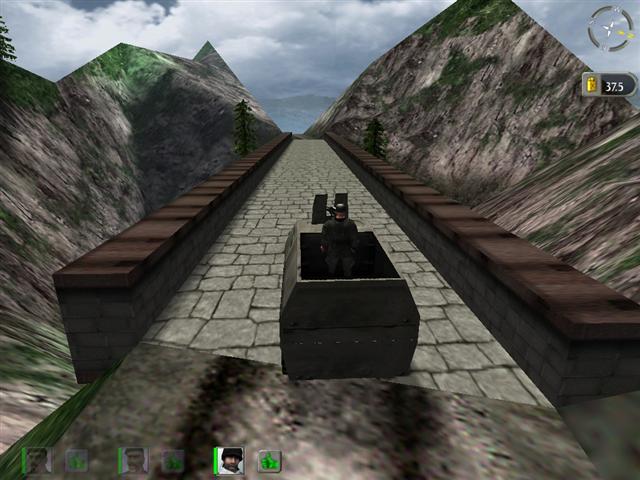
Back in the track, and have the driver maneuver through the trees - this is a bit tricky but not too bad - and onto the side road. Be careful going up through the cut; there's not much room on either side and the track tends to get hung up easily. No need to tell you to take it slow, the track will see to that as it groans and crawls up the steep slope. At the top you will emerge onto a truly amazing scene: a neat little one-lane stone bridge spanning a deep canyon or gorge, surrounded by precipitous rocky peaks, with ravens circling and croaking as you roll onto the bridge. The effect is stunning - and only a real spoilsport would point out that Peenemunde is in fact located on a low, sandy island in the Baltic....
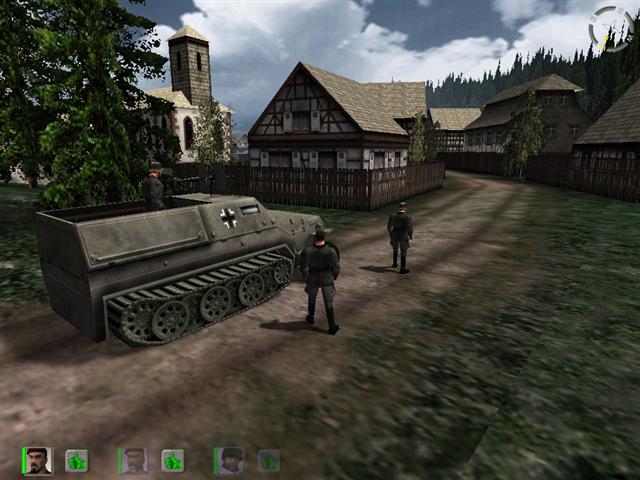
Never mind that; just admire the view and then go on down the road on the other side. Be even more careful here; there's one spot in particular where the track likes to get stuck and freeing it takes forever. As you approach the bottom, you will see up ahead the first houses of an amazing little village. You will also see yet another would-be hero rushing out with a Panzerfaust, only to be cut down by #2 with his trusty machine gun.
This village is really something else; it's one of the best things they did in H&D. It's worth having a look around. You have to do this anyway, because there's another punk holed up in the village and you need to do him so he doesn't get a chance to rocket the track.
So leave the track parked at the entrance to the village, and walk around to the left and behind the houses, over by the church; and move along investigating all the little lanes between the houses, till you see your victim. He's on the left side of the road, between a couple of houses. Step out and feed him a quick burst with the MP and then you can walk around some more admiring the knockout job they did on this village. But stay off the main drag.
Keep going until you come to the first windmill, on a little hill above the road. Move up beside the windmill, facing toward the road, and crouch down so as not to be visible from the roadway.
Now bring the track up the road through the village, going slowly. You need to stop just past the last house on the right. If nothing has happened yet, inch forward a little more, and a little more. You're trying to trip a trigger, but you don't want to go over the crest of the hill in front of you.
When you hit the trip line, yet another team will materialize out of the woods and take up positions by the road ahead. Your gunner will almost certainly get the first one before he can even fire his rifle. The other one will hunker down at the foot of the hill, out of your gunner's sight. He's got a Panzerfaust.
So back to your own character, crouched beside the windmill. Go to third person if you aren't already, and spot the Panzerfaust artist down below. Get out the potato mashers and go to work. It shouldn't take many; he's a dead easy target.
Once you've disposed of him and his buddy, you're clear to motor on down the road again. Now you can finally get up a little speed. But don't get too wild, because up ahead, around the next turn, the road turns to blacktop, and you'll have to slow down and do some careful driving.
You will never believe where you are about to find yourself. When you hit the start of the blacktop, you will discover that you are now on the other side of that rocky little stream that you had to negotiate to get past the tanks. Across the stream bed you can see the road and the beach. You will also see a couple of Germans, or rather your gunner will; he'll pick them off easily. (This is one thing the AI is really good at.) There will be another German or two down the road, and he'll get them too.
But you have to get off the blacktop, because it's mined. Get off it, to the right, as soon as it starts, but just barely; don't swing too far off the road, because there are a couple of tight spots where the track will have trouble getting through and may even get stuck. Just motor along with your left front wheels barely off the blacktop. You will see a bridge ahead. As you get close to the bridge the grassy area to the right of the road widens out, and you can move the track out into that area - keeping the front in pointed in the general direction of the bridge - and stop. Your gunner at this point will probably pick off a guy with an MP-40 in the woods on the far side. If he doesn't then move the track a little until he can do so.
The last serious obstacle is a Panzerfaust gunner lying hidden on the far side of the bridge. Don't try to cross the bridge until he's been neutralized. If you're lucky your gunner got him as you approached, but this doesn't always happen. Dismount and approach the bridge on foot, from the side, and use third person to see if he's still there. If he is you can try to grenade him, but you probably won't succeed; for some reason grenades tend to go wild in this area.
The other thing you can do is run way back up the road and get out the rifle and walk toward the bridge till you can see him and snipe him.
Once the two at the bridge have been chilled, walk across the bridge and down the road until you find the row of mines laid across the blacktop. Stand there in the middle of the road and mark the mines for the driver.
At this point if you've got four men and two tracks it's time for the men in the second track to abandon it and come join the others.
The track can cross the bridge now; the bridge isn't mined. It must immediately swing to the right, though, and motor along the embankment beside the road, until it's past the row of mines. Then it can get back on the road and we're nearly done with this mission. By the way, don't bother with that little side road off on the left; it doesn't go anywhere.
You can ride a little way if you like, or you can just walk on down the road while they wait in the track. The last obstacle is up ahead. After you go around the bend the road will dip and then rise. As you start down the downhill part, begin watching ahead very carefully with the scope at maximum zoom. At some point you will begin to see the hazy outlines of a big house or mansion - it will almost look like a cathedral at first - up ahead, silhouetted against the sky. As soon as the central bell tower becomes at all visible, stop and look closely. There is a sniper in the tower. You can see him. Kill him.
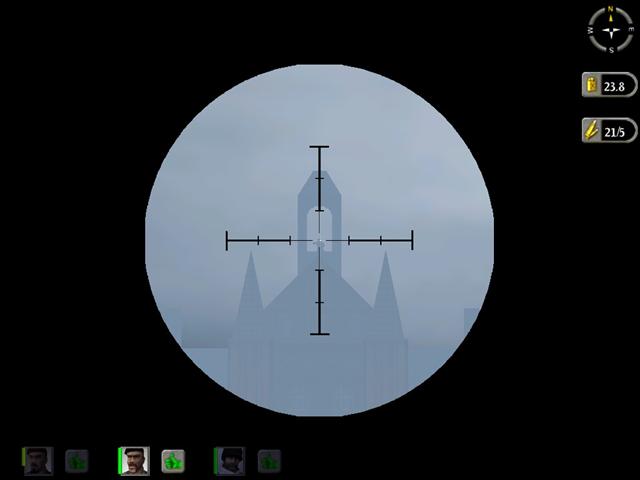
Reload, and move forward again very cautiously. There are two more snipers on a kind of balcony below the bell tower, between the two big Nazi flags. (I think this is supposed to be some kind of high-ranking Nazi place.) It's very hard to see them; actually it's impossible, all you can do is keep shooting through the narrow spaces in the balcony railing till eventually you hit something - you'll know when you see the bastard jump and flop - and then do the same on the other side till you get the other one.
If you don't want to do all that, then you can simply clear the back of the track and drive forward until they start shooting, and sit there in the road until they've fired off all their ammo. Not as much fun but perhaps safer, if you're unsure about your sniping skills.
With the riflemen dispatched to their meeting with Lucifer, there are no more obstacles remaining. Get everybody in the track and drive on, pausing to admire the fancy Nazi mansion. No, you can't get in to liberate that Mercedes, the gate won't open; but if you like you can take over the machine gun and blow it up before proceeding.
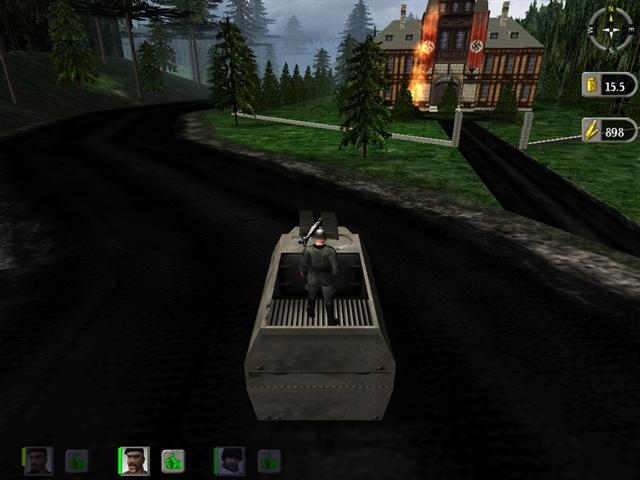
As you pass the Nazi mansion there will be a turnoff to the left and you will get a mission completed message.
Sound like fun? OK, well, before you start, here's a very different way that you can run it. Read it and see what you think:
This version will have the same personnel requirements as the other, but you won't be carrying any mines so you can arm yourself normally with a rifle and a few grenades - you won't need an MP until later, when there are plenty lying around. One man should be carrying a couple of Panzerfausts; the other should have a rifle.
When the game loads, instantly jump into the halftrack and start the engine. Cut the wheels hard to the left and swing the track around till it's across the road. It isn't big enough to block the road completely but that's OK as long as it blocks most of it, especially the left half. You may need to do a little jockeying but keep it extremely brief, you've got almost no time. Don't try to get it square across the road, it's actually better if it's at an angle.
As soon as it's in position, give a hearty "Follow me!" and dismount, and run like a son of a bitch up the road. Take the most direct route; shortcut the bend, between those trees. Keep going until you're well down past the hump and the curve. Don't stop and don't hesitate. Your men should be right behind you.
(It's possible one of them will do something typically AI-stupid, like run into a tree or get hung up against the side of the track. At that point you probably should restart the mission; it's not that big a deal.)
As soon as they've caught up with you - assuming you all made it without getting blown up - give them "Stop!" One man - whoever's got the Panzerfausts - can now crouch down and run cautiously back up the road, staying over among the trees and keeping well down. Use third person to check on that tank.
If you parked the track right, the Tiger should have come to a stop. It'll probably be grinding away trying to get past, but don't worry, if you got it blocked properly it's not going anywhere. You will probably see how it could get by simply by backing up and swinging over to the other side, but it won't do that; AI tanks don't know from reverse.
Don't get in a hurry to attack it. Stay down. It can still use its gun and it'll blow you up if you try to fight it. As long as it's obviously not going anywhere any time soon, leave it alone.
At this point you can now begin the procedure as detailed above - working your way down the road, sniping the road guards and then the men on the beach, swimming past the tank and all that, until you've taken over the camp. All that part remains the same.
(Except that at some point your man with the Panzerfausts ought to take out that Tiger, just on general principles. You might want to cut back to him from time to time and see what's going on. If you parked the track at an angle, the Tiger will gradually clank and grind itself into a position where it's not able to cover the road, and then you can stand up and blast it. Aim for the tank rather than the track; blowing the track doesn't always get the tank. Probably you could just go off and leave it there - I don't think it would ever succeed in freeing itself - but I've never felt brave enough to risk it.)
All right, now you've wiped out the tanks and you own the camp. You've taken over the halftrack that was parked at the camp and you've picked up your buds. Now continue, still as in the first version only with the other track.
But you'll notice there's a problem with this one. It's low on gas and it's a gas hog. You won't have enough fuel to make your destination. If you follow the route described above, you'll run out of gas just as you reach that bridge over the canyon.
Now you could proceed on foot and eventually complete the mission; there's nothing ahead of you that couldn't be dealt with using infantry tactics. However, that would take a long time and it's not necessary.
Instead of turning off the road and going up over the short cut over the canyon, stop the track and get out and take out the rifle. See that sharp bend up ahead? There's a roadblock just past it. Run over by that steep embankment and ease down to the angle by the road. Use third person and scout the roadblock; see where everybody is. It's not much of a roadblock, more of an ambush really, just a few guys with Panzerfausts and rifles.
So get down and wiggle past that angle just far enough to see the man on the far right, and kill him. Scoot back behind cover, wait a minute, and repeat the process. Don't try to get more than one at a time and take cover immediately after you fire, whether you miss or hit. Pretty soon you should have taken care of the Panzerfaust gunners.
Now your driver can start the track and bring it on down around the bend. If you got all the Panzerfausts (and you better hope you did) the riflemen won't be able to do anything to the track, and your machine gunner, if he's any good, should be able to get them. Or you could just dismount him and take the track around the bend and let them fire off all their ammo at it, if you prefer.
Once you've wiped out the ambush, you can run down and confiscate that neato little Kubelwagen they had parked by the road. Drive back and load everybody on board and go on up along the short cut and over the bridge.
As you approach the village you'll need to stop and go ahead on foot long enough to kill that geek with the Panzerfaust who comes running out. No need to look for the other ones, they don't matter now.
Now drive on down to the junction, but don't go through the village. Turn right and drive just a little way and park the Kubelwagen and get out. The others may as well stay there; this is a one-man job. You'll need your rifle, at least one Panzerfaust, and a couple of grenades.
Run on up the road, staying close to the left side, and as soon as you're over the hump get off the road and work along across the grass. You'll run into one of those invisible walls; just follow it and you'll be OK.
Up ahead, on the main road (blacktop here, as you'll see), is a considerably more serious roadblock, with a couple of tanks. Don't panic. Keeping down, move closer until you reach the point where the invisible wall breaks and allows you to move to your left. Lying flat, moving sidewise, crab up over that hump of ground with your rifle ready. Get as far to the side as you can; the tank guns don't traverse very far and if you can worm your way to their flank you'll be safe from them.
There are two men on the road, both with Panzerfausts. You should be able to snipe one of them with the rifle. If you can't get a shot at the other one, grenade him.
Now all you have to do is walk around behind the tanks, down by the bridge, and blow them up. One Panzerfaust will do the job; either one you hit, they'll both blow.
After that just bring the Kubelwagen around, get in, drive past the roadblock - you have to go off to the left and swing around that tree - and onto the bridge and across; and then on down the road and around the bend you'll reach your destination.
(Alternative within the alternative: you don't actually have to have the Kubelwagen. You can drive the track up the mountain till it runs out of gas and then do the rest on foot; the distances aren't that great. If you'd rather not mess with that first roadblock - and it is a pretty nasty business, with some risk of getting hurt - then just ignore it and drive the track on up the shortcut till it dies.)
The advantages of this procedure are (1) it's a surer way of stopping that Tiger; (2) it's less risky - you eliminate a lot of the danger points, such as the mines on the road and the snipers in that chateau; and (3) it's a bit shorter.
The main disadvantage is that, well, it's easier and less risky, and so you miss a good deal of the excitement, as well as some of the neat scenery. (Though there's nothing that says you can't stop and check out that village before going after the roadblock, as long as you remember to get that German who's lurking between the houses.)
My advice is to try it both ways. They're both fun.
Whichever way you did it, congratulations! This is one of the most complex and demanding missions in H&D and if you completed it without losing anybody you did very well. If you completed it without once having to do a restart, then you did very damn well indeed.
One more to go in this campaign. Trust me, it's a piss-cutter.