Here We Go Again
Here We Go Again
This is one of those missions that looks incredibly difficult but actually isn't. It's either fairly easy or flat-ass impossible, depending on how well you handle certain jobs at the start. It doesn't last long but it's very exciting, and at the end there are some bonuses.
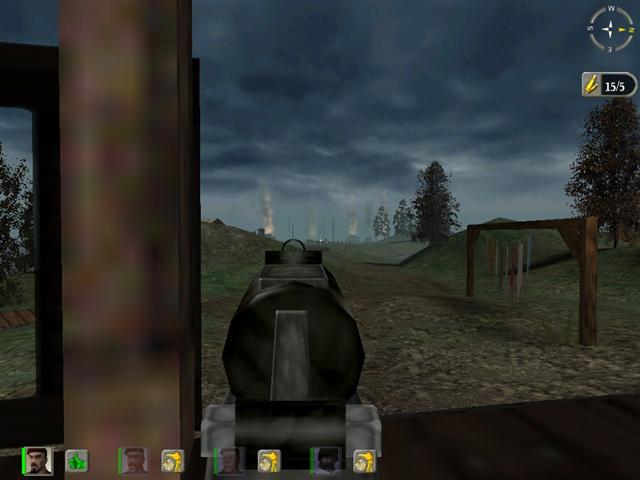
MISSION: To hold off a German attack until the aircraft is ready to leave. Yes, yes, been there, done that, got the T-shirt and used it for a bandage to keep from bleeding to death...but this time the plane is already there, and won't go anywhere until you're damn good and ready.
CONDITIONS: Still nice and sunny and clear.
THE OPPOSITION: Mobs and mobs of German infantry, nearly all armed with MP-40s. Two tanks.
PERSONNEL: Arguably you should still be using the same ones as in the last mission. However, the situation gives us some wiggle room. If you've only got three men, well, add a fourth and say he came in on the plane, or he was already here waiting to be flown out after a mission of his own. If you've got somebody you want to replace because he hasn't been working out so well, OK, say he got injured and you've already loaded him on the plane, and you've replaced him with another guy who was here waiting for the plane.
If you had four guys when you left the camp but reduced it to three in the halftrack mission, then just say you sent the fourth guy off on a separate assignment - recon, taking photos of a secret installation or something - and this is the rendezvous where he's rejoined you.
But you really should have at least one or two of the halftrack crew with you on this one. And after all, if you completed that mission successfully, then they must be pretty good men, right?
However you want to play it, you do need all four for this one. And you'll wish you had more.
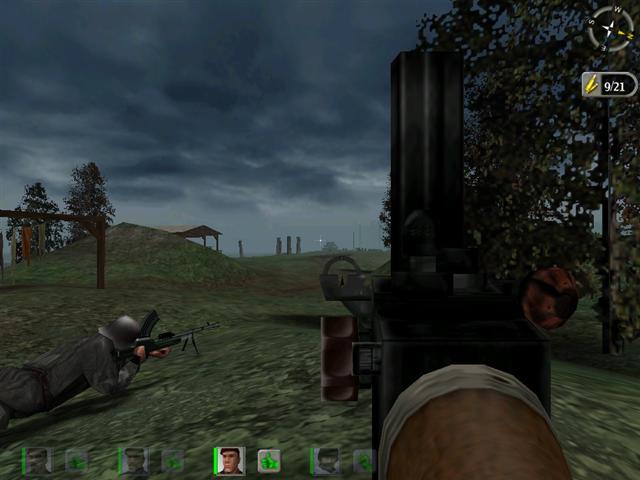
EQUIPMENT: Antitank mines and machine guns. Now is when you'll appreciate the strong boys like Whintson and Wooley. Everybody has a hell of a lot to carry and everybody will be loaded to the max.
I told you to put two Brens on the campaign equipment list. I hope you listened. The Brens should have plenty of ammo, three or four hundred rounds apiece.
You may choose to have two of the men carry those German machine guns you picked up at the villa and off Steiner's desk. However, they only have sixty rounds each, which limits their value.
Additionally, you will need at least six antitank mines, preferably eight. If at all possible you really need to have each man carrying two AT mines. You will have to shuffle things around to find out who can carry how much. A strong man like Whitson or Wooley can carry a Bren and two AT mines without any trouble.
Even a relatively average man can carry an MG and a couple of mines too, but there's the ammo problem. As we noted, the MGs only have sixty rounds, which isn't enough to get through the fire fight; and so the gunners need to have some sort of backup weapon for when their ammo gives out. But the average H&D trooper can't be expected to pack two mines and a machine gun and an MP or Sten as well. You could give him a pistol but while that might let him defend himself, it won't contribute anything useful to the firepower situation.
So I advise you to just leave the damn MGs out of it and give those two men a couple of mines and an MP-40 apiece, with as much ammo as they can carry. The range, when the shit hits the fan, is going to be well within the MP's capabilities, and the extra mines are of far more value than a couple of MGs with only enough ammo for a few bursts. I've run this mission carrying only an MP-40 for myself, and I didn't have any trouble scoring plenty of hits with it. And then you also eliminate that awkward pause while switching weapons. (Which you will have to do manually for both of them, because the AI won't automatically do so. That's something else to think about.)
There are some weapons available at the site, but they're of no use. Down on the seaplane dock there are a couple of weird things which are called "Browning automatic rifles" but they aren't; they look vaguely like the old BAR, but they feed from a belt rather than a clip, and in any case the British never used the BAR. If that sort of grotesque inauthenticity doesn't bother you, OK, but it bothers the hell out of me; I won't touch the damn things. Anyway, they're no good for a job like this because the AIs use them like rifles, firing single shots, rather than as machine guns which is what is needed. Leave them and bring your own.
AT THE START: You're standing beside a halftrack (presumably the one you rode in on) facing the wrong way. Nobody is shooting at you and nobody is about to but you don't have unlimited time.
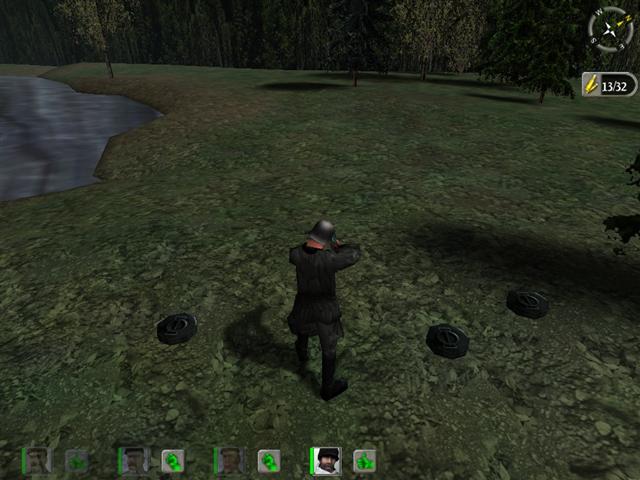
PROCEDURE: I'm going to assume you took my advice and each man is packing two AT mines. Your first man should now turn around and walk up beside the halftrack and place it just about at the edge of the halftrack's shadow. He should now step to the left and place the next one beside it, about a foot or so away.
Pull up the map and assign him to move back down the peninsula to a position in front of the house at the end of the peninsula, next to the steps. This will be close enough for now.
Pick one of the two Bren gunners and give him a map command to move over to the shoreline to the left, where there is a kind of little semicircular notch in the shore. Give one of the MP men a command to go to the same place.
I am assuming that the first man is carrying an MP and that the man left standing by the halftrack is a Bren gunner. In any case, have him turn and go up and place his two mines to the left of those already in place. The mines should form a fairly straight line, about even with the rear of the halftrack and perpendicular to the track as seen in the map. (You can see the track in the map but not when you're standing on it for some reason.)

If this man is carrying a Bren then use the map commands to have him run back to the house at the end of the peninsula and take up a position at the side of the house next to the fixed machine gun emplacement, lying down, with a "use inventory" command to make sure he's got the Bren in his hands. Then give him Guard on the little wooden bridge; that will line him up just about right.
(LEAVE THE FIXED MACHINE GUNS ALONE. THEY ARE DEATH TRAPS. Trust me on this.)
If this man isn't a Bren gunner, then just have him run back and stand beside the front porch steps. We'll get it all sorted out in a minute.
Select the other Bren gunner and fold the map. He should be standing somewhere near the shore. Look around and find the spot where the shoreline is sort of notched in a kind of miniature cove. This will be a short way east of the first tree along the shore beyond the forest line. Have him lay his mines a little south of the tree, a foot or two apart. Pull up the map and give him the commands to go back to the house and lie down next to the other Bren gunner. (If you still don't have a Bren man in place, then just send this one to lie down next to the fixed MG.)
Select the fourth man and fold the map. Have the remaining man place his mines to the right of the first two, also about a foot or so apart.
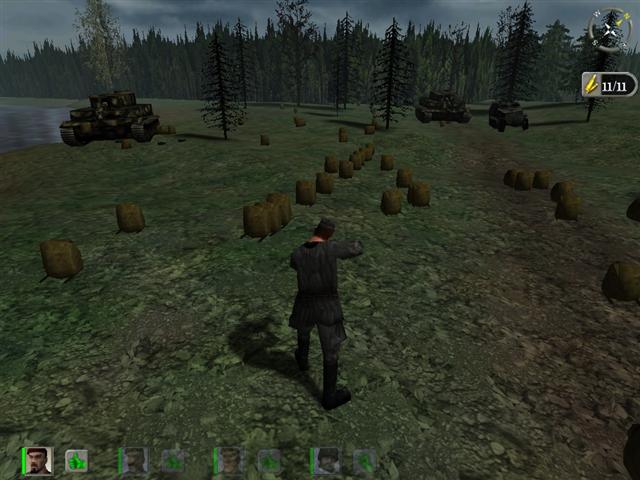
See, the trick in laying AT mines is that you don't try to spread them out to get the whole tank. They aren't magnetic; they don't explode just because the tank passes over them - it has to actually make contact, roll over a mine with a tread. So you try to figure where one of the tracks will go, and spread your mines in a pattern there. As you'll see, you've got about an eight-foot spread there; unless you're really off in your estimation of where the tank's going to go, it should hit one of them. And one is all it takes.
Right, now the map again; send this guy to the front of the house by the steps too.
Now we need to sort things out. I don't know whether you've elected to use the MP-40 or you want to shoot the Bren. In any event, do whatever is necessary so that you wind up with the two Bren gunners more or less side by side on the right side of the house (as you face back up toward the woods), lying down.
The other two men, with the MP-40s, should be lying down on the porch of the house, facing toward the woods.
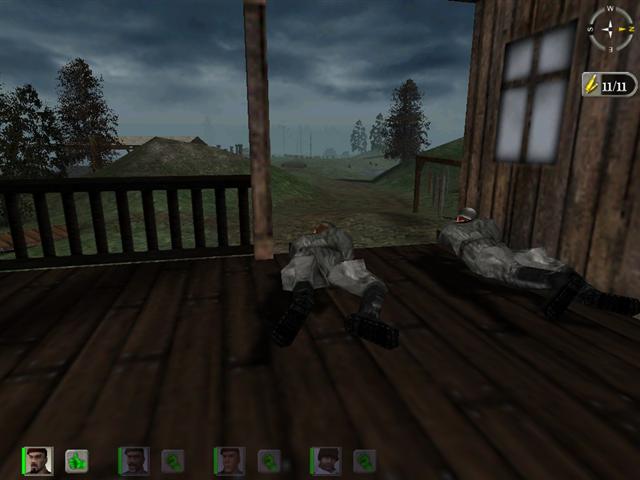
And everybody who isn't you must have a Guard command on that wooden bridge.
Now you all just lie there and wait. It won't be long.
In a few minutes some shellfire is going to hit the western part of the peninsula, up where the halftrack is, along through there. Don't worry, it won't set off the mines - it should, logically and scientifically, but it won't - but you'll have another problem: all your men will immediately start acting like total God-damned idiots. The noise freaks them out; they'll get up from their prone positions and move around. You will have to very quickly select them one by one and make them lie back down and, if necessary, get them back into something like their original positions. You won't have much time to do it, so move fast.
In just a few seconds after the end of the barrage, figures will start to appear, emerging from the woods. Behind them will be the tanks. If you're on the porch you'll be able to see the one coming down the middle; if you're on the Bren you might be able to make out the one moving along by the southern shoreline. Either way you will wonder if the damn thing is ever going to stop.
Meanwhile, though, you've got to go ahead and start shooting; the bad guys are coming and they're not screwing around.
You will know soon enough whether the mines got the tanks. You will hear them blow and you will see the smoke and flame. If they keep coming but you're not sure they've hit the mines yet, just pull up the map for a second and check.
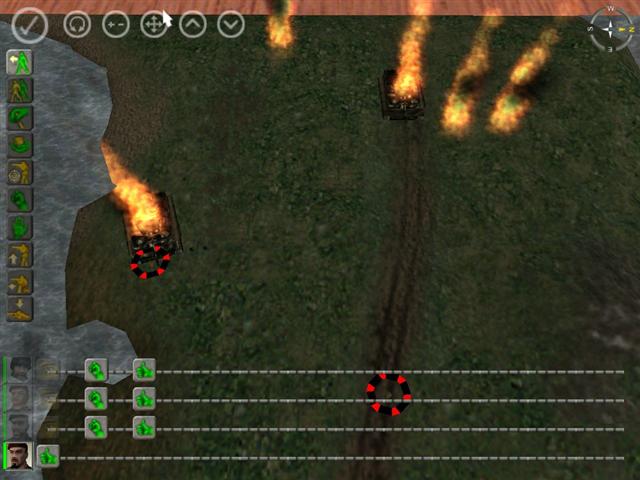
If one or both of the tanks misses the mines, you have no choice but to abandon the mission and try again. Before you do, though, study the map and try to see where you went wrong, and correct it next time.
There are some Panzerfausts on the dock but even if you already had one handy, there's no way you could make it out there and take out a tank without getting shot yourself. I've experimented with hiding behind a little hill and ambushing one of them, but then you get shot up by the infantry. The hell with it. Abandon the mission and start again. It's not that much trouble; and then you'll know where to put the mines next time you run it. There really is no reason you shouldn't be able to take them out, reliably, with the mines alone.
Once the tanks are out of the way, everybody can settle down to shooting Germans. It's not as hard as it sounds. They don't shoot at you very much; they're running in your direction and they rarely pause long enough to fire. And you're all in pretty good positions. Just keep raking them.
You will now begin to notice something rather strange: each time you shoot a man, a little black object appears where he was. Soon enough you will see the explanation, and you won't believe it.
Unless you have really botched the placement of your men, or unless they are hopeless turkeys, in a surprisingly short time the attack will falter and break up, and then things will start to get quiet. Look over the killing ground for anything moving; sometimes there's a survivor crawling around. Wait and watch. Your men will see things you don't; there will be an occasional burst of fire.
Finally you will get a message saying you did it. All right. Take off all the Guard commands so everybody can relax. You shouldn't have any casualties, though it does happen.
Now before you board the plane there's some serious looting to be done. Get up and walk out to the battlefield. Be prepared to stare in shock.
Each of the bodies has been replaced by a large greenish duffel bag or pack.
As I understand it, some people had problems with frame rate slowdowns on this mission, so it was decided to eliminate the dead bodies in order to improve performance. All right, but replacing them with these pack things was a very bad idea. It would have been much better just to go with some sort of very simplified, stylized body shape - could have been huddled up in such a way as to present a simple shape not unlike the pack; but even flat silhouette forms on the ground, like police outlines painted black, would have been better than this. The effect is goofy in the extreme and totally ruins the feeling of immersion that you could have with this otherwise excellent mission.
Well, it's over now anyway. There's still looting to be done.
Go out to one of the wrecked tanks. Study, while you're there, the position of the remaining mines, and figure out which one(s) it hit; this kind of knowledge is useful to have.
Then check the pack lying directly in front of the tank. You will find it contains a perfectly lovely MP-44 assault rifle with 200 rounds of ammo. A great improvement over anything else you've got; be sure and grab it.
Scour around some more, checking some more packs; there should be one way up by the forest wall for example - somewhere up that way there is one that contains a nice German machine gun with a worthwhile supply of ammo. Have the other men come out and get themselves each an MP-44; there's one in front of each tank, and one in a pack lying near the tank on the left side. (The tank's left.) There's a couple more machine guns, too, try to find them.
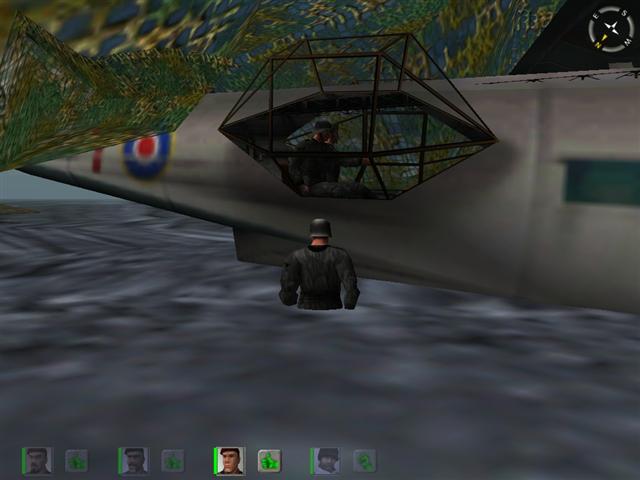
Then everybody can go back down to the boat dock and board the plane. You have to jump off the dock and wade out underneath this camo net to the side blister of the PBY to get in. I always load the men separately rather than using a follow-me; given their usual antics when they get that command, I don't trust them to do it under these conditions without drowning themselves.
And then all you have to do is sit quietly while the PBY takes off and Bob's your uncle - and, if you're from San Francisco, quite possibly your aunt as well.
Congratulations on completing the longest and, arguably, hardest campaign in H&D. If you did it without losing any men, double congratulations.