Camp Concentration
Camp Concentration
This is a very difficult mission. It is one of the hardest in H&D. It requires good reflexes and shooting skills, and excellent planning and management of your men; this is one of the missions that most powerfully justifies the term "thinkshooter." You better be damn good at both.
And even when you do your very best, there is a strong possibility that you will lose one or more of your men; and you may have to go back and start again a few times in order to run it successfully at all.
It is a very exciting mission, though, and if you succeed in pulling it off without losing anyone you will have reason to be proud of yourself. Even if you lose a man, just completing it is an accomplishment.
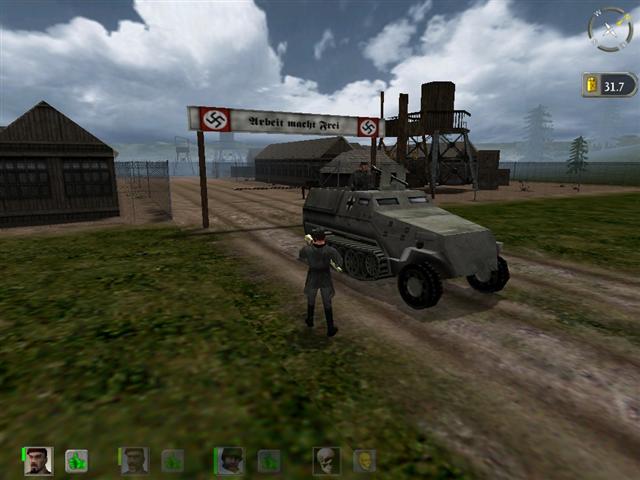
MISSION: You've just emerged from the demolished underground missile complex. Ahead of you is the concentration camp where they keep the slave laborers. You have to get through the camp and commandeer an armored halftrack with which to make your getaway. There is no kill-them-all requirement as such but in practical terms it is necessary in order to complete the mission.
CONDITIONS: Daytime, sun shining, beautiful day really. But you're not going to have time to admire it.
THE OPPOSITION: Usual twenty-some-odd Nazi psychos. Eight guard towers. Assorted thugs inside buildings waiting to charge out when triggered. Even dogs. I swear. You'll see.
PERSONNEL: As I said before, these should be the same ones you used for C3M3. If you don't feel constrained by that, well, it's your game. The basic requirements in any case are: four good men, all with fairly high endurance levels. At least one with very high endurance, like Aldridge or Big Willy. All the others need to have good reactions and shooting skills. However, you don't need a sniper or a fast-gun specialist. Strength as such isn't terribly important and stealth is irrelevant.
My team for this job is Major Calvert (my own character), Lt. Whintson, Sergeant Ranking, and Private Aldridge. I've tried other combinations and these four gave the best results.
EQUIPMENT: To be completely consistent you should have had them start C3M3 carrying all the weapons they're going to be using in this one. But I admit that's getting pretty purist-picky. Up to you.
Everybody carries an MP-40 and plenty of ammo. One man, probably your character, should have a rifle as well, but only a little ammo because you won't be using it all that much - the standard 40 rounds will be plenty.
Additionally, one man carries a Bren. The MGs you confiscated on the last two missions would work too, but you have only a limited supply of ammunition for them and you're going to need every round on the last mission of this campaign.
If you've got them in your campaign supplies, it would be useful for each man to carry an antipersonnel mine. Or two, if he can. But it's not essential.
Finally, your own character should pack a knife.
AT THE START: You're all standing in the mouth of the tunnel through which you left the underground missile complex. You're facing down a narrow gravel street with chain-link fences on either side.
PROCEDURE: No high-stress startup this time; this is another one where nothing happens until you're ready to make your play. You're still wearing the German uniforms, but in this mission they actually have some effect; you can walk out of the tunnel in plain sight and nobody will bother you or even notice you until you start shooting, or until you cross the trip line. (We'll get to that last in a minute.)
Leave your men in the tunnel - don't give them any commands at all, let they stay right where they are, it's the only way to keep them from blowing it - and put away your gun and select the knife. You can conceal it or not, it doesn't matter. Walk up the gravel lane, staying over to the left. Ignore the damn dogs, they can't get at you and aren't you glad of that.
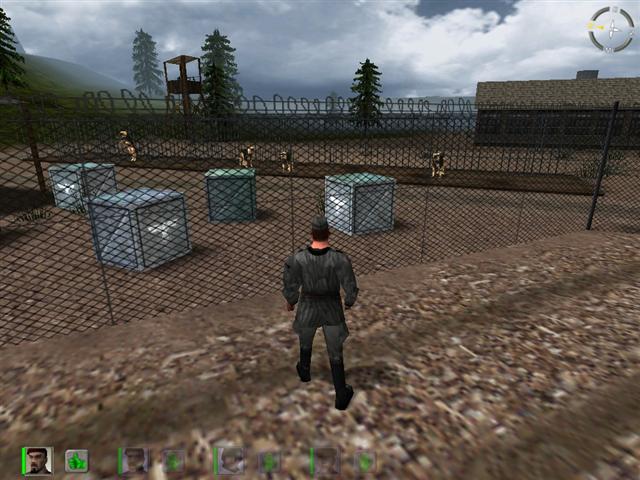
Up ahead, standing beside the fence, is an unarmed German. You're going to kill him in a moment, but first stop and look around and get a feel of the layout of the place. Pull up the map and compare it, so you can orient yourself.
Now walk up to this putz standing by the fence. Come up on his left side - his left side, do not walk around in front of him - and knife him, just as you did those guards back on that island. He's easy meat. He'll make a soft "urk!" and collapse at your feet. Nobody will take any notice.
DO NOT TAKE ONE STEP BEYOND THIS POINT. IF YOU TAKE SO MUCH AS ONE STEP PAST THE DEAD GUY THE ALARM WILL GO OFF AND YOU ARE DOOMED.
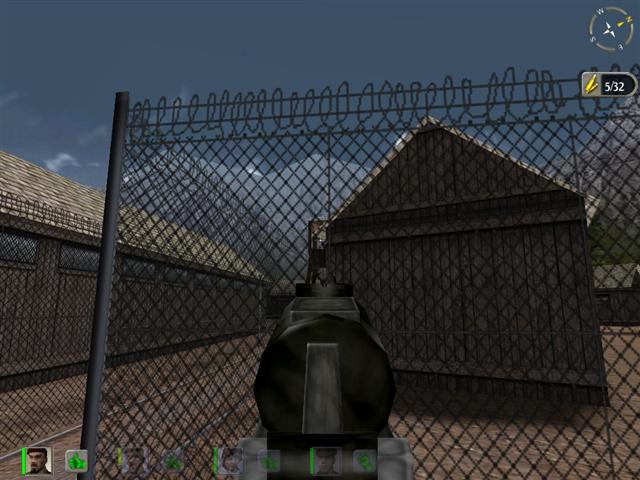
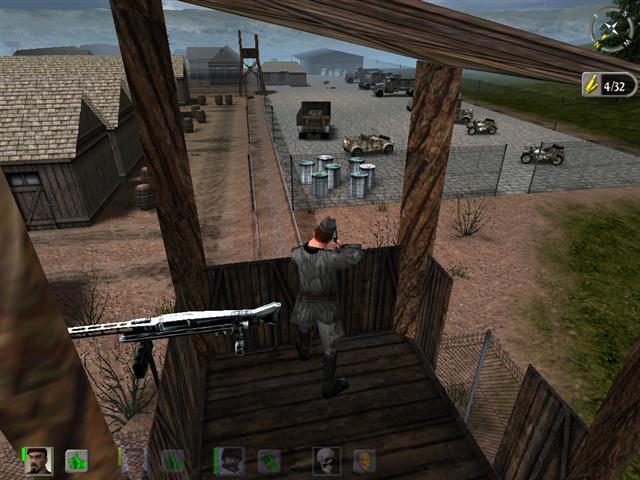
Take a couple of steps back, just to be sure. Get out your rifle. Nobody will notice that either as long as you don't fire it. Look off to your left, behind where your victim was standing. See that guard tower? You should be able to see the guard's head. Back up to give yourself a clearer shot - you don't want to shoot through barbed wire if you can help it - and move around, making sure you don't cross the trip line, till you're certain you can get him. Make sure there's a fresh clip in your weapon. (The game occasionally hands you an unloaded one to start with, you know.) Take aim at the back of the guard's head. Nobody will notice that either.
Now pull up the map. This is not optional; you cannot execute the necessary steps with direct control only. Give your best gunman a command to move out of the tunnel to a position a little before the first bend in the road - just far enough along that he has a clear shot at the guard in the tower to the left, over beyond the dog kennels. (The northernmost tower on the map.) Give him Guard on that tower.
Assign the same commands to your Iron Man type, but have him stop just a little bit farther on, so he and the first guy don't get in each other's way. Again give him Guard on that tower. Taking out that particular tower guard, instantly and before he can get off a shot, is so important it's worth having two men on the job.
Now select your Bren gunner - use Use Inventory to make sure he's holding the Bren - and give him a command to move out along the road to just at the first bend. Give him a lie-down and then assign Guard on the general area to the left of the water tower, so he's looking down between the water tower and that barracks building, covering that road.
Close the map and take very careful aim at that tower guard - the back of his neck beneath the helmet is a good spot - and wait. As soon as you hear the sound of gunfire behind you, kill the guard. Keep shooting till he's dead, don't screw around, because he's in a position to wipe you all out if you let him get started.
By the time you've eliminated him, your men should have gotten the tower guard over by the dog kennels. (If they haven't, then he's about to kill you and probably everybody else and it'll be time to restart the mission.) Yank the map up quickly and delete their Guard commands so they can engage targets of opportunity.
Switch quickly to the MP-40 and look down through the space under the tower where you just whacked the guard. At least one guard will come out a gate and up the road just beyond the tower, in your direction. Probably your men will get him; in fact you'll probably hear a lot of firing from off to your left and see tracers streaking down that way. If they don't get him fast enough he may open up on you. He's hard to hit so you might want to hop over behind the cover of that L-shaped guard structure and let your men get him.
At this point things should get reasonably quiet in your part of the camp, except for that damned maddening alarm which will eventually stop if you'll just wait. If you brought the antipersonnel mines, you can at this time move your people one at a time back the way they came and have them lay their mines in a row across the road just beyond the tunnel exit, more or less evenly spaced. If you didn't, it's not a big deal.
Now you can bring your men up to join you. DO NOT LET ANYBODY STRAY INTO THE NEARBY INTERSECTION. Keep them back about where you stabbed that geek. There is a guard tower with a field of fire right down that street.
And that's your next target. Once the two towers have been neutralized and the two guards on the ground are, well, on the ground, you've got to go tower-guard hunting and there's no easy way to do it. Be extremely careful. This is a very dangerous business just ahead and you can easily get killed. It doesn't matter who does it, either. You can't lose anybody or you'll have to restart the mission. You just cannot get through this one part that lies ahead without four men.
As I say, there's no easy way to take out the tower guards. All you can do is work your way into position behind a building, get to the corner, have your weapon ready, sidestep past the corner, and blast the bastard before he can shoot you.
This is made harder by the tendency of the tower guards to climb down and come at you on the ground. Not that this is a bad thing in itself - they're much easier to kill when they're not sheltered by those wooden boxes - but if you come around a building aiming up at a tower and he's standing under it, he might get you before you realize your mistake. Use the third-person lookaround and try to see where he actually is before you make your move.
They also like to play jack-in-the-box; you fire, they go down, you think you got them, then they pop up again. All in all this is a really nasty business but it's got to be done.
The first tower you have to attack is the one due west of the interesection where you are. It is the hardest because it's got the best field of fire and you've got no cover at all. Once you do neutralize it, move up the side lane toward it. Bring up another man and position him where he can cover the next corner just in case one of the other tower guards comes down and launches a ground attack, as they sometimes do. (I wish I could tell you how to get them to do it, because it really does make life a lot easier.)
The next tower is off at a 45-degree angle from the street you're on, to the southwest. It's harder to get a clear look because there's a lot of wire in the way. This guard is the most likely to come down and try to rush you. Or he may be standing underneath the tower, he does that sometimes too. Try to figure out where he is before you step around the corner of the building and open up on him. You might want to switch to the rifle long enough to check and make sure he's down.
The third tower is off to the south of the first one you took out. I've never known this guard to be anywhere but up in the tower facing north, in your direction so you're not going to sneak up on him. You'll have to just step out and bust him fast. Damn, that sounds so easy.
Now you have neutralized the three towers that form a triangle at the west end of the map. You have one more tower to go in this part of the camp.
Climb up into the tower you took out first. Switch to the rifle and look off to the southeast, at the tower there. Shoot the guard and do it quickly, he shoots back.
If he's not in the tower, then you've got a problem; he's on the ground somewhere. Probably he's over by that building by the gate. (See the map.) Climb back down and go south; when you reach the end of that row of brown wooden structures, get down and get out the rifle. Move cautiously sidewise, scanning the area through the scope, and you should be able to find and kill him.
Go back to the intersection where you left your men and turn right, facing south. You will see a gate in front of you. Walk up to it and use the Use key to open it. You don't have to take a key off a guard or anything. Note that only a few gates in this camp can be opened, though.
Walk through the gate you just opened and turn left. Walk down the gravel lane until you come to another gate. Open it and walk through. DO NOT TURN RIGHT. Walk straight ahead. The motor pool is off to your right but if you go that way any distance you will trigger catastrophic events.
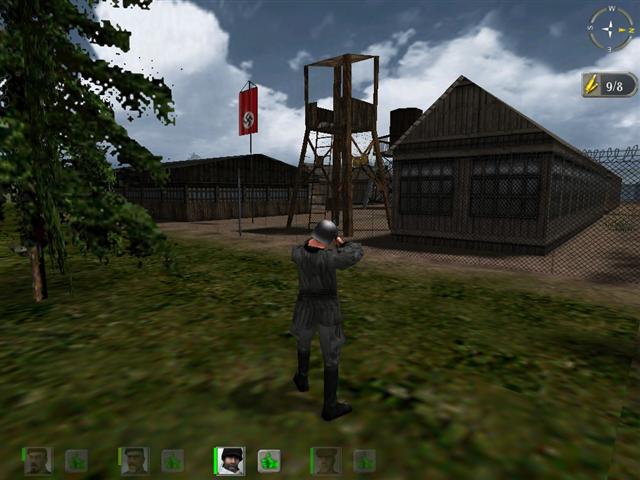
Just keep walking down the drive, toward the main gate of the camp. There are two towers flanking the gate. One is unguarded, because the idiot who was manning it came down and tried to rush you guys when you first came in. The other is on your right, beyond those buildings. That's the one you've got to silence, because he's in a position to wreck your upcoming play.
You won't need the rifle. Just walk sidewise out the gate and around the outside of the fence, keeping your eyes on that tower. You won't be able to see him at first but keep sidling till you can. He may turn around and yell, in which case you can shoot him, or he may have his back to you making it easy to kill him. This can't really be predicted so be ready for anything.
Pause and look around, if you like, admiring the Third Reich decor; the designers did a really good job on this camp. Then go back up the drive and up the lane through the open gates and back to the intersection in the middle of the camp. The dogs will still be barking. Shoot them if you like, PETA isn't going to find out. Be warned, though, they'll start barking again later on. Tough dogs.
Now you have to set up a very complex play.
The Bren gunner will go through the opened gates to the intersection, where the drive from the motor pool runs into the main street going out to the gate. He will turn and face south and lie down in the middle of the intersection. Make sure he's looking down a broad gravel lane toward the closed gate of the motor pool, not the narrow walkway next to it that ends at the foot of a guard tower.
Make sure his Bren is fully loaded. Pull up the map and give him a Guard command for the area just inside the wire fence to his left. Not the gate, but the area between the gate and the nearest barracks building. Go back to first-person and make sure he's pointing that thing in the right direction.
Another man will move down to that tower by the dog kennels - the one that was taken out first to open the party. He'll stand up in the tower facing toward the road you came in on. Do a Use to have him take control of that machine gun - swing from side to side a little to make sure he's got it - and give him Guard on a point on the road, where you all came in, over beyond the dog kennels. This should be your best man, with the best reactions - the one you'd most want to have with you in a tight spot. He's going to have to shoot fast and accurately, because he's got a tactically vital job; but as a bonus, from your point of view, he's also at the least risk of anyone in this play, so this lets you keep a valuable man in a relatively safe spot.
Preferably your choice should be based on your own experience; he should be someone you've worked with before, so you know what he can do. Numerical ratings don't always tell the whole story. For example, Whintson's shooting and reactions numbers aren't all that great, but if you put him in that tower it is very unlikely anything will get past him. On the other hand Julio Zapata looks good in the ratings, but in practice he's not worth a damn in a situation like that - he'll maybe get one of them, the others will go right by him. I found out the hard way not to count on him.
Now run your own character back up the lane toward those towers at the west end of the camp, to the tower at the west end of the motor pool compound. That's the WEST end, under no circumstances try to approach that one up next to the motor pool gate. Climb the tower, check to make sure your submachine gun is fully loaded, and aim at a point just this side of that big metal-roofed building at the far end of the motor pool compound, where those shiny barrels are lined up. You want to be sure and take this position yourself, because the shooting requires a little more judgment than the AIs have.
No doubt you see the next part coming: the fourth guy is going to be bait. Now and then in this game it is necessary to trip a trigger. Usually there's some reasonably safe way to do it, but not this time. This is why, frankly, this job should be given to your least valuable team member.
This is where you use your Iron Man, the one with the highest endurance rating. Even then there's a high likelihood that he'll be killed, so don't use one of your best men in this role.
So move this poor bastard up until he's standing underneath that tower at the west end of the parking lot - the one you're standing in - facing east, along the narrow lane, in the direction of that guard tower next to the motor pool gate. Now pull up the map.
This next part is a little tricky. Using the map, give him a movement command that will take him almost but not all the way to the end of the path. Definitely not as far as the tower, not even close. Just barely even with the corner of the nearest building, that's about right - unfortunately the map doesn't do these movement paths with great precision. But err on the cautious side. If you don't run him far enough, no sweat, you can change it and try again. If you take him too far, he won't get another chance.
Now give him a lie-down command. That's all. I've tried having him turn and run back the way he came, but it hardly ever works; usually he gets there and just stands there looking confused till he gets blown away. Really, the only chance of survival he has is if you and the Bren gunner do your jobs so well that nobody has a chance to shoot him. But lying down he'll at least be a little less of a target.
Here is what is going to happen. See that group of barracks buildings over near where your Bren gunner is lying, on the lane that leads up to the guard tower beside the motor pool gate? And the kind of yard in front of them, and the open gate?
When your man trips the trigger, four guards will come running across that yard and out that gate, heading toward him and shooting at him. If all goes well, your Bren gunner will get them from the flank and the rear while they're concentrating on the trigger man.
Three more will pour out of that metal-roofed building at the end of the parking lot, in the area you're covering from the tower. They're going to be shooting at the runner too, and they're a much bigger danger to him, because they've got a clearer shot at him. But that's OK because you're going to get them first, right?
What about the man over by the dog kennels? Well, that's the other trigger: at the same time all the other shit goes down, four guys are going to come out of the tunnel and charge up that same road where you all came in. So you have to have a man in the tower to bushwhack them, otherwise they'll hit your Bren gunner from behind just as he's finishing up with the others, and then fan out to attack the rest of you. And, naturally, that's also the reason for the AP mines; if even one of them blows himself up, it'll give your gunner one less target to worry about.
So get everybody set, issue your map commands to your trigger man, select your own icon again, and fold the map. From where you stand in the tower you'll be able to see the running man, but resist the temptation to look at him; if he makes it he makes it, if he doesn't that's too bad, right now you've got a job to do.
Watch the area next to that big metal-roofed building at the far end of the parking lot, on the left side. That's where your three targets will come from, and the quicker you hit them the better. You really should be able to get them before they reach the area beside the fuel barrels, but if not then a few rounds into the barrels should crisp at least one of them. Keep firing, lay down a solid wall of lead on those three bastards, your man's life depends on your shooting right now. In the background you will hear the deep cough of the Bren and the woodpecker knock of the machine gun.
The whole thing will be over in a very short time. As soon as the firing stops, quickly pull up the map. Check the character icons and see if anybody's dead. If the Bren gunner is showing a skull then that's very bad, because it almost certainly means somebody got past your man by the dog kennels, and may still be at large. In that case get down from the tower immediately and go find out what's happening - or else just restart the mission and try again, which is what I'd advise.
If not, then select the Bren gunner's character, delete the Guard command, give him his submachine gun, and fold the map; and, in his character, turn around and look back up the road to see if anybody's coming. Be quick; if one of the new arrivals did get by your machine gunner, he could be trouble. Get up and move cautiously back up the road, checking the area around the guard house, and see if there's anybody lurking there.
If the runner is dead, well, it's too damn bad but it happens. I'm afraid this is just one of those missions where there's no way to get through it without somebody's ass being on the line. But if any of the others got killed then you screwed up somewhere. Possibly you trusted somebody with a job he couldn't handle; possibly you laid it out wrong. Try again till you find out what went wrong. Don't feel bad; this is an extremely difficult mission.
For what it's worth, you'll only need three men for the next mission, and there's a valid rationale for putting in replacements on the final one. So you don't actually have to re-run the mission if you lost a man. Unless of course he was you.
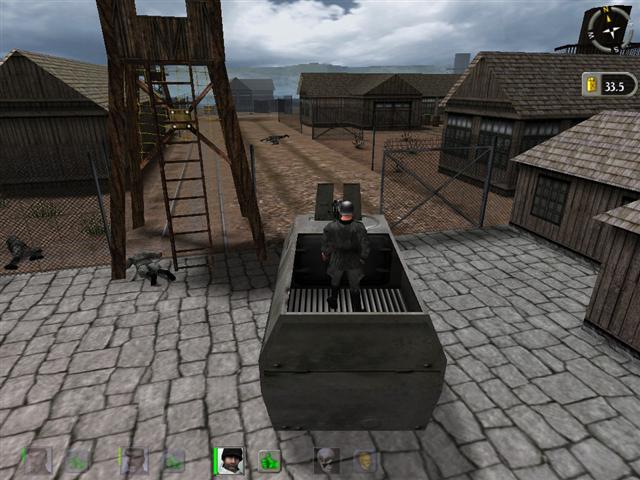
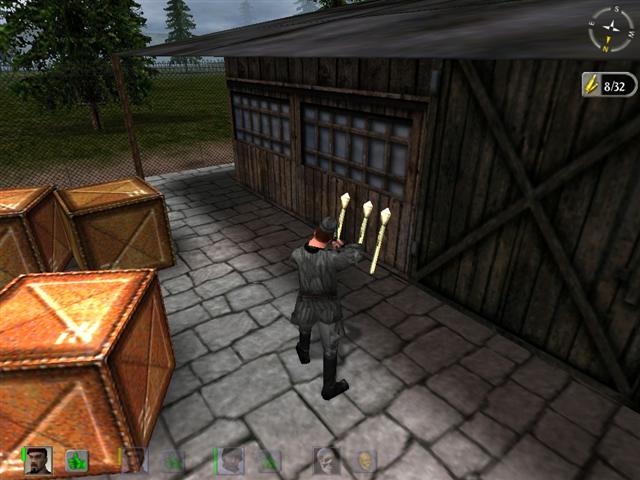
Assuming the play was successful and you now own the camp and have no more than one man lost, then assemble everybody at the motor pool. Walk across the parking lot toward that big metal-roofed building and around to the side where there's a kind of shed. Standing against the wall you will find three shiny new Panzerfaust rocket launchers. Take them. Take all three. You shouldn't need more than one to finish up this mission, but you'll need them in the next one.
Go over to the halftrack and walk up to the passenger side and use the Use key to get in. Unless of course you're planning to drive it yourself. The driver should of course get in on his side while the other two men (or however many you have left by now) get in back. At this point I strongly recommend you go to third-person wide-angle view. The visibility from inside that thing is barely more than zero, and it's not an easy vehicle to control - and you've got to get it through a pretty small opening.
Control it the same way you did the truck and the boat: use your move-forward key to gun the engine, and your turn keys to steer. It's not an easy skill to master. One important tip, in the present context: in order to move it at low speeds, rather than holding down the forward key, just blip it repeatedly, tap tap tap. This will let the vehicle move forward at a crawl, which is what you need right now. It doesn't have any brakes; if you have to stop it quickly, hit the reverse (move backward) and it will stop with a loud sound of protest.
Maneuver it through the gate, bearing in mind that it will stop if it runs into anything solid and it's possible to get it inextricably hung up. (If you're unsure of your driving skills you might want to save before you start this part.) Drive down the lane to the intersection and turn right. Everybody else get in and ride down to the main gate, maneuvering carefully around the end of that barrier pole. (Damn tough material they made that thing out of, to stop an armored halftrack.)
When you get to the main gate, stop. You get out, while everybody else stays on board. Run to the left, away from the road, up along the outside of the perimeter fence. Go a long way, clear up into the foothills. Use the map to orient yourself if you get lost. What you want to do is make a big swing through the hills so that you come out on the creek bank way off downstream (or upstream, that part isn't clear) from the bridge, and the tank waiting just on the other side.
Once you reach the creek bank, turn right and start moving back in the direction of the bridge, which is probably just barely visible from here. The tank may not be visible yet. Get out a Panzerfaust. Start walking, slowly and cautiously, until you see the tank. Don't be afraid, as long as you're off to the side like that and you haven't fired it won't shoot at you. But don't try to get too close. As soon as the tank is clearly visible and appears to be in range, bring the Panzerfaust up and use it. It works just like the bazooka you used before: trigger once to bring it up, trigger a second time to fire. Take your time and take careful aim, unless you see the turret gun starting to swing toward you in which case you better shoot and hit the deck.
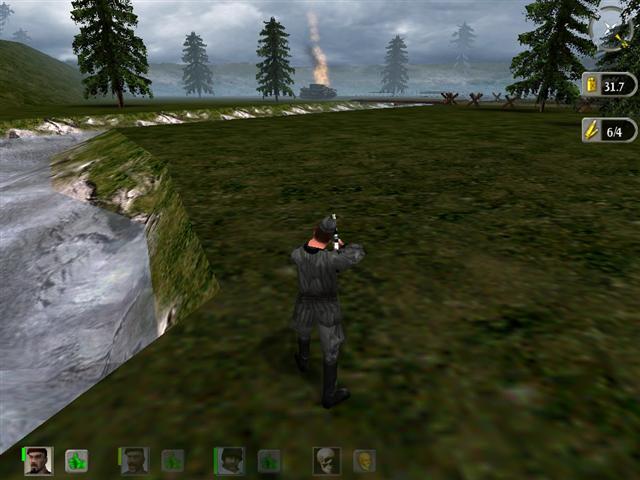
You'll probably hit it; it's a big target after all. If you do miss, just select another Panzerfaust and try again. Watch it blow and admire the explosion. Now head back toward the road and position yourself a short distance from that little cabin by the bridge, in a position to cover the front door.
Leave yourself there and go back and select the driver and get the halftrack moving again, quite slowly. As you rumble along the road, at some point a trigger will be tripped and a nasty little dickhead will come running out of that shack and try to lay a mine in the road. Your guy standing nearby will gun him down. The guy manning the track's machine gun may get him first. Stop the track until the shooting is over and then return to your persona and walk over and check to see if he did succeed in laying the mine. If he did, the driver will have to maneuver around it. If you don't see anything of the mine, go back and get in the track. If you like, if you've got a strong man with load capacity left over, he can go over to the stiff and take the mine. Now his mine is yours.
All that's left now is to drive to the bridge and across. Maneuver around the dead tank on the other side and head on down the road. You should get a nice completion message just after you pass the tank.
Wasn't that one hell of a mission, though?
Stick around, kid. You ain't seen a damn thing yet.