The Big House
The Big House
This mission isn't very difficult if you're reasonably careful and have decent moving and shooting skills - which you must have by now, otherwise you wouldn't have gotten this far - but it's fairly risky in spots. It's also got a rather trying bit right at the end which can drive you mildly crazy, but nothing you can't handle. On the whole it's fun.
MISSION: Get into this big house used by German intelligence, destroy certain "archives", and liberate Allied prisoners held in the basement. Note: the mission requirements do not include killing all the enemies present. In this case this is an important consideration, as you'll see.
CONDITIONS: Gorgeous moonlit night. You'll be indoors for most of the action, though, so visibility isn't a factor except in the beginning.
THE OPPOSITION: Twenty-some-odd Germans on the premises, not all of whom have to be dealt with. Two of them are patrolling the maze between the flower garden and the gazebo. (I'm not making this up, you know.) Four are walking a clockwise beat around the outside of the big house. Two, armed only with pistols, are standing beside the front door. One, also packing only a pistol, is standing by the black staff car out front. One, more seriously armed, is walking a short beat by the front gate.
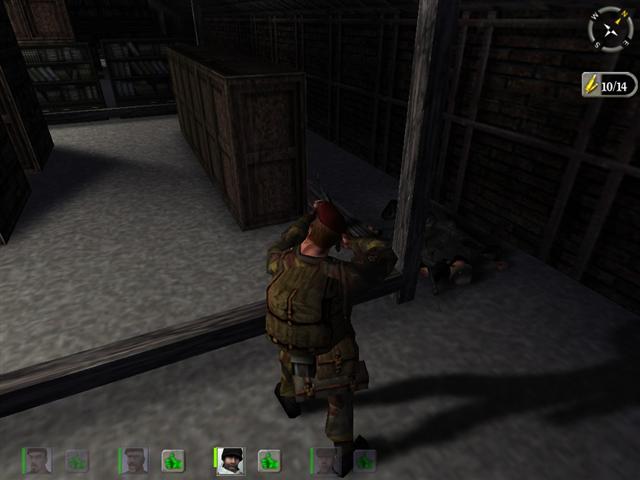
The others are inside. Two are in the basement guarding the cells. Three are up in the attic with the archives. One is walking the hallway in the east wing of the ground floor. Two are stationed in the hallway on the second floor. Several are gathered on the stairway landing. The others are scattered about the place in various rooms.
PERSONNEL: You'll need a couple of good men who can shoot accurately and fast, but nothing spectacular. Whintson or Wooley is good on this one, as is Ranking or Caven. You don't really need four men - three could do it, or even two if you wanted to push it; I suppose it could even be lone-wolfed although I've never tried it.
Still, it never hurts to have extra backup, and this isn't one of those missions where the AIs can get themselves in trouble. So you might as well take four. Give each man an MP-40 and a couple of grenades. One man (your character) should have a rifle as well.
And explosives. You've got to have at least three charges. Four would be better, and it's not unreasonable to take six. (Divide them up between two men.) At the end you have to place some charges, and it's not easy getting them in just the right spots. You may have to try again, and explosive charges are not a renewable resource. So take plenty of extra. They don't weigh much, and it's not as if you were carrying a lot of heavy kit this time.
AT THE START: You're all standing near a lovely gazebo at the end of a lovely white walk that wanders off through a lovely maze between lovely hedges under a lovely moon. Jesus H. Christ. Long way from Yugoslavia, aren't you?
PROCEDURE: Pull up the map and study the layout; you'll go crazy if you try to figure it out on your own. As you'll see, you have to go straight ahead and then take the first left.
Go down to the first left turn, but don't take it. Bring up the other men. Move a little way down the turnoff, stopping before you get to the curve. Bring the others up and arrange everybody to cover the curve ahead. Now just hunker down and wait. Be patient. In time a guard will come walking along and you can burn him. Stay put and wait some more till his buddy shows up. Dump him too and you're ready to move on.
(Some of the published walkthroughs tell you these two are down by the flower garden. No. You will run into them well before you reach the flower garden.)
Go on ahead, leaving the others for the moment, until you come to a spot where the hedge is a foot or so lower. From here you have a view of the upper part of the big house. Specifically, you can see the balcony on the north side, and, through the rifle scope, the lone figure standing on it. Drill him and go on to the flower garden and bring the others up to join you.
Now pick one of your men - the least vital member of the team - and station him over next to the hedge on the east side of the flower garden, facing toward the house. It doesn't matter exactly where you put him or what he's holding; you're only going to be using him as a lookout.
Go up the path heading east and negotiate the zigzags till you come to a place where a walkway branches off in the direction of the house. Stop here. Move up close to the corner but don't try to cross yet. Bring up your best gunman and station him next to you.
Go back to your lookout in the garden. Using third-person view, you should be able to see the big house in its entirety, including the guards walking around it. If you don't see any guards, just wait; eventually one will appear. Watch as he walks past and turns and heads away from you.
Switch quickly back to your own man and, during this moment when you know the coast is clear, move him across the open intersection and have him lie down facing south, where he has a clear view of the walk and the side of the big house. Move the other man into position beside him, also lying down. Go back and get the third man and bring him up. Leave the fourth man where he is; that walkway is too narrow for four to lie side by side and you don't need that much firepower anyway.
If you want, you can just hold back in the person of your lookout in the garden and let the AIs take care of this business. If you prefer to be an active participant, then you'll probably find you do better with the scoped rifle - the light is pretty poor down by the corner of the house and it's difficult to see them as they appear. Even with the scope, chances are your AI colleagues will eliminate them before you ever see them.
There are four sentries walking around the house and you have to eliminate them all. It's possible one or more of them may charge your position, making things even simpler.
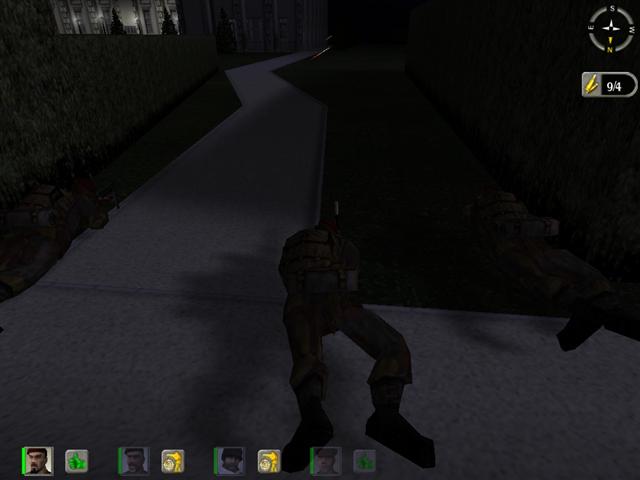
Once all four sentries have assumed the deceased mode, move everybody down the walk and have them stand next to the long French doors at the north side of the west wing. Leave them there for now and go around the west end of the house - actually you could do this from either end but the west side is closer - and get out onto the lawn and crouch or lie down and work your way sidewise until you can see the black staff car parked in the drive, and the geek standing beside it. Terminate the geek and move sidewise some more till you see the two jackoffs standing by the front door. Pop them too. They've only got pistols but even so don't let them get off a shot at you.
Go up the walk by the two latest cadavers and turn right and go out toward the Mercedes. Move over by the front of the car, looking toward the front gate, and you'll see a single sentry moving to and fro on a short beat by the gate, walking in a fast and nervous manner, as if he needs to pee really bad. You'll just get quick glimpses of him in between the trees and the parked truck, but if you time it right you can pick him off.
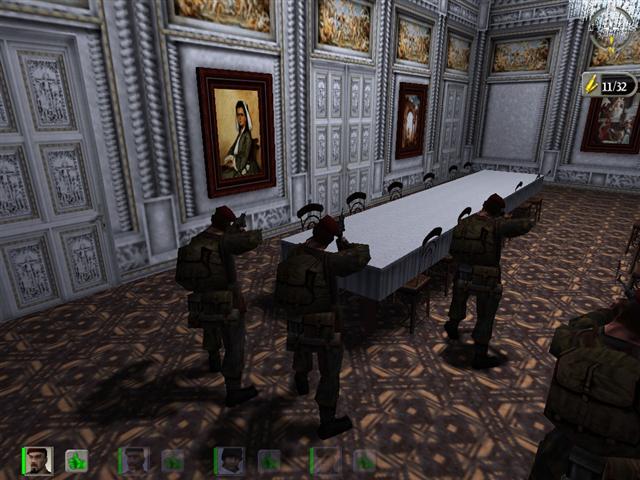
Now you've secured the grounds, it's time to get these men in out of the hot sun. Go back to the French doors and open them, using the Use key. You'll find yourself looking at a long elegant dining or conference room with tables and chairs and chandeliers and suchlike. Move everybody into this room. No need to leave a guard outside; you're clear there.
There are several doors opening off the long room. Have one of your men open the single door nearest the French doors where you came in. The first thing he'll see is a huge portrait of Adolf Hitler (assuming you de-censored the game, and if you didn't you need to take care of that right away) at the end of a short side hallway. Let him just stand there for now, covering the end of the hallway; there's a guard who patrols the hallway who may come by.
The big double doors at the far end of the room open onto the main ground-floor hallway. If you just kick them open and stand there, you'll come under fire from a number of Nazi punks standing on the stair landing; and while they've only got pistols, you know by now how unnaturally accurate they all are with those things.
So stand one of your men in a position to cover the double doorway, but off to one side so he isn't exposed to fire coming through it, and then go up and very quickly open the door and step aside out of the doorway.
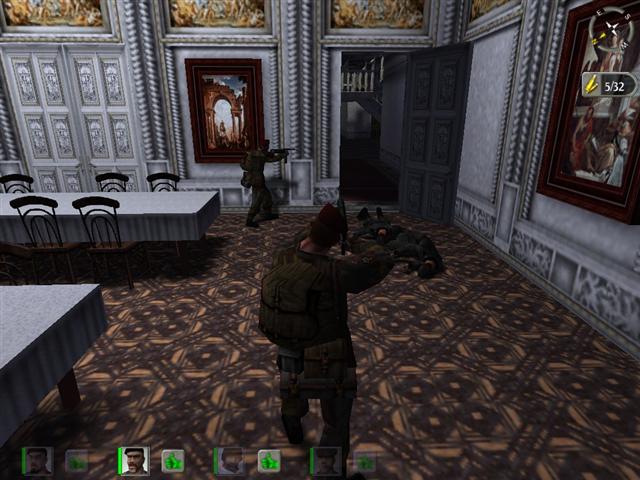
Probably things will be quiet for a little while. Sometimes, though, one or two wall-climbing idiots will charge down the hallway and try to rush into the room. Charging submachine guns with pistols, do you believe these fools? This gives you a chance to whittle the opposition down a bit. You may have to piss them off, though, to get them to attack; you may have to do a quick sidestep past the edge of the door and spray the staircase landing and then jump back. Eventually they'll come and you and your men can burn them.
You'll still have at least a couple on the landing, though. There are various ways to go after them. You can try tossing a grenade, bouncing it off the hallway wall - your guy in the corridor is in a good position to do this - but save before tossing, because you know how glitchy H&D can be with grenades in indoor areas. The spot where they're standing, though, really isn't easy to get at with a grenade.
You can simply do a quick sidestep into the doorway and try to shoot them before they shoot you. Or you can go around to the front of the house and open the front door and try to take them by surprise. Whatever works for you.
Once you've eliminated them, by whatever means, go and stand in the doorway of the big room, facing down the main hallway toward the far end. In a few minutes a single individual will appear, way off down there, and you can kill him. If you don't want to wait around, station one of your men there and have him guard in that direction. It won't take long.
At this point the obvious thing to do is move on out into the hallway and get on with the mission. Don't. There are a couple of bastards with MP-40s lurking on the second floor, and a couple of spots where they can shoot down into the hallway. Not very well, but it's one more hazard and it's easy to avoid. Just take everybody around the house and in the front door.
(Actually you could just leave them outside. There are Germans all over the house, and the AIs pick up their presence and it makes them nervous. If you bring them into the front entrance hall, they'll start shuffling around like idiots and it can get on your nerves. And there's really no reason for them to be inside. So it might be better to station them out by the Mercedes for now.)
In the rooms alongside the front entry hall, especially the east wing, are a number of German soldiers. It isn't too hard to go in and smoke them, but there's absolutely no need to do it; they'll stay there if you don't bother them. Leave them alone is my advice.
The ones in the upstairs hallway are another matter, because they do have some limited ability to fire down into the ground-floor halls. Besides, you want that floor clear as an escape route later on. So let's take them out.
Go down to the east end of the main hallway - move smartly and don't hang around near the stairwell - and turn left. At the end of the side hall, on your left, you'll see an open door and some steps going up and down. Take the ones going up, to the second floor. Step quickly out the door, just in case there's a Kraut in the hallway, but there probably won't be. Move on down the hall, checking carefully around the corners before showing yourself. Sometimes one of them will be wandering around the halls. Usually one will be standing in the main upstairs hallway somewhere near the head of the stairs.
You can try grenading him - that's the safest way - or just get him with a fast sidestep and a burst from the MP-40. If you haven't met the other one yet, probably lurking in the hallway just past the stairs. Study the wall and floor carefully and you may even see his shadow, telling you where he is and which way he's facing. Grenade him or shoot him and then go back downstairs. There are some interesting sights in some of the rooms (notably the interrogation room) but there are also Germans in some of them, and why put yourself at needless risk?
Now for the assigned mission. The first requirement on the list is to destroy the archives, but don't assume you have to do that first; there's no mandatory order of performance. First you need to go get those poor bastards out of the cells in the basement. I mean, it's the decent thing to do.
So go back down to that winding little stair, and make sure your MP-40 is fully loaded, and descend into the basement. There are two guards down there and, owing to the limitations of the camera in tight spaces, there's no real way to look around the corner this time. Just step sidewise out of the stairwell and if you meet a guard be ready to shoot before he does. If there's nobody in sight then wait until one of them comes wandering out of the side corridor to your left. Then wait some more and get the other one. The prison guards are not exactly the intellectual or military flower of the Third Reich; they're pretty easy prey.
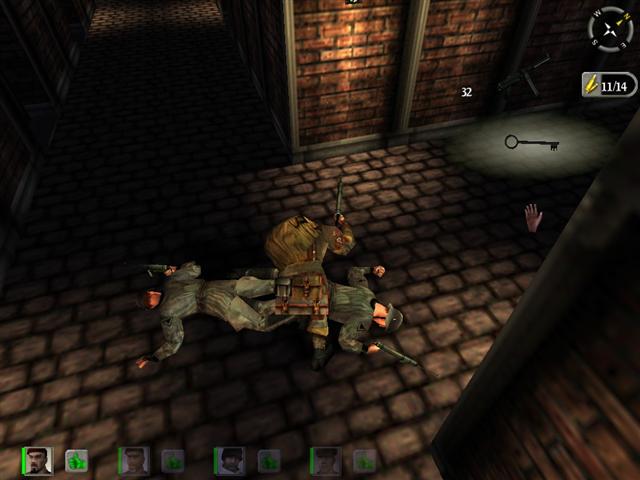
Roll the bodies and you'll find each of them is carrying a key. I think you need both keys, though I've never experimented. Pick up some MP-40 ammo while you're at it, by now you probably need a refill. Walk on down the corridor past the cell doors, marveling at the large, roomy, almost palatial cells; we never had that much room in any of the US jails I've been in.
The prisoners are in the cells at the far end of the corridor: one cell on your right, two on your left. Open each door and give each occupant a follow-me, and then move quickly back up the hallway so you won't have to look at their antics. They really are creepy as hell; the Nazis seem to have lobotomized them. Lead them up the stairway to the ground floor. If you miss the doorway - it's easy to do - and find you've gone too far, just keep going and take them out onto the second floor and then down the main staircase, because there's no way in hell you'll get them to reverse directions in that enclosed space. As it is you may have to go back for one or more of them. They tend to get hung up in that stairwell.
When you've finally got the Living Dead up to the front hallway, lead them out past the flower bed and give them stop. (You won't believe their behavior as they come out the door.) Go back to your men and assign one to take them out to the truck. Anyone you like, as long as it's not the demo man or the man with the backup explosives. Have him go up to the zombies and give them follow-me, and then walk out to the truck and get in behind the wheel. The prisoners will follow, after a fashion, and mill around and run back and forth before climbing into the truck, and it's possible one or two of them may never make it, but don't worry. It's like the business with the plane: once you've issued a follow-me command, the game assumes it was obeyed. The game has such touching faith sometimes.
At this point you should get a message saying that #2 goal has been completed. Boom-boom time.
Have your man remain in the truck cab; there's nothing left for him to do and if he gets out the zombies will get confused. Take control of the demo man and, in his person, go up the little winding stairway to the very top, where you will find yourself facing a closed door. There is a Nazi bastard on the other side with a serious excess of attitude. Try walking up to the door and scratching around at it, poking your weapon against it etc., without trying to open it. There's a good chance you may piss him off enough that he'll open it himself and try to charge you. If you hear a scream of "Englander!" get ready, he's on the way. Of course when he does rush out it's simple to riddle him at point-blank range.
If he doesn't rise to the bait there's nothing for it but to kick the door open and step through and try to get him before he gets you. (I'm pretty sure the space is too small for a grenade.) He's off to your right, in a narrow little hallway, and he's got an MP-40, so watch your ass or there'll be some new holes in it.
Once he's been eliminated, you've got two areas to blow up. Might as well do the easy one first. Across the hallway you'll see a big wood double door. Open it - open both sides, you're going to be coming out fast - and walk through, and you'll see you're in a small but nicely appointed room lined with bookshelves. There's another door to the rear. Open that one too and go into the similar room beyond.
You have to take out the contents of both these rooms. It's easy enough. Just plant a charge squarely in the center of each room, and then run down the steps and out into the house - you don't have to leave the building altogether, just get somewhere down around the main stairway - and wait for the explosions.
When that's over, go back up the stairs to the top again. You'll see fires burning in the rooms you just blew. Now for the tough part. On the other side of the hallway you'll see a featureless gray door - it doesn't even look like a door, just a kind of panel, but that's it. Check the map if you're confused. Beyond this door is your remaining target.
Beyond this door is also a couple of seriously hostile armed Nazis, so you can't screw around. Go up to it on the left side and open it and step quickly aside out of the way. There's a good chance somebody may shoot at you through the doorway. If they don't, you can try sidestepping a little and seeing if you can get a shot at one of the occupants. You might even get lucky and get them both. They walk a pretty steady path and if you use third person to study the pattern you can be ready for them to walk into your sights. Anyway you have to burn the two guards and by now you should have a pretty good grasp of the ways of doing it.
Once you've killed them both, walk through the door and into a big poorly-lit attic full of bookshelves and other cryptic objects. At this point you might want to save the game, because here is where it gets tricky.
Supposedly you can destroy the target with one charge, and sometimes it works, but I've gotten to the point that I just go ahead and place two, which seems to give surer results. One goes at the back of the first enclosure, at the intersection of the dividing frames. The other goes all the way at the back of the second enclosure, next to the bookshelves there. Set the timers and bugger off downstairs. Go out front and wait with the others.
When the charges go off you'll know soon enough whether you got it right. The initial blast will be followed by a long rumbling series of secondary explosions (I suppose the information in the archives had some really explosive content) and then you'll get a completion message.
If there's just the single explosion and no message, then you'll have to try, try again. This is the frustrating part. I strongly advise you to save the game before placing the charges; then you don't have to climb the stairs again and again.
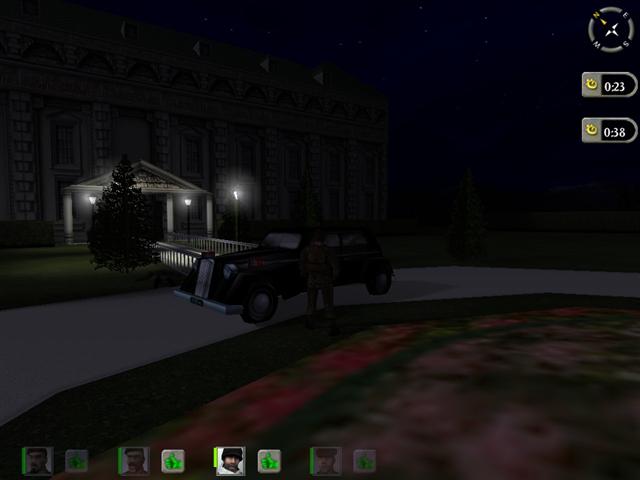
When you do get a completion message, all that's left is to split the scene. Use the Mercedes; you don't want to get in the back of the truck with those mutants. Besides, it's a fun car to drive. YOu only get to drive it a little way down the driveway (watch out for zombies standing behind the truck) but then you get the final completion message and you're outta there.