Last Train From Piemonte
Last Train From Piemonte
Now it gets a little tougher. This one is definitely a step upward from the first two; you'll need to do some thinking, and some careful shooting, to pull it off.
MISSION: The railroad yards at Piemonte are about to be bombed. You have to (1) free the prisoners being held in the station - yeah, right - and (2) blow up a transformer supplying power for the searchlights. Then (3) blow up a fuel tanker car to give the bombers a target marker. Hey, I didn't make this up, I'm just telling you about it. The mission requirements do not mandate killing them all, just those necessary to carry out the mission.
CONDITIONS: Dark. Nothing falling.
THE OPPOSITION: The main enemy presence is the troops stationed around the anti-aircraft gun emplacements, of which there are three groups. There are also some guards patrolling along the railway tracks, and a single machine-gun bunker holding one man. There is one guard tower next to the station, and a couple of sentries by the transformer. Finally, there are two SS guards inside the station.
PERSONNEL: You need at least three good men. You could do it with two - I suspect it could be lone-wolfed but I've never tried it - and four definitely isn't necessary to do the job if you know what you're doing. But again, there's going to be a lot of loot lying around. Anyway, this time there is a possibility you might take casualties, so you need backup.
You need one competent rifleman; that should be your character, the sniper gets almost all of the action in this mission. The others just need to be reasonably fast, accurate gunmen. The same team you used on C1M2 should work very well.
EQUIPMENT: One sniper rifle, with a good supply of ammo. Stens or MP-40s for the others; the sniper doesn't need one. I've never found any use for grenades in this one. I tried a flare pistol once but it was useless. Really, there's plenty of light to do the job.
You will have to have two explosive charges. You might want to take a third if you're the super-cautious type, though it's pretty hard to screw this one up in that respect.
And take a bazooka. A bazooka? Yes. A bazooka. With a couple of rounds. Actually one should be enough but better allow for error.
AT THE START: You're at the gate at the south end of the train yards.
PROCEDURE: Turn off all the lights in the room before you start this one. You'll find it makes a critical difference in your ability to spot and hit targets.
Leave the crew standing there, where they're safe and won't go looking for trouble. Move to your left, over against the wall, and along the wall till you get near where it bends. Lie down flat and crawl on ahead, looking through the rifle scope. Ahead of you (northeast) you'll see a searchlight mounted on a truck. Keep crawling and you'll see standing next to it, on the north side, a couple of human silhouettes. You'll just barely be able to make them out as black shapes against the dark gray background. If you keep crawling closer you'll be able to see them better, but remember the closer you get the more chance there is that they'll see you too and make holes in your person.
Shoot them both and make sure they're deceased. Reload. Turn a little to the left and keep crawling, following the course of the road. Soon you'll spot another guy standing near where you dropped the first two, near the back of the truck carrying the searchlights. Shoot him too. Make sure he's down before you proceed because if he's still alive he'll have the drop on you as you crawl.
Now move on along the road, staying down flat - absolutely do not get up, even to a crouch - and peer into the darkness ahead through the scope, stopping frequently to scan the area ahead of you. Soon you will make out a building with a sandbag MG emplacement next to it, and a man standing behind the MG. Kill him. Make sure he's dead; he's one of the kind that go down and then pop back up again.
Keep crawling till you reach his position and get behind the sandbags and take a breather. Creep over to the dead gunner and confiscate his MP-40; he doesn't need it any more. Crawl on over to the left side of the bunker, where you've got a view of the line of railroad cars nearby. Give yourself that MP-40 and then go off and leave yourself there; you'll be OK.
Now it's time to bring up the rest of the troops. Bring your best gun hand over to the right, following the chain-link fence, and along beside the line of railroad cars, staying down in a deep crouch. Remember, there's a whole bunch of Germans on the other side of the train, so don't let him be seen. Move him manually, don't trust the map; he's liable to wander off and start a private war and get killed. Have him lie down next to the line of flatcars, till he gets close to the end. Not too close to the tracks, these guys get weird when they're hemmed up, especially prone.
While you're doing this you may hear gunfire, or see the firing icon appear next to #1's face at the bottom of the screen. Your character may be taking care of some business on his own, while you're away. Weird feeling, isn't it? Don't rush back and take control; if you've picked a good man, he can do this better than you can. (For one thing he can see better in the dark.) When he's quiet again, check the map; look for one or two black and red circles down near the tracks, that weren't there before. There are a couple of guards who patrol along by those lines of boxcars, and you're moving your men into position to get rid of them, but it's possible your character may have gone ahead and waxed them. If so then you can just leave everybody else where they are for now and go back and take control of him again - but make sure he got them both.
Assuming, however, that the train sentries are still at large, go back and get another good man and move him up in the same way and have him lie down next to the first one - not too close, they get up to disgusting things if you give them a chance. Both of them should be even with the middle flatcar and facing northeast, parallel to the tracks. You might want to bring #4 up and let him cover them from the rear, though I've never had this come up.
Now you want to move them forward, along the same path parallel to the tracks, to a position about halfway down the flatcar on the end. Move them one at a time, using third person so you can see where they are, and in short increments, so they can cover each other. When they're in position, leave them there. Remember those Germans on the other side of the train; don't let them get too close to the end of that flatcar, where they might be spotted.
Go back to your sniper character. Lie there and wait a few minutes. Very soon you should hear a couple of bursts of fire as they take out the two guards patrolling the railroad tracks. If they don't fire within a reasonable time you might want to check where they are and what's going on. These two guards have to be eliminated so if necessary take charge of one of these men and do the job. The map should show a couple of red and black circles when the guards are down.
Time to get back to work. Leaving the safety of the sandbags, selecting the sniper rifle again, crawl carefully in the direction of the nearby gun emplacement, where you whacked those two guys. In fact aim for their bodies. As you come up next to the gun emplacement you should see through your scope another gun position with a couple of troops standing next to it. Your view may be partly obscured by some trees and other stuff. Move sidewise until you have a clear view; sometimes those trees deflect bullets. You should have two clear figures in your sights and possibly a third, dark and shadowy, standing in the background.
Shoot the two gorillas and keep shooting till they're dead. Now if you can see another one - he'll probably be just a dark silhouette - take him down too. If not crawl closer until you do see the bastard. He's only got a pistol, and not a clue in his head, so he's not as dangerous, but still you want to get him as soon as you can. Now there's one more, also with a pistol, lurking in that area in the shadows. Just keep crawling forward and sidewise until you see him and can get him.
Assuming the track guards are down by now too, you almost own this half of the yards. One last job before relocating: move up to the small brown building with the PIEMONTE sign. Off across the track to the east you'll see the end of a long open shed, where passengers wait for the train. There are a couple of guards who patrol there. Just lie and wait with your rifle ready and they'll appear, either together or more likely one by one, and you can pick them off. Move up to the passenger shelter and bring your men with you. This is a good time to regroup, and to save.
Leaving your lads down at the south end of the passenger shelter, move cautiously northward along the middle of the shelter area, near the benches. When you're about halfway to the end, stop and lie down and scope the area beyond that line of parked passenger cars. You should see a gun emplacement. If you can't then move on slowly, prone, until you do. There will be four men standing beside it. You may not see them all at first but you should at least be close enough to see the two nearest ones very clearly, faces and all. The others may appear as silhouettes behind or beside them.
Get as close as you dare - don't be too daring - and make sure you've got a clear field of fire. Shoot the one next to the emplacement first, he's closest to cover. Shoot the other one without waiting to see if he drops. Shift back and forth, shooting, until they're both dead. By now you should be able to see the other two. If not then move closer until you do. You have to kill them all. Don't give them a chance to mount a counterattack.
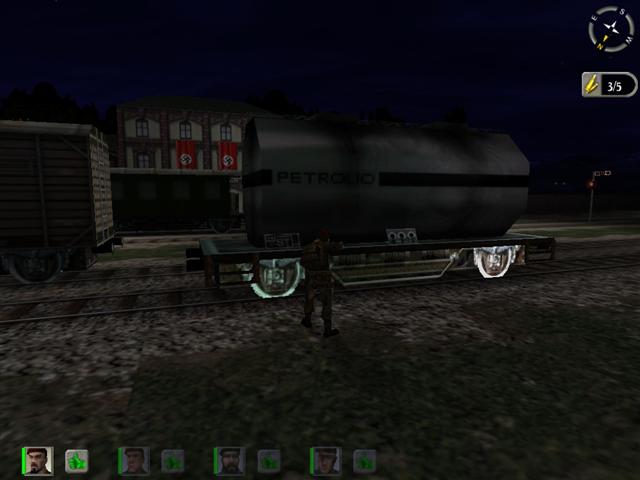
When they're all dead - usually you can verify this with the map - crawl on out in their direction and turn left as soon as you pass the railroad cars. Crawl past the sandbags, keeping the gun emplacement on your right. When you are all the way around both gun emplacements and the sandbag walls, you will find yourself more or less alongside a big shiny tank car, which you will recognize from the briefing as one of your targets.
Now is when you deal with those guards inside the station. Some published walkthroughs have advised various John Wayne techniques for rushing them, but this is foolish and unnecessary. Here is the easy and safe way:
Stand up, all the way. Move sidewise, to your left, parallel to the tank car, facing east, looking through your rifle scope. As you start to come even with the end of the tank car, zoom all the way out and begin moving very very slowly, one sidestep at a time.
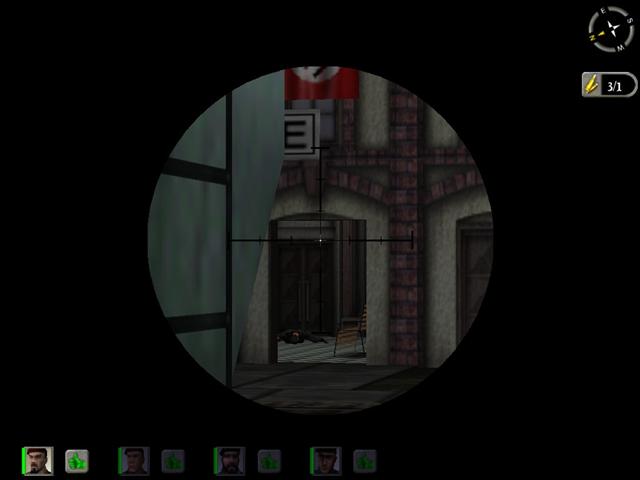
There will come a point when you can see past the end of the tank car; you will see a space between the end of the tank car and a passenger car on the next track. You will see a patch of the front of the station, a fragment of the PIEMONTE sign. When you see a big swastika flag watch out, you're almost to your mark.
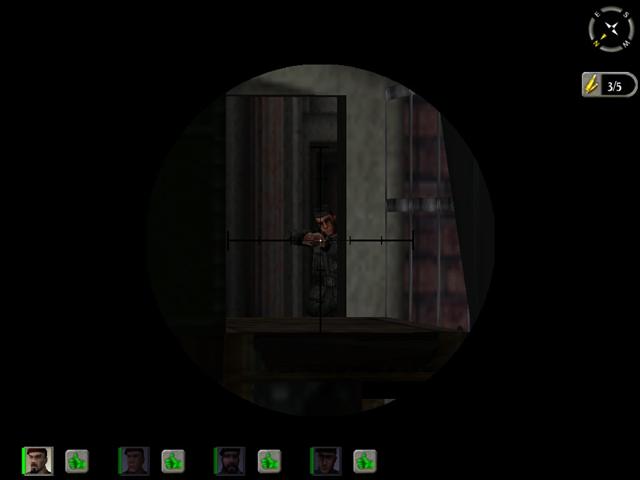
Just a little more to your left and you will be able to see in the door of the station. You will also see a little bastard with a gun. Take careful aim and shoot him through the head.
You may be disappointed; you may get one of those annoying puffs of smoke indicating that H&D isn't too clear on where the solid obstacles are. Don't worry, he can't shoot you either. Just move a little farther to your left and try again. But make damn sure you kill him, because if he hits the deck you won't be able to get at him any more and then you'll play hell winkling him out of there.
Right, now move to your right in exactly the same way, down to the other end of the tank car, and repeat the same performance. Once again you'll see the station front, then the swastika, then the doorway and then your target. Shoot the son of a bitch and watch him drop. \
One thing that you might want to do, just as a precaution: before you make your move on those two in the station, go back and get a couple of your men who are waiting back at the platform, and move them one by one over against the wall toward those lit-up houses in the background. Walk them along close to the wall and in front of the station building, still hugging the front wall so they can't be seen from inside, and put them in position - one lying down, one standing or crouching - so they can cover the doorway. If you miss one of the station guards, he just may come charging out the door and come looking for you; and if he does, your boys by the doorway will be in a perfect position to bushwhack him.
Once you've killed the guards inside the station, you've basically got it bagged.
But not quite. Some other details need to be attended to first. Look off down the tracks to the north and you'll see a bunch of heavy tanks at a loading dock. They're not manned, they won't bother you, but there are a couple of Germans standing guard there and they can be tiresome. You don't want them alive at your back while you're doing your thing.
So bring up whoever has the bazooka and have him put a round into one of those tanks. The whole lot will go up in a big explosion and the guards will go with it and as a bonus you've knocked out a bunch of new tanks.
All right, there's still the tower gunner and two sentries by the transformer. If you work your way along the line of passenger cars you will eventually have the transformer area in sight - it's next to the station, on the north side - and you should be able to pick off the sentries from there, then move on a little farther and nail the one in the tower. (He's easy; I've never known him to get off a shot.) If you fail to get one or both of the sentries you'll have to move up by the station and do it the hard way.
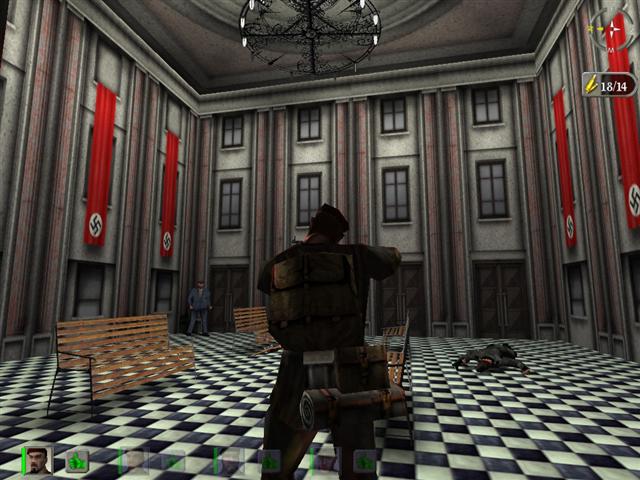
Now you stride into the station and pause in shock, staring around at the huge Nazi flags, the fancy chandelier and the general decor, hearing the sound of a player piano tinkling away on "Stars Fell On Alabama". Over in the corner is a shabbily dressed man, remarkably similar in appearance to the guy in the refinery office. (Lot of inbreeding in that part of Italy.) When you approach him he will sneeringly inform you that the prisoners have been taken away and you can't catch them. Resist the temptation to shoot him; he's going to get his anyway in a little while when the RAF bombs this place.
All you have to do now is ghoul up all the weaponry you can carry and get everybody except the demo man - leave him by the station - to the escape road. You can all run, or you can go across the rail yard to the warehouse next to that machine gun emplacement you took out early on. Behind the warehouse you will find a couple of trucks, one of them in running condition. You can start it up and collect your people and drive to the exit if you prefer. No point in it but a fun thing. Anyway you're going to have to learn to drive vehicles in this game, if you haven't yet, and this is a good time to practice. As usual, you'll know when you've hit the escape point because you'll hit an invisible wall.
Now the demo man merely has to set a charge next to the transformer, give it a brief delay, and haul ass for a reasonable distance - the explosion isn't going to be that humongous - and then, after the latest mission status message appears, go over and place another charge next to that tank car. Be sure you get the right one, the one near the station; nothing else will register for mission completion. Set the timer, run like hell for the exit, and go jump in the truck with the others. There should be a completion message when the charge goes off.
You may be tempted to stick around and see what happens when the RAF attacks. Don't. What happens is the place gets blown to shit and if you're standing around you'll get blown to shit with it.
One more mission to go and you'll have completed your first campaign in H&D Deluxe. Get some rest; it's a rough one.