Fossil Fuels Follies of Forty-Two
Fossil Fuels Follies of Forty-Two
This is an overall easy mission with one moderately tricky bit and one extremely nasty point.
MISSION: As with so many H&D missions, this one has two main objectives: find and rescue the prisoners, and blow up the remaining undamaged oil tanks. Again, the requirements don't specify killing all the Germans.
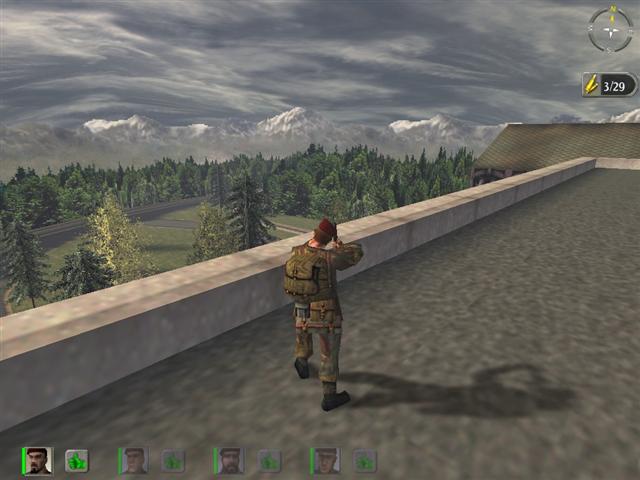
CONDITIONS: Daytime. Clear. Birds singing in the trees.
THE OPPOSITION: There are three guard towers on the premises. One is no big deal and easily neutralized, but the other two are very dangerous, as they completely command the main street. As usual, they tend to use their personal weapons rather than the machine guns, but you can't count on this. The one at the west end has a rifle and is good with it.
In addition, there are half a dozen guards wandering about the premises on foot, as well as four inside the big building. And finally there is one on the roof of the big building, near the AA gun.
PERSONNEL: You need at least a couple of good men on this one, with good reflexes and marksmanship, because you'll need to be able to rely on them to watch your back at a critical point. However, you don't need to risk your very best; McGatt for example would be overkill. Sergeant Gulp has always worked well for me on this one, as has Private Mills. Gilbert Caven would be another possibility. Three men could do the job, but this is going to be a good chance to build up your arsenal, so you ought to have one big strong guy as well.
EQUIPMENT: You'll need one scoped rifle, either the Enfield or one of the captured Mausers, and a fair bit of ammo because you'll be doing a good deal of sniping and some of the targets are difficult. The rifleman should have a Sten as well, and three or four clips of ammo. Also - this is very important - either he or one of the others must carry several English grenades, half a dozen or so. Err on the side of plenty, because there's some very tricky grenading to be done.
Each of the other men should have a Sten and a few clips. And finally, most important, you'll need two charges of explosive. Make it three just in case you make a mistake placing one; it happens.
AT THE START: You're all down in a tunnel that runs under the refinery. Up ahead there is a ladder and a manhole.
PROCEDURE: Give everybody a follow-me and run down the tunnel to the foot of the ladder. Now give them a stop command and go over to the ladder. If your character is packing the rifle, have him switch to the Sten at this time.
Now save. This is very important, as you'll see in a moment.
Back off into third-person, widest-angle zoom. Move him right up against the foot of the ladder and give the Use command. Start him up the ladder little by little, a rung at a time. Watch the view above him. The picture will get crazy for a moment, but there will be a point as he approaches the top of the ladder that you can see the surface of the ground just outside the manhole.
See if there's a foot there.
This is something that occasionally happens in this mission: a guard happens to be standing there as you come up the ladder. If this happens, just hit Load and start again. That's all you can do. As far as I've been able to determine, there's nothing you can do about the situation. The guard isn't going to go away, no matter how long you wait, and there's no way you can get at him. You can't shoot while climbing the ladder, because of the way the Use function works; you're completely helpless till you're clear of the manhole and by then he's shot you to bits. Just load again and hope he isn't there next time. It's very rare he'll be there twice in a row; three times for sure you should be OK.
(On one occasion he fell down the hole. At least I think he fell; he might have jumped in order to investigate us, but he didn't shout out any of the usual stuff, and he didn't seem ready for action. I think he fell. They do fall sometimes; every now and then you may find a tower guard lying on the ground next to his ladder, and you didn't shoot him. Anyway this poor putz came crashing down right in the middle of us. Somehow we all managed to shoot him without hitting each other.)
Give up any idea of following the tunnel and coming out somewhere else. There are other Germans in the tunnel, and they'll leave you alone if you leave them alone but you don't want to get involved in a subterranean shootout. Besides, even if you get them all, the other tunnel exits are no good; they're both covered by guards with MP-40s, you'll never make it out alive. Just reload and try again.
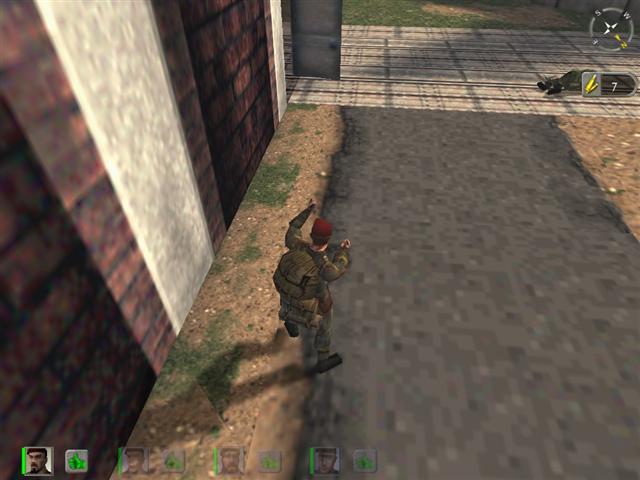
Once you're clear, with no guard standing there, scoot up out of the hole - don't worry, if he's not in front of you he's not there at all, he's always in that one place - and run over to the big oil tank right next to the hole and hunker up against it. Bring the rest of the men up and have them form a defensive arrangement next to the tank, two of them covering the area to the northeast and two facing west and northwest. On no account let anyone move around the corner to the east of the tank; there are a couple of guards covering that area.
Go around the tank on the west side and look northwards, through the opening between the next two tanks. You'll see a little stretch of paved street. Watch until a guard comes walking by. Shoot him, of course. The Sten is plenty good enough, you don't need the rifle unless you just feel like it.
Now run westward across the little open area, across the blacktop drive, and stand close to the oil tank with the ladder on it. Bring one of your good shooters over and have him stand next to the tank, covering the gap between the two sets of tanks. One of your remaining men, over by the first tank, should also be covering this space. It wouldn't hurt to pull up the map and give them Guard. It's very possible a German or two may try to come through that way and in a few minutes you're going to be in a very vulnerable position.
Take the rifle and move around the tank to the south, till you can see the guard tower up next to the big building. As you'll see if you zoom all the way, the tower guard pretty much has his finger up his ass; he doesn't see you and isn't taking any interest in events. Since you can't depend on this, shoot him. Try for a headshot, but it may take several shots to get him down. Be absolutely sure he's dead and then reload and go back around the tank and get ready to climb the ladder.
Now comes a nasty moment, because there's going to be a point when you're in danger and can't do anything about it. As you come up over the edge of the tank, you will be visible to the guard on top of the big building, and for a moment there, until you're all the way up and off the ladder, you will not be able to shoot back or take any kind of evasive action. (For this reason you might want to save before you start up the ladder.)
Usually he doesn't see you, and if he does shoot he doesn't usually hit you, but it's a possibility - I've been hit in that situation - so you want to get down flat just as quickly as you can after you're on top of the tank. Then sweep the rooftop with your scope till you locate him - he'll be near the AA gun - and blow his head off. Don't do anything else until you're sure you've eliminated him.
Now you want to work your way roughly northwards, past the big pipes, toward the northwest sector of the top of the tank. Don't get too close to the edge, because there are guards on the ground who will shoot you if they see you. Look westward along the street until you see a big overhead crane. Beyond that, if you look carefully at full zoom, you will see the top part of a guard tower and, if you're in the right spot, a guard's head and shoulders. Kill him and make sure he's dead - he has a way of dropping down and then popping back up. Stay on him until you're positive he's assumed ambient temperature.
The other tower is a little harder to neutralize. First you have to crawl across the board bridging the gap between the two tanks - I recommend doing this in third person, it's easier - and then turn and aim yourself eastward and start moving gradually sidewise, to your left. Pretty soon you'll see the tower, but it generally takes some doing to get a clear shot at the guard. I'd save the game before trying. This is one of those points where you sometimes find your bullets glancing off some invisible barrier - there's nothing solid in the way, but the game thinks there is - and at the same time the guard can shoot at you just fine. He can't bring his MG to bear on you, and he's only got a pistol, but he's an impossibly good shot with it.
Once you do get him, there are other targets you might as well go for while you're up there. If you'll swing around and face northwest - still lying flat - and go into third-person view, you may see a couple of Germans standing on the grass between the street and the long factory building, near where that one stack is pouring out smoke. They may be in range of a long grenade throw. It would be nice if you could take them out, but don't use up too many grenades trying - there are other ways to get them, and you're going to need some grenades later on.
You should also get the guard at the east end of the street, near the tower. You'll have to work your way out pretty far on the tank, close to the edge - watch out about exposing yourself to those two on the ground, if you weren't able to grenade them - and you'll have to shoot fast, because he's quick and he'll shoot back. Again, don't take too many chances because there are other ways to get him.
And then again you might not want to climb up onto that tank at all. That's how nearly everybody does it, but it's not absolutely necessary and it does sometimes pose some risks. At Easy and Medium level, yes, head for the ladder, that's your best bet. At Hard - maybe not.
You're very vulnerable when you climb up onto that tank, especially during the brief time it takes you to get out of Use mode at the top of the ladder and get down under cover. As already noted, the rifleman on top of the big building can hit you - and he's really good - and also the machine gunner in the tower at the west end may fire a burst or two at you. All in all a nasty spot, and you might prefer to do it some other way.
It's certainly possible to run this mission successfully without ever climbing onto that tank. It'll take some really good shooting and tactics, though. You will have to have excellent mastery of the movement commands and shooting techniques. Unfortunately, since this is only the second mission in the game, you might not yet have the requisite mastery. If you try it this way, you might want to save frequently.
The sentry on the ground by the eastern tower has to be gotten out of the way first. There really isn't any tricky way to do this, that I've ever found. Somebody standing next to the tanks, where you came out of the hole, has to just sidestep quickly past the side of the tank and shoot him before he can fire. You have to move just barely far enough to get him, and then pop back to the left instantly, because the gunner in the tower will shoot at you with his pistol and he's a regular Wyatt Earp with that thing.
(I've thought from time to time that it might be possible to work your way up between those tanks and grenade the bastard, but I've never tried it. Lots of luck if you do.)
The gunner in the eastern tower is harder. I've found that it's best, if you're running this one on ground level, just to leave him there for the time being until you've disposed of the remaining guards over by the red-brick factory building. (See below for how to go about this.) The noise and shooting distracts him and gets him looking in that direction, and then somebody can pop around the side of the tanks again and shoot him. Again, you'll have to be extremely fast and shoot straight; he won't give you a second chance.
Now clean out the remaining guards on the ground, until you own everything east of the big building; and then move up to the east wall of the big building, sidle up to the corner, get yourself oriented, and sidestep around the corner and shoot that son of a bitch out of the western tower. Hose him down with half a clip of 9mm. from the Sten and if you hit him right you can forget him.
This is a tricky approach and you really have to know what you're doing, but at the same time it's actually no more dangerous than climbing up onto that tank and exposing yourself to fire from the rooftop rifleman and the eastern machine gunner. Up to you; you might want to try it both ways and see what you think.
If you did climb up onto the tank, then when you go back down check the body situation. One or two guards may have tried to rush the area, and been shot by your followers. If you got one or two while you were up there, good, add that in. There are four guards on the ground working that area: the one you shot between the fuel tanks (and we all know how that hurts), the one at the east end by the tower, and the two over by the factory. If you can account for all four of them as definitely dead, plus all the tower guards, then you own the eastern half of the grounds. If you've got one or more still at large then you'll have to do a search and destroy. Use the Stens, work around cover carefully, and make liberal use of the third-person around-the-corner view.
One thing that you can try, to get rid of those two guards standing over by the red-brick factory building: ease over toward the west side of that second group of fuel tanks, without moving far enough to let them spot you, till you see a parked truck sitting on the drive between the tanks and the factory building. Give it a squirt with a Sten and blow it up. The explosion will probably take out one of the guards and quite possibly both, depending on where they're standing.
Once you've secured the eastern half, the other part is easy. With the Sten ready, head west through the passage between the two tanks you were using as a sniping platform. You'll cross a couple of open areas and finally you'll come up between the last set of tanks before the big building. (You can check with the map if you're not sure.) Careful now. As you come out of this last passageway, there will be a German standing a little to your left, by some metal barrels. Step sidewise quickly and shoot him before he can turn around. Give it a long burst and the fuel barrels will blow too. Bit of a rush there.
(In fact you don't even have to shoot him, or get him in sight. As soon as you see the end of the row of barrels, you can just give that a burst and the explosion will kill him with no risk to you.)
One more grounds guard to go. Reload and run northward across the main street (now is when you better hope to hell you did get that tower guard) toward the factory wall, and around behind that string of railroad cars. Move along next to the cars, toward the area under that guard tower. As you reach the car on the end, begin moving sidewise, facing south. Be ready. When you pass the end of the car, you will be facing an open area next to the big building, and there will be a man standing there, and he will shoot you if you don't shoot him first. Move fast and shoot straight, and don't be too proud to hold down the trigger and spray the whole damn area if that's what it takes.
You now own the grounds. The only opposition is inside the big building.
(There are also some men down in the tunnels, underneath where you're standing now in fact. Leave them alone. Do NOT go into any of the manholes except the one you came out of.)
Move along the west wall of the big building, along the edge of the paved walkway, next to but not on the grass. You'll see that the brick wall includes regular vertical stripes or columns of white cement or something. When you're about halfway between the last two of these, before you reach the door, stop.
OK, now you get to do a little trick. It's not easy at first, so save at this point - it's not likely you'll pull it off the first try, though you never know.
The targets you're after are a couple of SS goons inside the building, on the ground floor, to the left of the door. They're standing by a couple of trucks. They'll shoot you if you show yourself in front of that door.
What you want to do is bounce a grenade off that opened door and into their faces. If you play a lot of pool you'll see how it works. Or basketball; think of it as a backboard shot.
Go to third-person view, if you aren't already. Move your man around until he's a few feet out from the wall. Again, he should be lined up about midway between those last two vertical light streaks. Get out an English grenade. Deep breath. Save, if you haven't already.
The top of the door is too low for a conventional throw. Even an underhand throw is liable to go high, and anyway an underhand throw may not have enough power for what you're trying to do. So bend him forward a little, using your mouse control. Adjust him so you're sure he's aimed at the door - not the doorway, the DOOR - and hold down the Run key. Now hold down the trigger and let it run all the way to 100%.
If you've done it right, the grenade will bounce off the door and ricochet in through the doorway. If not, you will probably blow yourself up. If you see the grenade going wrong, you can turn and sprint away and you might get far enough to escape the blast, but you'll probably at least be nicked. This is why I said save first.
When you finally do score, you'll know it. You'll hear a huge explosion from inside, as those two trucks explode, killing the guards beside them.
Right, now comes the bad part. There is a rifleman way up on a walkway inside the building. He's got the door covered. If you try to run inside and shoot him he'll get you first sure as hell. Or if you even get too close to that door.
This is the only way I've found to get him, and it's pretty risky, especially at Hard level. First you have to get in the right position. Still in third-person view, move your man out into the middle of the paved walkway and have him switch back to the rifle and lie down. He should be aimed at the door at a 45-degree angle to the front wall of the building. He should be aimed straight toward the corner of the walkway; looking down at him from overhead view, his body should just about exactly bisect the right angle formed by the blacktop. He should in other words be a hypotenuse.
You aren't going to see all of him; if you do it'll be the last thing you see. Just watch very very closely for any sort of strange object to come into sight - sometimes you can see his shadow on the wall below where he's standing, that's a help - and if you're extremely careful you'll get a look at his boots. Maybe even his lower body, but if you see anything above his boot tops then you better shoot damn fast because he's about to nail you.
But if you see boot that's enough. Shoot him in the foot. Seriously. Or the ankle if you can hit it. You'll probably see blood spurt. He may or may not go down but shoot him again in the feet and he will. Keep shooting as fast as you can as his body crashes into view. Don't screw around here; this guy is incredibly dangerous and you're in a very bad spot.
(However, one time he wasn't there, and I went in and found him lying dead at the bottom level. Probably when the cars exploded he fell off. The AIs do that occasionally; don't ever leave one of your own men near a high drop if you're going to make any loud noises.)
Assuming you got him, there's now only one enemy left to worry about. Put the rifle away and take out the Sten again, and make sure it's fully loaded. Go into the building and up the metal stairs along the south wall. You can do it at either end, your choice, doesn't make any difference. Go all the way to the top, where your dead sniper pal is lying.
Look along the walkway and you'll see an open door. Move up next to it and get ready. There is a guard inside, facing the door. He's got a rifle rather than a machine pistol, and he's not the most valuable player on the enemy team, so you can get him. DO NOT USE A GRENADE. There's someone else in that room whom you need alive. Just get yourself lined up next to the door - watch out, not too close, don't give him a target - and use third-person view to check where he is. Now hit your fast sidestep (right or left plus run key) and as you flash by the doorway rake him with the contents of the Sten. This looks more dangerous than it is; he's not the sharpest tool in the Nazi drawer.
Walk into the room and confront the rather ratty-looking civilian character standing over by the desk. As you get near him you will hear yourself demand to know where the prisoners are. He will reply that (surprise, surprise) they have been taken away. A message will appear on the screen telling you that you have completed the first part of the mission. Hot damn. Don't shoot the poor bastard, you can see he's terrified - though, interestingly enough, there's no actual penalty if you do shoot him, provided you let him make his speech first.
If you're not in too big a hurry, go down to the end of the walkway and use the ladder there to climb up onto the roof. The view is incredible; they really knocked themselves out on the scenery. You owe it to yourself to see this. Be careful going back down the ladder.
Now it's time to do some serious ghouling. Help yourself to all the hardware you can carry, making sure each man gets an MP-40 and a Mauser, as well as potato mashers - the pistols aren't worth fooling with. You yourself can pick up some weaponry on your way out of the big building.
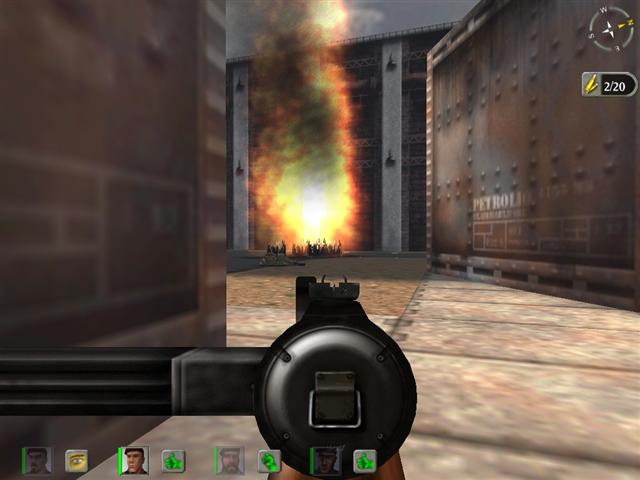
Once everybody is loaded to capacity, all but the demo man should go and jump down the manhole where you came in. (Or they can use the ladder if they want to be Nellies about it.) Move them on up to the escape point, so they don't wander off and get in fights with the remaining German troglodytes down in the tunnels. You'll know when they reach the escape point; they'll hit a kind of invisible wall. Now the demo man has to place his charges. First he must go all the way up to the western end of the tank farm, to the westernmost set of tanks. The tank in the middle is the one that has to be destroyed. Set a charge against this - it should be right up against the tank - and give it maybe a minute; you don't need the full minute and a half to get clear. Run back to stand by the manhole and watch as the charge goes off. If you got it right there will be spectacular fireworks for a moment.
Now the other tank. This is the center tank in the trio next to the manhole. Set a charge against that, right in the inside of the angle formed by the three tanks, and give it the full minute and a half. Run and jump down the manhole and go join the others at the escape point.
Stop and wait. When you hear the explosion, you should get a Mission Completed message.
If not then you set the last charge in the wrong place. Go back up the ladder and try again. This is why you brought extras. (Alternatively you could just save before setting the charge; then all you'd have to do would be reload and try again.)
Welcome to the wonderful world of international petrosabotage.