Staying Alive
Staying Alive
Last in the Ardennes campaign, and not really up to the standard of the first two; some silly aspects, though still less so than most of the original H&D missions. Not much of a mission overall - the kind that looks as if it's going to be terribly hard but in fact is very easy (though you can still step in the shit big time if you get careless). But it does have some rather exciting moments; and after the stress of the last two, you've got an easy one coming.
MISSION: Take over a supply dump (as in kill everybody present) and then survive until the arrival of American reinforcements. That's all. The briefing tells you you have to hold the place, but that's a lot of ballocks. You don't have to do anything of the sort and it's not a good idea to try.
CONDITIONS: Daytime, and it's finally stopped snowing. Still cloudy, though.
THE OPPOSITION: The debriefing screen lists the usual 29 enemy killed, but I don't know where they get that. I make it 15 Germans at the supply dump, plus the crews of a couple of tanks; so either somebody had some pretty bizarre ideas of the size of Wehrmacht tank crews, or else (as we've long suspected, haven't we?) the debriefing screen is as full of shit as the briefing.
(In support of which, the debriefing screen also invariably lists three civilians as killed, even though there are no civilians anywhere in this mission.)
In any case, the dump itself is very lightly held - it's actually not too unreasonable to imagine that four guys, if they played their cards right, could take out that many rear-echelon ground troops - and while the subsequent attacking force seems to be pretty numerous, you don't have to deal with them except for a couple of tanks.
PERSONNEL: Again, take good quick shooters. They need to be reasonably strong, though, because they're going to have to carry things like Brens and bazookas and sniper rifles.
EQUIPMENT: Three men with MPs, one with a Bren - this last is optional, you don't really have to have it but it's useful extra firepower and why not? You'll be operating almost entirely from setup positions so the Bren's lack of quick-response mobility won't be an issue. The Bren gunner might carry a backup weapon such as a Sten or a carbine.
One sniper rifle, with a modest number of rounds - 40 or 50 is plenty. A good supply of grenades; that gray German one is ideal, or the old Mills bomb.
At least one bazooka, with half a dozen rounds. A second bazooka, with three or four rounds, would be very good to have if you've got a man who can carry it. If not, then you better be damn good with grenades.
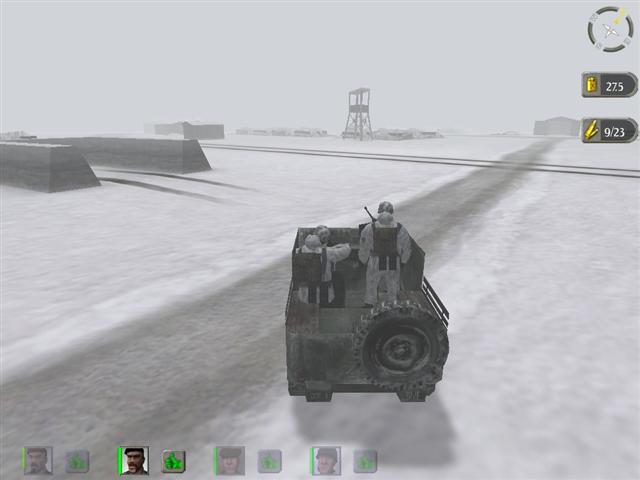
AT THE START: Once again standing around a jeep on a country road, but at least it's not snowing.
PROCEDURE: Load everybody in the jeep and move on up the road till you reach a place where a high hill starts to rise to the right. Stop right there and dismount. Go up the hill, almost but not quite to the top, and take up a position to the southwest of the tower. You should be able to see the top part of the guard tower to your south - this is the first guard tower on the left side of the main road as you approach the camp; don't get confused, the one out by the big storage tanks isn't manned. Just check through the scope and if there's nobody in it you've got the wrong one; the one you want is the only manned tower you can see from the hilltop.
Bring your men up and arrange them so as to cover the slope of the hill to the southwest. A couple of men are going to come up that way, and they won't take what looks like the obvious route - they won't appear at the bottom of that big dip beside you, they'll be farther over to the left, in that sort of shallow dip. Have all three of your men cover this approach and give them Guard.
Now take your rifle and shoot the sentry out of the guard tower. As soon as he's down switch to your MP, if the attackers haven't come up the hill yet, and help take them down.
Note this: two men should run up the hill to attack. (And they won't be screwing around, so you better get them fast.) Now and then it happens that only one does. If so, the other one is skulking around down there somewhere and you need to get him. Check under the guard tower; sometimes he lurks there.
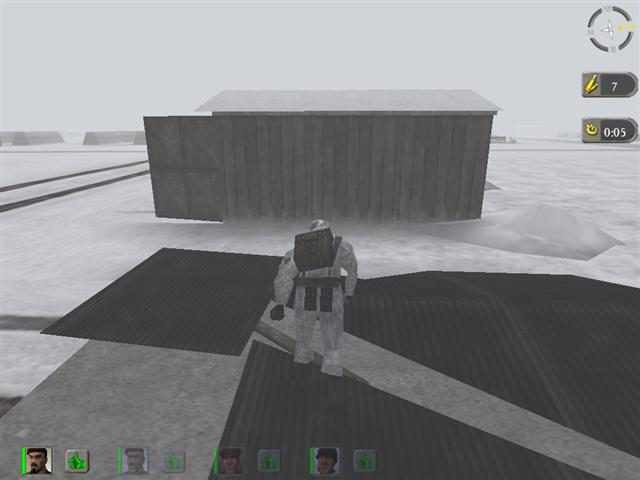
Once you've got a dead tower sentry and two stiffs on the ground, bring everybody back over the hill to where you left the jeep. Now run along the road toward the camp. You can stand up for most of the way but for the last bit you should crouch down and go over to the left side of the road. Go to ground next to that tower where you just killed the guard. (His shadow will probably be showing on the ground under the tower. Ah, the wonders of H&D graphics.)
You are now at the corner of a big square made up of supplies covered with camo tarps - barrels of fuel, presumably, though they don't exhibit the usual H&D explosive qualities; try not to think about the absurdity of so much gas being so lightly guarded, at a time when the German Ardennes offensive was grinding to a stop for want of fuel. Right now your main interest is in their value as cover.
Bring the other men forward, one at a time - better do it manually, too much potential for them to get in trouble on map commands - and lay them down at the corner of the supply square, near the tower. Two men, including the Bren gunner, should be facing southwest, parallel to the road. The other should be at right angles to them, facing southeast, along the side of the square of supplies. There are three men who are going to run out and attack in a minute or so, and it's not certain which way they'll come, so both sides have to be covered. Give everyone Guard commands to keep them in line.
Crawl up under the guard tower and shoot the sentry out of the next tower. As usual it may take several shots to kill him, and you'll have to concentrate on the job and ignore the hell breaking loose all around you. Once a German ran right into my line of sight just as I fired at the tower guard; he looked huge in my sights and the 7.92mm. round took him right in the head before the Bren gunner could get him.
As always, be sure you've got the tower guard permanently deceased before moving on. Now turn left and head down to that little wooden building to the southeast, on the other side of that muddy-looking street or lane. Keep the building between you and that tower off to the south - the one next to the big building by the side road - and the disagreeable man standing underneath it.
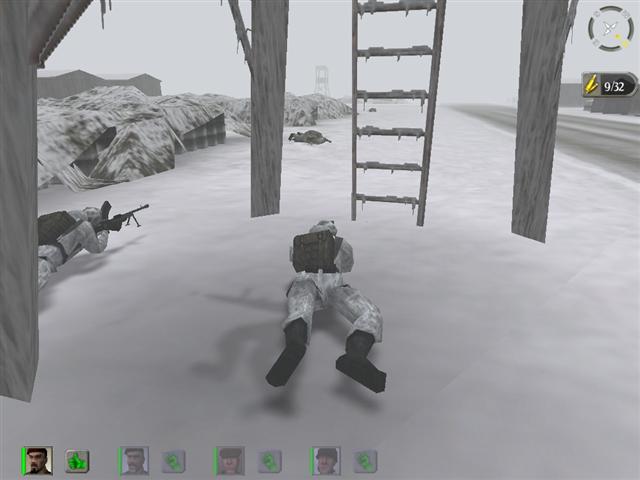
Bring up your two MP men and lay them prone in the street, over to the right side and, again, shielded from that guard tower by the little wooden building. Aim them down the street.
You've got a problem here that isn't obvious. See that line of storage sheds along the right side of the street, with the doors standing open? One nearest you, then beyond that there's one that's been demolished - just pieces left on the ground - and then beyond that two more sound ones? In between those last two sheds, there's a couple of hostile bastards with MGs. Usually they'll stay there till they've been dealt with, but now and then they'll come out and try to deal themselves into the game at this point. So give your two MP men Guard on the spot in front of those last two storage sheds.
The Bren gunner should be moved to a point about halfway along the side of the nearest supply square, but out well away from it, so that he's got a line of sight down between the buildings almost but not quite to that guard tower you're after. The man under the tower is going to run toward you when you shoot the tower sentry, and if you position the Bren gunner right and give him Guard he'll shop the son of a bitch down before he gets near you.
Get down and move around to the left, past the corner of the little building, until you can see the tower sentry and shoot him. He takes a lot of shooting sometimes, but stay after him and don't let up till he's good and dead or he'll shoot back and probably get you.
Once the tower guard and his little buddy are dead, check the street. It's possible there may be another stiff lying down there by those storage sheds, though probably not. Either way, your next job is to nail whoever's left between those two storage sheds.
Leave one of your MP men in the street, and bring the Bren gunner out to join him, with Guard on the same point. Put the other MP man in back of the nearest storage shed, where he can cover the back side of the row of sheds in case they make a break that way. Now go around the front of the nearest shed and into that space left by the demolished one - you'll end up standing on some roofing metal, which makes a loud clang-clong sound when you walk on it - and get out your grenade collection.
You want frag grenades rather than potato mashers for this job; then if you hit a roof it may still roll down where you want it. Those big fat gray German grenades are good, as is the good old Mills bomb. Wind up and lob one over the nearest shed. Be sure and get plenty of throwing power - if you're short you'll blow yourself to shit; 80-90% is about right.
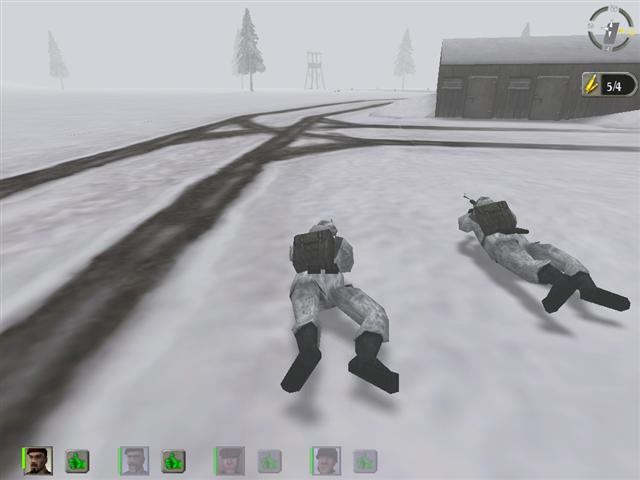
The results can be pretty funny. The sheds are very flimsy and will collapse when hit with a grenade explosion. Don't assume, though, that just because the shed fell down the bad guys are both dead. They're very durable; sometimes it takes several grenades to kill them both. Go around the end and use third person to check whether anybody's left alive, and if so, well, I can't see any reason to allow that, can you?
Once these two have been sent off to scenic Croak City, you've only got four Germans left alive in the camp. One of them is holed up in a little underground bunker, like an old-fashioned root cellar, in the middle of the camp - across the side road from where that armored vehicle is parked. DO NOT GO NEAR HIM. Don't harm a hair of his precious little Master Race head. You're going to kill him, but not now, or everything will go to shit.
The other three are out at the southwest end of the camp, by the main road. One is up in that last tower and the other are standing on the ground nearby. Clean them up now.
There are several ways you could do this, but the simplest is to go around on the southeast side of the supply dump - being careful not to pass in front of that bunker; the little turd might shoot at you - and take up positions by that last cluster of buildings. Not the biggest one, that's too close for your purposes; the smaller one on the other side of the little side lane is just about right. Lay your men down in the street in front of that smaller building and give them Guard on the area at the base of that last tower, and then shoot the sentry in the tower. If you get him immediately, then turn your rifle on the two men running toward you and help clean them up.
With those three zapped, and the one in the bunker not going anywhere - he won't, he never does, you don't have to watch him - it's time to take care of some fairly complicated and unexciting business. This part of the mission, frankly, is a pain in the ass.
Somebody has to go get the jeep. In addition, your own character (or whoever is your lead bazooka man) has to go out on the main highway almost to the place where you started the mission. The jeep driver could give him a lift, but it won't hurt him to run the distance and he can be doing it while you're handling other matters.
So give yourself, or your bazooka jock, a map command out along the highway to the general area where it makes that big curve; and give another man a command to where you left the jeep. Then while they're both running down the road one of the remaining men can get into that armored vehicle and start it up.
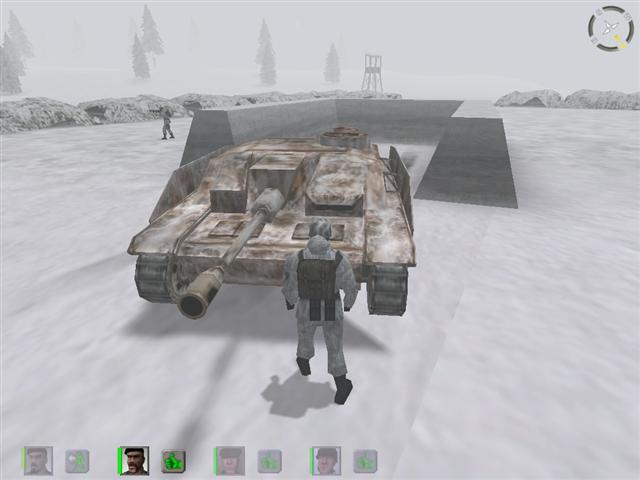
This vehicle is often referred to in walkthroughs as a tank. It is not a tank; it is an assault gun, aka Sturmgeschutz. (Sometimes called a self-propelled or SP gun by the Americans.) Specifically, it is a StuG III Ausfuhrung F, with 75mm. gun, built on a PzKw III chassis. Unlike a tank, it has no rotating turret; in order to aim the main gun, the vehicle itself has to be turned.
Which, along with its generally poor handling qualities and low speed, makes it impractical for use as a defensive weapon. Appealing though the thought of armored warfare may be, there's a better use for this thing. So get in and crank it up. In order to drive, you have to stand in front of it on the left side and hit Use.
Maneuver it out of the revetment and turn to the right and start up the road toward the southeast. By this time your running men should have reached their destinations or be getting close, so stop and deal with them before proceeding.
The one with the jeep will of course get in and drive it back into camp. Use the cutoff and stop by that big building where you shot the tower guard. At this point the fourth man may as well come up and get in the jeep; there's nothing left for him to do in this mission and you can't afford to waste time picking him up later on.
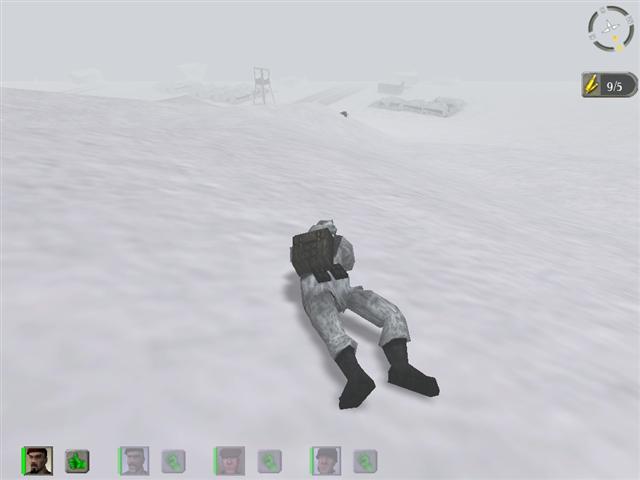
Cut now to your own heroic figure - and this is a job you definitely will want to do yourself - out on the highway. Before long some persons of the National Socialist persuasion are going to come down this road and you're going to hide and let them go by. Go over to the right side of the highway - the right as you're facing back toward the camp, on the outside of the curve - and you'll find a big hillock or snowbank, behind which you can hole up. Put yourself there, down well out of sight of the highway, and go off and leave yourself there for now.
Meanwhile back at the ranch you've got two men aboard the jeep and one man driving the StuG. The last man can start up again now, moving slowly (and oh, it will be slowly all right) out along the road to the southwest. The StuG has no power or speed; it must be in terrible condition, since it also emits big plumes of black smoke. (Though the designers, who were Czech, may have been confused by the diesel engines of Soviet-made tanks. German tanks and StuGs had gas rigs, though.)
Clank clank, clatter clatter, drive on out along the road until you approach a tight bend up beside a low rock cliff. At this point stop and bring up the jeep. One man can get out and walk over toward the bend in the road, staying well clear - the StuG driver is about to need lots of room - so he can spot; or rather, to get real for a moment, so you can see what the StuG is doing, because you can't see jack shit while operating it, in any of the views.
What you are going to do is use the StuG for a roadblock. If you can park it across the road, there in that tight spot between the cliff and the trees, it will stop a tank or at least create a major delay.
And now for one of the most maddening, frustrating experiences in H&D. This job will drive you crazy. For one big thing, the StuG has no reverse, and no real brakes - it's getting pretty clear why they left it at the dump, basically this thing has had it - so you can't really maneuver in any precise fashion. It will probably take you many attempts, and much cursing, before you get it right.
But you should know that you don't have to totally block the path - in fact you can't, the StuG isn't big enough. You just have to block the roadway itself, and if at all possible at a ninety-degree angle or close to it, so that anything coming down the road hits it squarely rather than at a glancing angle. And the German tanks are pretty big, and the AI drivers are pretty clueless, so if you can get the StuG stopped square across the road it should be good enough.
After you're done and have gotten out of the StuG you can if you like blow it up with a bazooka round, or a potato masher or two. (The designers seem to have had the grotesque idea that armored vehicles can be destroyed with grenades.) This serves no real purpose - the AIs aren't nearly smart enough to think of getting in and driving it out of the way - but by now you'll feel like destroying it anyway.
Everybody back in the jeep and back to camp again. Time now to trip the big trigger.
Park the jeep next to the bunker where the last survivor is hiding. Not too close, you don't want to risk blowing up the jeep with your efforts to get him, but within very short sprinting distance. Only one man should get out of the jeep, and this should be the man with the bazooka - or, if you haven't got a second one along (and are you going to wish you did), one with a good supply of grenades. If this man was driving the jeep, then put somebody else in the driver's seat. Make sure and have the engine running.
When you kill the man in the bunker, this will trigger the second half of the mission: a German attack from two directions. So you have to be ready to haul some serious ass just as soon as you've terminated the little dickhead.
There are various ways to get him, grenades being the most obvious. However, because of the small size and low angle of the doorway, it's not all that easy to get them in, and even then the explosion may not be sufficient to do the job. (These are the same grenades that can destroy a full-sized tank, but never mind, never mind.)
You can try setting off an explosive charge on top of the bunker, if you feel like wasting your time; it will have no effect on him whatever. And I don't recommend trying to shoot him, because he shoots back and he's got the instantaneous reflexes of the armed coward.

Personally I prefer to just put a Panzerfaust or bazooka round or two into the door. Sometimes it takes more than one. You have to get up fairly close in order to hit it, and the angle is important; you can't just stand in front of the doorway or he'll shoot you, but too much angle and the explosion won't reach inside. Get off to the left side - your left - rather than the right, because the way the bunker is laid out he's got more of a field of fire to his left.
If you use up your rockets and still haven't gotten him then you'll have to try grenades after all. Good luck. When all else fails I guess you can try shooting him, but whoever does it better have a tremendous endurance rating because he's going to get hit.
(There just may be some place around there where you can snipe through the door with a rifle, but I've never been able to find it.)
However you do it, you will be in no doubt when you finally do kill him. You will get a big fat yellow completion message telling you that you've accomplished the first part of the mission.
Ass hauling time. The instant the yellow letters appear, your man has to sprint for the jeep. Switch to the driver and gun the engine and head straight for the southwest end of the camp. Don't bother with roads, just go as straight as you can past the buildings and supply squares. Behind you there will be a series of loud explosions as the attackers mortar the place, but you're safe as long as you keep going.
No need to get on the main highway, just drive along beside it till you see a dirt road turning off to the left and vanishing up between a couple of hills. Take this and drive the jeep up toward the end and stop. Everybody may as well stay in the jeep; their part of the mission is done.
And now back to your guy, shivering behind the snowbank beside the highway, clutching his bazooka and don't we all know how that feels on a cold day. At this point he's still alone out there, but not for much longer.
Wait a little while. Soon some men will come running down the road, on the far side. Leave them severely alone. You're after bigger game.
Check the map every now and then. A tank should appear quite soon at the start of the main highway, and also at the end of that side road where you parked the StuG, at fairly close to the same time. You won't be able to see the one on the highway yet, but as the map will tell you, it turns off the highway to its left, climbs up the embankment a little way, and turns back toward the highway.
By now you can see it, in third person view over the top of the snowbank, and it looks as if it's coming toward you but stay cool. It will turn again and drive along next to the highway as it passes your hiding place.
(Unfortunately its route doesn't seem to be predictable enough for mining purposes. I've tried mining it and did get it on one occasion but it's a long shot and not worth burdening everyone down with mines. Besides, it's just not all that hard to destroy the damn thing.)
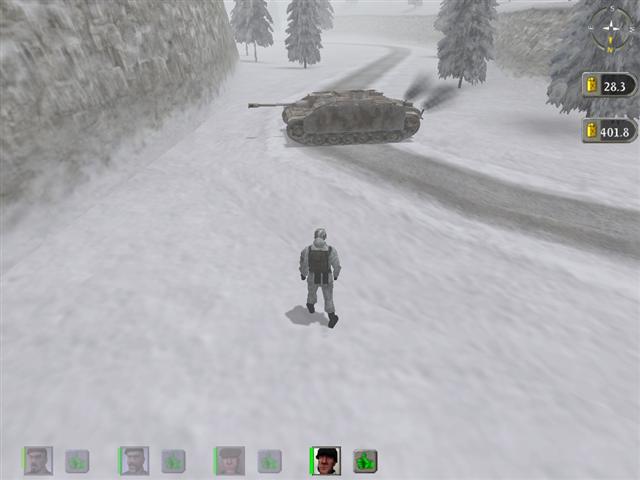
As soon as it's past your position, get up and run across the highway and chase after it like a dog spotting a bicycle rider. It's a Tiger I and therefore it's not moving very fast so you can catch up easily; it may even pause. When you're sure you're within range, stop and give it a bazooka round up its big fat ass. If you miss you probably weren't close enough. Get close; I know it seems unnatural but it's really not dangerous as long as you're not close enough to be caught by the explosion. There are no infantry nearby; they've all run on to the camp, so you're at no risk while you do this.
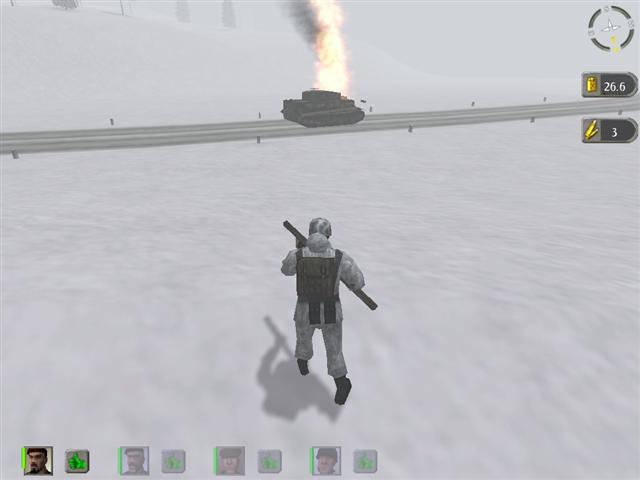
As soon as the tank blows, turn and run to your left, up the snow-covered embankment and across the level ground beyond. You're heading for the spot where you parked the StuG, and where a Panther tank is now stuck trying to get past.
(If you haven't done so yet, pull up the map and check to make sure that's what's going on. If the Panther has already gotten past the StuG, then frankly I don't know what the hell you do. It'll make it to the camp before you can get to the road to ambush it, and then you'll never get at it. All I can say is run the mission again and try to get that StuG in the right place next time.)
You need to move fast, because the roadblock may not hold the Panther up indefinitely; eventually, just by steady pressure, it will probably shoulder its way past, if you don't get there and take care of matters pretty soon.
At the same time, the most direct route from where you are now isn't the safest one. The hills to your left are mined and if you try cutting across there you will probably blow yourself to shit. So you need to swing to the southwest a bit, roughly following the line of the hills - and of course staying well out of sight of camp, which is now infested with pissed-off Germans - until you get nearer to the road, and then turn south.
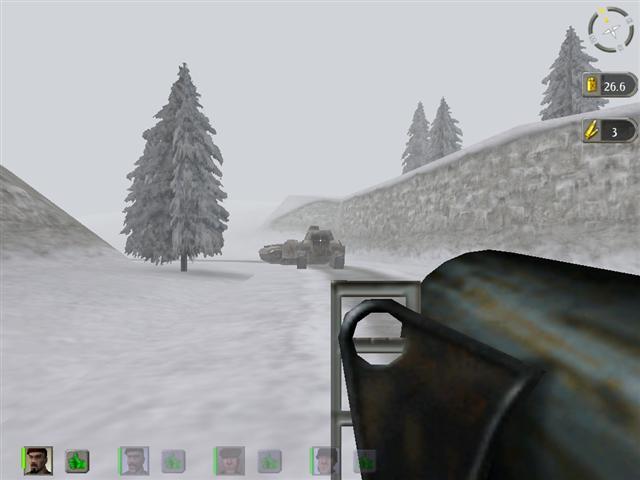
As you approach the spot, stay back far enough from the road that you don't get spotted and shot at; remember, that Panther can still use its turret gun. Go on past the turn until you find a place where you can run down to the road. You'll have to go farther than it looks like on the map, and be sure and stay clear of the edge of the cliff; remember, this is the world of H&D, where a strong man with parachute jump training dies instantly if he goes off a trifling fifteen-foot drop.
When you finally do make it down to the road, go over to the other side and run toward the bottleneck. Unless your luck has really gone to shit - or you made a ballocks of parking the StuG - the Panther will still be there with its ass pointed toward you. (Though it may by now be in the process of getting past the block.) Get close, up with the bazooka, and administer a rocket-propelled enema.
Now just go back up the slope and back the way you just came. From here on out it's just a matter of waiting for the game to decide the mission has gone on long enough. It does seem to be necessary to come within sight of the camp, but it's not necessary to enter it or get within shooting range. Just backtrack to where you took out the Tiger, and if the mission is still running you can cross the road. It shouldn't take any longer than that.
At some point during your little run or hike, you will get a yellow completion message and the screen will show a couple of Shermans, signifying that the Americans have arrived. So much for that.
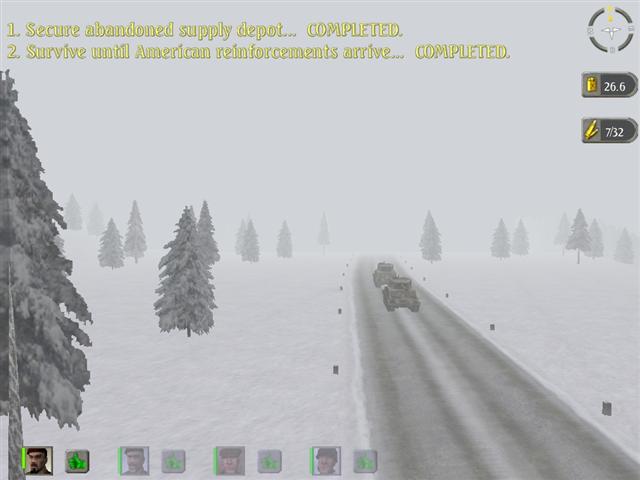
As you will see, it is not necessary to hold the camp or keep the Germans away from it. Let them have the place; Patton's boys will sort them out soon enough. All you have to do is hide your men in the woods and go get those two tanks.
The tanks do seem to be necessary triggers to the completion of the mission. On one occasion, due to some bug I've never figured out, the Tiger never did show up at all; and even after I took out the Panther and went back to the road, and then all the way back to where the others were waiting with the jeep, I never did get a mission completion - in the end I had to scrub the mission and run it all over again.
Other than taking out the tanks, though, you don't have to engage in any further combat and you shouldn't do so; don't even get close enough to the camp to let anybody shoot at you. If you don't get the completion message by the time you get back to the highway, I don't know, wander around a little or something. If you still don't get it then something's gone wrong and you'll probably have to run it again. Sorry about that.
Now you are at the end of the Ardennes campaign, the best set of missions in the H&D Deluxe package. Too bad it couldn't have gone on longer.
And now, if you will take my advice, you will end the game and call this the final mission. It goes steeply downhill from this point on; the remaining campaign is a bad joke in all respects.
You won't do it, of course, but I warned you.