Another Snow Job
Another Snow Job
This is a considerably harder mission than the one before, but the difficulty has been exaggerated. Some have said this is the hardest mission in H&D. Ballocks. It's not in the same class with that one in the concentration camp.
Somebody even said that you needed to be prepared to sacrifice a couple of your men to pull it off. Ballocks a mundo.
It does have a couple of hard parts and it's certainly possible to get hurt and lose men if you don't play your cards right, but it's really not as hard as legend has it.
MISSION: To get into a secret laboratory and blow it up, and then blow up the communications aerial mast nearby so they can't yell for help. Logically you'd think it should be done the other way around, and for that matter I suppose you could do it in the reverse order if you wanted though I've never tried it.
CONDITIONS: Night, light overcast, but visibility still quite good because of reflections off snow.
THE OPPOSITION: Usual number of assorted guards - about 25 but some of them you won't have to deal with. A few of them are pretty damn good, too, and very aggressive; most are pretty dim, though. Most of them carry MP-44s.
Specifically: two guards patrolling around the lab building, with rifles. Several over by the motor pool; a few out by the main gate. One poor lost soul up by the radio tower. Three in the lab itself, three more working the hallways of the building. Bunch of clowns inside some other buildings who can and should be left alone.
PERSONNEL: You need good men for this one; they're going to have to do some first-class shooting. At the same time specialist snipers like Smedley aren't needed and are too easily killed. Strength is important because you'll be looting later, and endurance matters because there's a fair chance of getting hit at one point. Stealth is irrelevant. Wooley and Whintson are both very good. I usually take Sgt. Ranking along, he's steady and dependable and he can shoot.
EQUIPMENT: Three explosive charges. Actually you only need two but it's always worthwhile to have something extra. One scoped rifle, to be treated as a throwaway item. (You should have put enough rifles into your campaign arsenal to allow this.) Fifty or sixty rounds of rifle ammo.
Issue yourself one of those MP-44s from that last mission, but leave the others home; you don't have enough ammo yet for everybody to use them. Anyway, the AIs don't really make optimum use of the MP-44, because they fire it one shot at a time rather than in burst; in an action like this, with the ranges not too long, they do better with buzzguns. Two submachine guns, Stens or MP-40s, and don't load up on ammo for them because they'll only be used in one fairly brief fire fight and then be thrown away.
One of those German machine guns you used in the first mission, also a throwaway item; only a modest ammo supply needed. A bunch of Mills grenades.
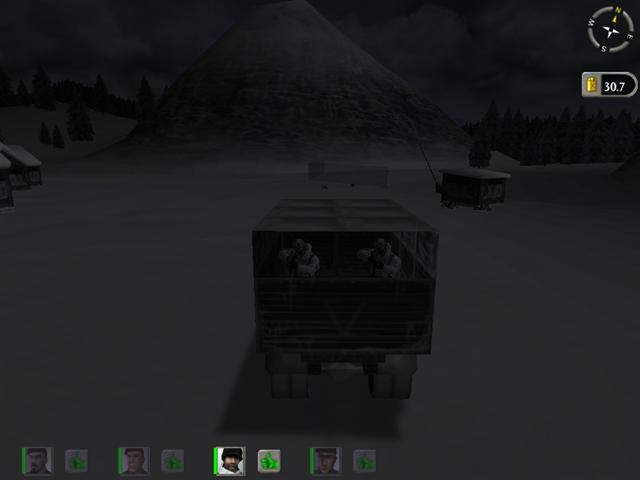
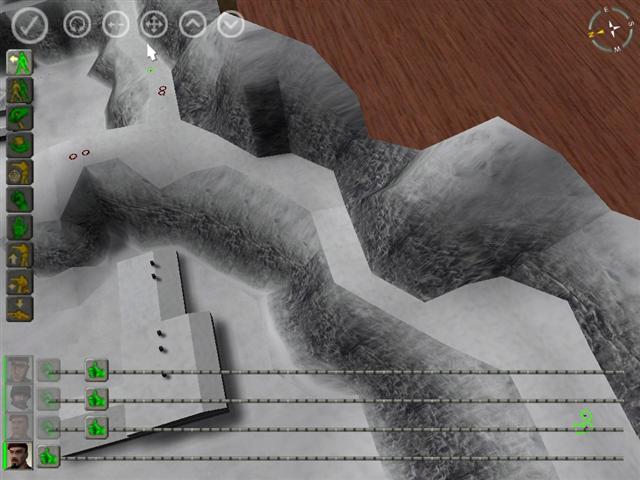
AT THE START: You're all standing on a mountain trail above the valley where the lab is located.
PROCEDURE: You can actually see the lab from where you're standing but there won't be anything going on; you have to move on a little way to trigger the sentries. If you'll walk up by that next sort of zigzag in the cliff, though, you should be able to get a shot at the two sentries walking around the lab building. Go ahead and get them, not that they're any threat or even a big priority item in themselves but later on while you're trying to move everybody into position your men will tend to spot them and shoot at them at an awkward time. They've both got scoped rifles so don't give them a chance to shoot back.
The valley floor is heavily mined so you don't want to go down there. It is just barely possible to work your way along it by hugging the rock, but there is absolutely no tactical advantage to this and a lot of good reasons not to do it, so just forget going downstairs for now. Instead you need to move everybody eastward on the pathway in front of you.
However, you can't just bugger off merrily along the trail. This next part of the mission calls for very careful and precise movements and shrewd tactical deployment. Start by moving yourself along the trail, past that saddle where it falls off on either side, to that area where it widens out and rises in a kind of big snow-covered hump before falling away and getting narrow again. You'll see it when you get there. Get up to the top of that hump and look to the northeast.
Study the terrain. Pull up the map and look at that too. You will see that there is a kind rocky spur or outcrop forming a natural ramp, coming up off the valley floor and joining the mountain trail. This is the key to your attack plan. It's the only way you can get down into the valley from the trail without going through a minefield. It's also the only way anybody in the valley can get up to the trail to get at you.
And they're going to try to do it, pretty soon; in fact you want them to, you're going to deliberately provoke them to come up that natural ramp from the valley. So you want to find a spot where your men can cover that ramp, and the area on top of it.
You're not ready for that part yet - you've got some other business that has to be taken care of first - but you might as well go ahead and position your men where you're going to need them. Put your machine gunner and the men with the submachine guns up on that high snowy hump where they can cover that rock outcrop, but lying down so they're not exposed to return fire. Give them Guard on that rock ramp. Leave them there; it's not yet time for them to come on - but the bad guys are a little bit unpredictable in this mission, so you want that area covered just in case somebody forgets the script and comes up that ramp early.
Now get yourself into a spot where you can cover the trail as it passes by the head of that ramp. Bring the nearest submachine gunner over beside you and make sure he can cover that spot too.
There's a two-man patrol - riflemen - that's going to come walking along that trail from the east, and you're going to wait for them. You may have to wait quite some time, but be patient. Chances are you yourself won't see them at all; your AI buddy next to you will spot them before you do. When he opens up you join in, even if you don't see anything; spray that area up on the trail next to the cliff, hose it down with full-auto. Keep shooting till both of them are dead; you can use the map to check.
Now and then it happens that they just don't come. This is one of those random things in the game; on occasion they will have to be triggered. If you're positive they're not coming, then run on up the trail to that very last rise of ground before the interesection, and lie down and cover that spot again. (If your man starts firing before you get there, hit the deck and hope he knows what he's doing.) That should be enough to trigger their arrival and destruction.
Once you're positive you have eliminated the two riflemen, you can get on with the tricky stuff. Enough with the spiderlike patience; now it's time for ratlike cunning.
Move yourself back to join the others. Move your backup man to cover the target area like the others; make sure he's fully loaded and give him a Guard command too. Make sure all your men are spread out enough that a single lucky burst of fire won't get them all. Everybody should be well down under cover and exposed only enough to be able to cover that all-important upper part of that ramp.
(Don't try to cover the whole thing, clear down to its base. Just the upper part of the curve, and the flat area on top - although they shouldn't get that far, but it happens.)
When you've got all three men positioned where you want them, move yourself back a bit and over to the left, nearer the edge of the cliff. Don't get close enough to the edge that they can see you from the valley floor, though. Get a grenade ready and toss it over the cliff. Doesn't matter where it goes, you're just trying to make a big noise. While it's still falling switch quickly back to your MP-44 and cover that ramp.
What you're trying to do is trigger those goons down in the valley into charging up that ramp where you can chop them. Usually just about anything will do it - sometimes they'll even go for it when you shoot the trail patrol, which is why you had your backup men covering that ramp, but that's unusual. As I say, they can be unpredictable in this part of the mission.
Usually a grenade tossed at random will do the job. Someone down in the motor pool will fire a flare and that will signal the start of the fun and games. That part isn't absolute, though; I've known the attackers to come up that ramp without any flare or other preliminaries, so don't rely too much on this. But if the flare does go off then they're definitely on their way; and the flare will do a nice job of making it easier to see them. No doubt it seemed like a good idea at the time.
Now and then the grenade doesn't do the job. If it doesn't, don't waste another one; this is something that works the first time or not at all. Bad luck for you if it doesn't, because your only remaining alternative is going to require doing something pretty risky.
You'll have to work your way down past the intersection of the ramp with the trail - past where those two riflemen are lying - and crawl over close to the edge of the trail and stir the bastards up some more. Easiest is to spray the guard shack, out by the gate, with a burst from your MP-44. You may or may not get the gate guard, but you'll definitely get some action. Get back from the edge fast and swing around to cover that ramp, and hope your men are on top of their form because you're awfully isolated right now.
As usual your men probably will see the targets before you do, and they may even finish the business before you can get in on it. But join in the shooting even if you don't see any targets; comb the slope and crest of that ramp outcrop with automatic fire, so nothing can live.
It should all be over very quickly. Usually there will only be two who actually come up the mountain. The others will just mill around down in the valley, mostly by the motor pool. Wait, though, a little while after things quiet down; make sure this part is over before proceeding.
This ambush is one of the two tricky parts of this mission. If you don't place your men right, they can get hit hard by return fire. In particular it's vital to make sure they're not visible from the valley floor, or they'll come under fire from a lot of guns down there. Only the men actually coming up the trail from the camp should be able to fire back at them, and they'll be at such a disadvantage they shouldn't have a chance.
This is why I said don't try to cover that entire ramp down to its base. If a man is in position to do that then he can also be hit from the valley floor. (Besides, your men will tend to pick fights with the wrong people.) As long as they can make sure nobody makes it to the top - or, if they do, they don't live very long - then that's all you want.
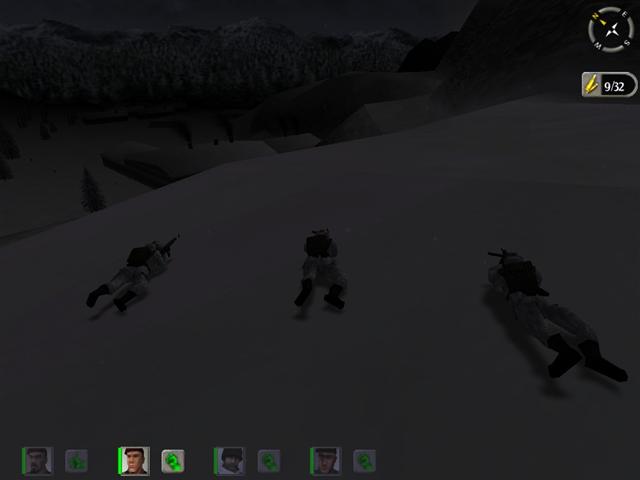
All right, let's say you've cleared the trail. There are two stiffs up ahead where you dropped the rifle patrol, and two goons with MP-44s lying somewhere on the ramp. While these four assume ambient temperature, you can move on. Work your way along the trail till you can see the guard at the base of the radio tower. He's not really a problem at this point but go ahead and kill him just to have him out of the way.
Move on down to where those two dead riflemen are lying. (If you didn't already have to go there to trigger the attack.) Make sure you don't show yourself to the people down on the valley floor, especially that lot hanging around by the motor pool. Go on a little way beyond the juncture with the ramp - about where those two riflemen are lying, or a little beyond - staying down flat now, and wiggle toward the edge very cautiously.
Off to the north is the camp gate and a little guard shack, with a few sentries standing in front of the shack or patrolling nearby. Go just near enough to the edge to see this area without exposing yourself to those nasty bastards down by the motor pool. Take the rifle and do some sniping. You'll feel pretty exposed but it's OK, nobody else is going to try to come upstairs to get at you - not that it would do them any good, since your men are still covering the only access. Your only danger is getting shot by somebody down by the motor pool.
So take your time sniping those yokels out by the main gate. Be sure they're all seriously dead. There's one in particular who tends to hit the deck and it looks as if he's dead but if you watch closely he's moving around a little. Finish his sorry ass before proceeding.
Now you've got one more big problem: those guys down by the motor pool. If you go to third person you can see them standing around down there. They're out of effective grenade range - at least I've never been able to hit them from there - so you're going to have to shoot them. And you can't get careless, because even though they're not terribly alert or fast they've got MP-44s and they'll cut you in half if you give them a chance.

It's probably best to take the rifle and snipe them one by one, moving just barely far enough out to get in a shot and then instantly moving back - this is one of those times when you operate with one finger on the reverse button. With careful sniping you can eventually get them all without too much risk to yourself.
Clearing the motor pool area is a dangerous and hairy business but once you're done with that you own the exterior part of the compound. Before moving all the way down to the valley floor, though, you should stop and remove one minor annoyance. If you'll look to the north, from about halfway down the ramp, you'll see a light where a barracks door is open. There's a little geek just inside and he'll shoot at you with a pistol when you go by. He's not likely to do any serious damage but the nerve of him even trying. Take a minute and line up on him - you'll have to do some sidewise movements, be careful you don't go off the cliff - and take him out. Didn't his mama tell him not to take a pistol to a machine gun fight? There are some others inside that barracks but they'll leave you alone if you don't bother them.
Bring up your men now, and have them discard their weapons. The machine gunner and one of the others can now pick up MP-44s off those two dead heroes who tried to climb the ramp.
All right, everybody down to the valley floor. From here on out it's pretty easy going, but you do need to be alert so take a quick breather if you like.
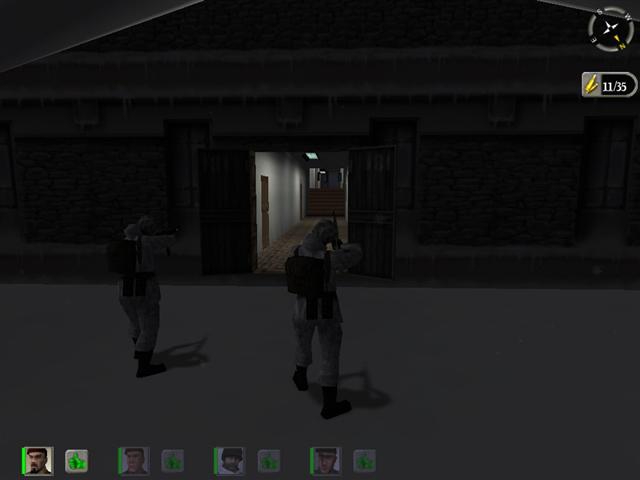
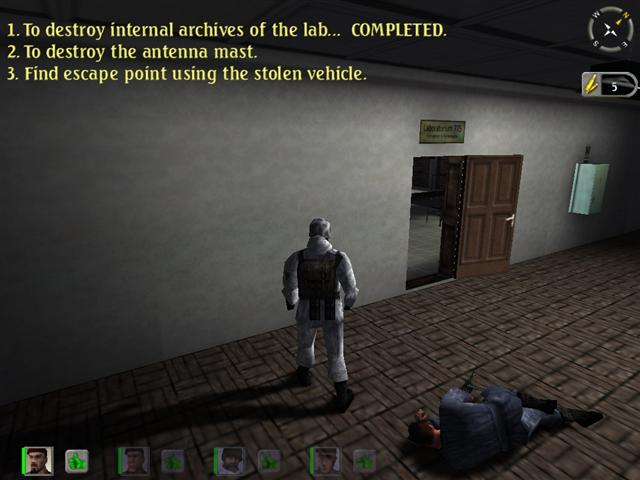
The lab building has two doors. The main door is on the north side and this is the one you may as well use. There's a side door over by the cliff but there's no advantage in using it and it's a trifle more risky. Go in the front door, then - it's OK, nobody's going to shoot at you when you open it - and up the corridor, studiously ignoring those doors on either side of you. In the room on the left there is a German officer, looking remarkably like Steiner but not as passive; he's got a pistol and he's not bad with it. On the right there's a bastard with an MP-40. You could stop and shoot or grenade them both, but why bother? Your job is to blow the lab, not screw around wasting the administrative staff. If you do go for it, be careful and if you get shot don't say I didn't warn you.
Get over to the right as you reach the steps and go up about halfway and stop. There's a guard in the hallway to your left. Get out a grenade and toss it so it bounces off the wall into his lap.
Go on up the steps and take the corridor to the left, stopping before you reach the corner. There's another guard walking a short beat along the next hallway. Use the look-around-corners trick to figure out his pattern, wait till he turns to walk away from you, and then step around and shoot him in the back.
There's one more guard you need to deal with at this time. See that side corridor going off to the east, toward the side door? If you watch you'll see a man walk across it, walking along a little hallway. Get him and then you're ready to attack the lab itself.
This is when things get wild and crazy.
The lab has two doors, one on the east side and one on the west. Leave the western one alone for now. Walk up beside the eastern door, on the left side. You will have learned by now that you don't have to be standing in front of a door to open it; you can be well off to one side. So make sure you're off to the left of the door rather than in front of it, and hit the Use key to open it, and simultaneously hit "move left" and "run". If you did it right, the door will open but you'll be well out of the way before it does. (If the door doesn't open, you were too far to the side. No harm done, just try again.)
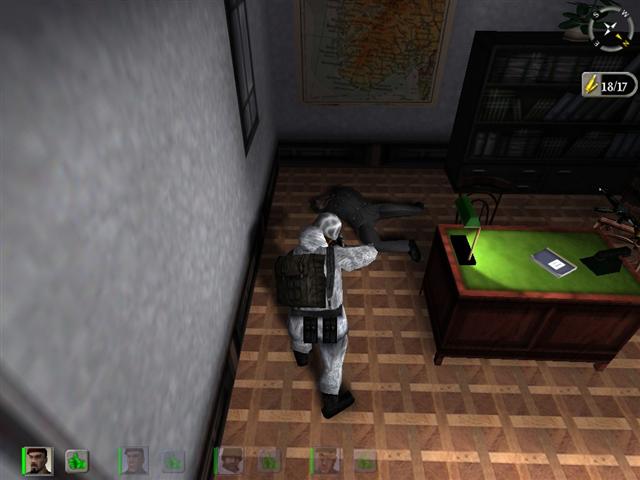
As soon as you're out of the doorway, turn sharply to your right facing the doorway. An armed nutcase is about to burst out through the doorway and attack you. Be quick and be ready and blow his ass away with the MP-44. It's going to be intense; he'll be right in your face and chances are he'll fall at your feet. One of the most exciting little moments in this game; you'll probably want to pause for a moment, after he's down, and chill.
On rare occasions he doesn't come out. Then you've got a problem. It's not too hard to shoot him out of there, though it's not really necessary; what you're going to do next should get him too, though his presence will make it harder to do it.
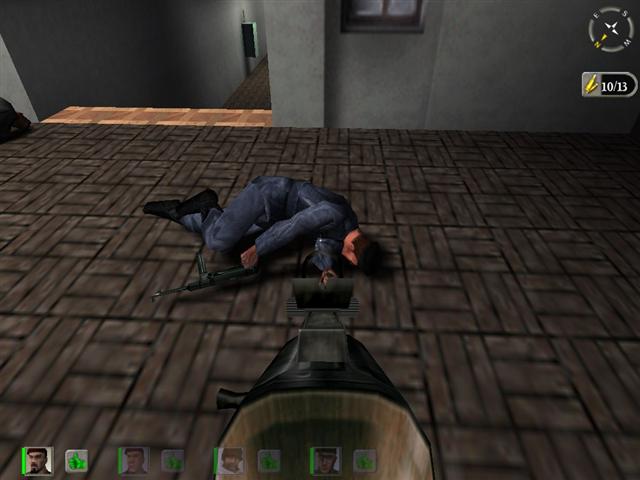
There are now two guards left in the lab. They are much smarter and more dangerous than the fool you just blew away. They are over by the south wall, next to a lot of barrels of inflammable stuff. One is over in the southwest corner of the room. The other is more centered along the wall, in front of the barrels.
It is possible to shoot them, doing a fast sidestep past the door - what some gamers call "strafing" - but this is very dangerous and difficult. Also unnecessary. There's no need to shoot anybody in that room. In fact you can put your gun away, you're not going to need to shoot anybody else tonight.
It's really simple. Just move into position where you've got a clear view of the middle of that room but none of the occupants has a shot at you. (If the third man didn't come out and they're all still alive and covering the door, you'll need to go back out - using the corridor on the south side, don't even think about walking past that open door - and go around the building and come back in through the side door by the cliff, and up the corridor. This should put you in position without exposing you to fire.)
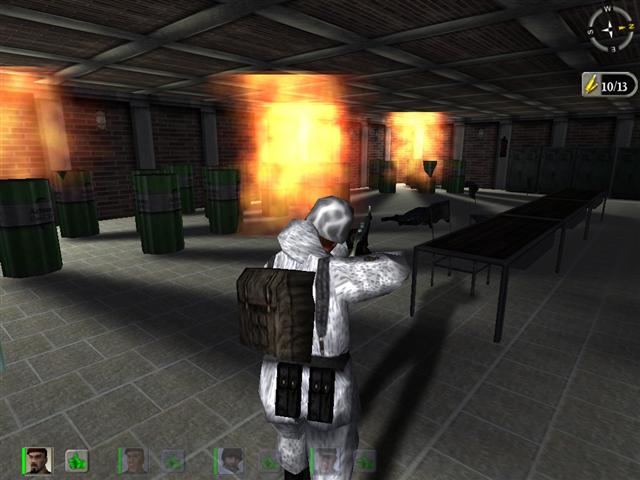
Now just throw a damn grenade into the room. Doesn't much matter where you put it, just lob one in, and then you might want to step back a little.
You'll get them, all right. And that's not all you'll get.
Remember those barrels? An instant after your grenade goes off, so do they. Kaboom. The building will shake and for a minute you'll think oh shit, the whole place is going up.
But no. All that happens is that the barrels explode. Out in the corridor, you're perfectly safe.
This, however, is enough to trigger the mission completion signal. Congratulations. In the process of taking out those gun hands, you also fulfilled your main task.
Now if you'd like to keep your suspension of disbelief intact, don't look into that lab, because you'll be quite disappointed. There's no towering inferno; the barrels are blazing away but that's all, and even that doesn't last very long. The rest of the "lab" isn't damaged in any way - not that there's anything in it to suggest a laboratory anyway; any high school chem lab has more equipment around.
But regardless, you've taken out the lab and eliminated the last opposition with one grenade, and that ain't bad. And I suppose if you really feel the need for a bit more "realism" you could set one of your charges, if you brought three or more, in the middle of the room and then haul ass. It won't accomplish anything but if it makes you feel better, go for it.
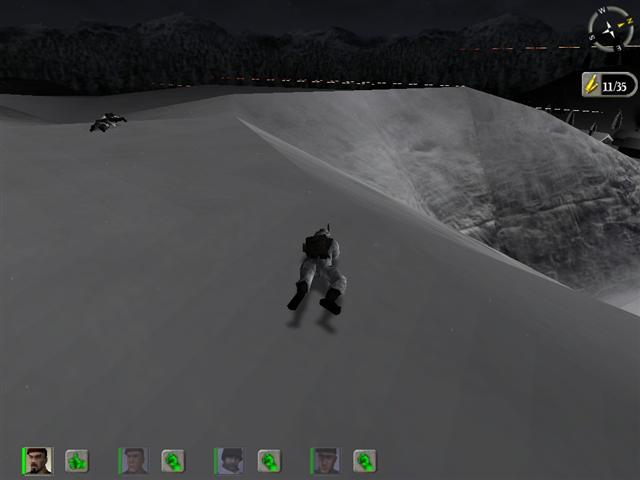
Whoever's got the explosives will now run up to the ramp and up the trail, turn left at the top, and head on down the mountain trail. Go into third person, because it's very easy to get disoriented and fall off the cliff, and there's one very narrow place on the trail that takes some negotiating.
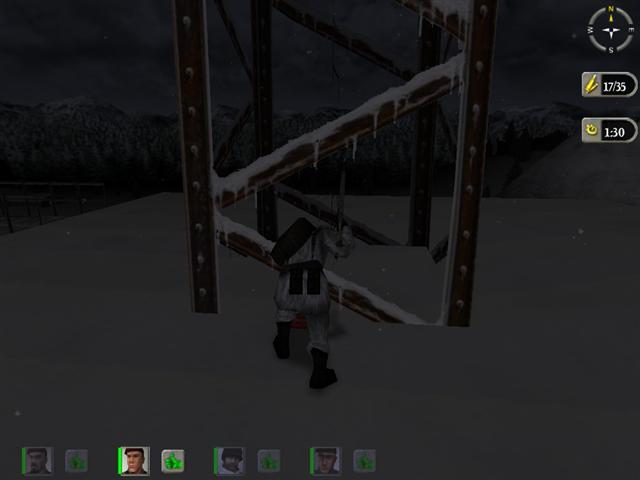
Follow the trail up to the steps that lead up to the radio tower. You have to use two charges, one on either side of the tower - east and west is how I do it, I don't suppose it makes any real difference. But if you put the last one on the west side that leaves you closest to the escape route.
Run back down the stairs and along the trail, but don't try to negotiate that tight spot in a hurry. By the time you get there you're plenty far enough away for safety anyway. Stop and admire the dramatic effect of the twin explosions, and the subsequent completion message.
Back down to the valley - careful, be a hell of a thing to fall off the cliff and kill yourself now - and get everybody together at the motor pool. Forget that barracks with the light and the open door; they'll stay put. (They've got more sense than some of their colleagues.)
There is a building, near the one with the open door in fact, that contains various items which can be looted. However, it's all pretty much irrelevant stuff: Panzerfausts, which you're not going to have any need for, and potato mashers, which you should already have plenty of, and explosives, likewise. You're already going to be loading your team to capacity with MP-44 ammo anyway. And there's a couple of armed guards inside, and the front door is exposed to fire from that barracks with the open door. Leave the place severely alone.
Everybody take MP-44 ammo now off the dead guards, and whoever doesn't have an MP-44 yet pick one up. Throw away your rifle if you didn't already, you've got others in the campaign arsenal. (Don't you?) There's more ammo around than you can carry, but get all you can.
The only vehicle that will run is the truck on the end, next to the Kubelwagen - which won't run either, so don't bother trying. Pile in and start her up and head for the gate. A good night's work. You'll be glad to know the next one is a lot easier.